Physical Address
304 North Cardinal St.
Dorchester Center, MA 02124
Physical Address
304 North Cardinal St.
Dorchester Center, MA 02124
Explore 20 sophisticated kitchen wallpaper ideas to elevate your culinary space. Get expert tips on durable materials, flawless application, and creating a luxury look.
Can we just talk about something? This persistent, frankly baffling, notion that wallpaper is somehow too delicate or impractical for a kitchen. Every time I hear it, I want to pour a glass of Champagne and sit the person down for a serious chat. The finest hotel bars, the chicest restaurant powder rooms, the spaces designed to withstand immense traffic and still look impeccable—what do they use? Exquisite, durable wallcoverings.
The secret isn’t avoiding wallpaper in the kitchen; it’s choosing the right kind and applying it with intention. The difference between a kitchen that feels merely decorated and one that feels truly designed is in this level of detail. What most people see as noise—primer, adhesive, pattern scale—is where the real magic happens. So forget what you’ve heard. I’m going to tell you how we actually do it, the shortcuts we use in the high-end hospitality world, and how to create a culinary space that feels like a permanent five-star retreat.
Before you fall in love with a single pattern, we need to have a serious talk about the foundation. This is the unglamorous part that ensures a glamorous result. Rushing this stage is the number one reason DIY projects end in tears, with bubbling seams and misaligned patterns. Think of this as the mise en place for your design—get all your ingredients and strategy in order before the heat is on.
Forget the pattern you love on Pinterest for a moment and look at your actual room. What is the light doing? A bold, dark botanical that looks impossibly chic in a sun-drenched online photo can feel like a cage in a small, north-facing kitchen. This isn’t about the pattern; it’s about how light and space interact with it. The best hotel lobbies feel grand and welcoming because they use wallcoverings with a subtle sheen or a light-reflecting metallic thread to bounce light around.
You need to become an expert on your own space. Tape large samples to the wall and observe them at 8 a.m., noon, and 8 p.m. under both natural and artificial light. Does it wash out? Does it become gloomy? Pay attention to the architecture. A grand, continuous pattern is breathtaking on a long, unbroken wall but looks frantic and cheap when chopped up by cabinets, windows, and doorways. For those kinds of walls, a smaller, more forgiving pattern is always the more elegant choice.
This initial assessment is truly everything. It’s the difference between a wallpaper that elevates your kitchen and one that completely suffocates it.
This is a non-negotiable. Anyone who tells you to use a standard, untreated paper wallpaper in a kitchen is giving you terrible advice. Think about it: a kitchen has steam, grease, and splatters. You need a workhorse material, and in the design world, that means one word: vinyl. I’m not talking about the shiny, plastic-looking vinyls of the past. Today’s luxury vinyl wallpapers can look and feel like linen, grasscloth, silk, or textured stone, but they have the resilience to be wiped down.
When you’re looking at options, ignore “washable” and look for the word “scrubbable.” They are not the same thing. Washable means you can gently dab it with a damp cloth. Scrubbable means you can actually clean it after a disastrous spaghetti sauce incident. It’s the standard for any high-traffic hospitality space, and it should be the standard for your kitchen, too. This single choice will determine whether your wallpaper lasts for two years or ten.
Getting this right is the shortcut to ensuring your beautiful investment doesn’t become a stained, peeling mess in a matter of months.
A mood board isn’t just for pinning pretty pictures; it’s a critical tool for creating a cohesive narrative. You need to see how all the elements are going to speak to one another. I once had a client who was adamant about a stunning, large-scale Art Deco wallpaper. On its own, it was magnificent. But when we placed the sample next to a photo of her very rustic, farmhouse-style cabinetry and busy granite countertops, the problem was immediately obvious. They were screaming at each other.
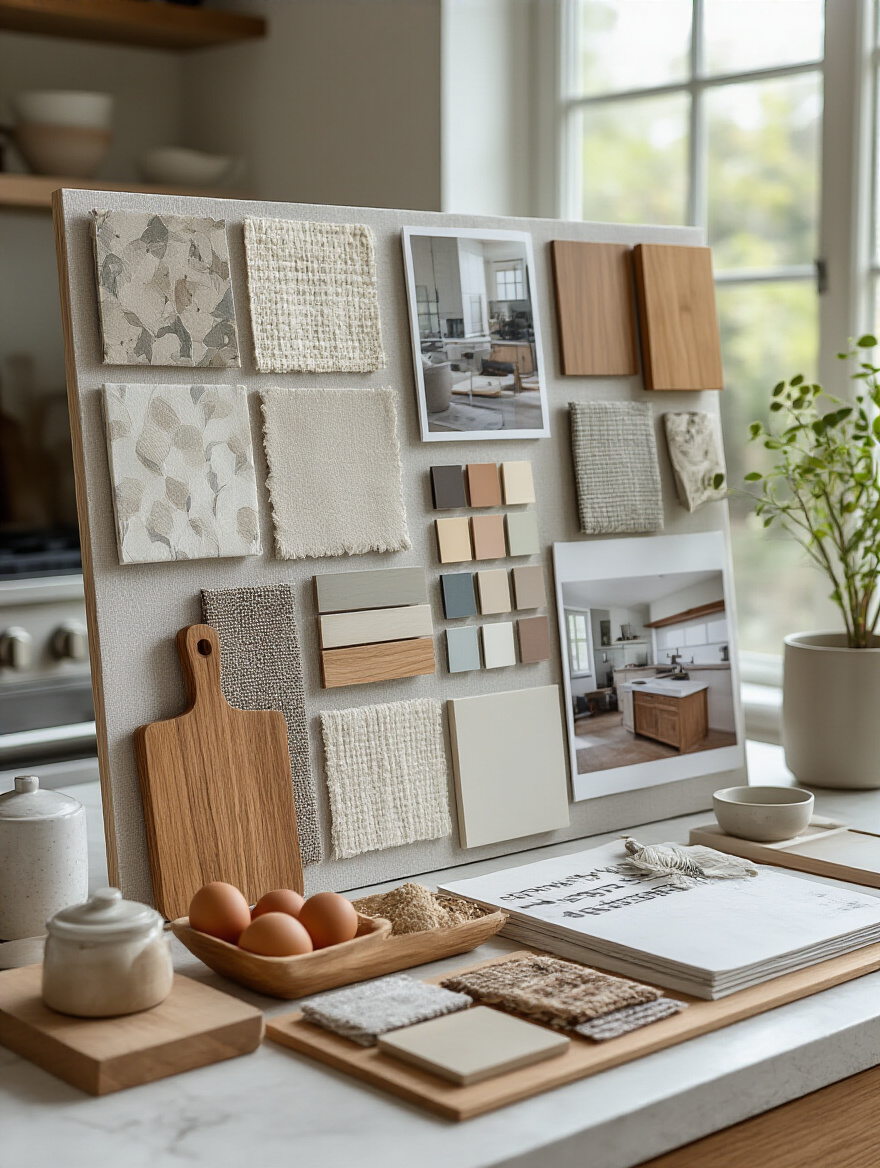
Your mood board must be tactile. Get a physical sample of the wallpaper—not just a printout. Put it next to a chip of your countertop material, a piece of your cabinetry finish, and a swatch of the fabric on your barstools. This is how you spot the subtle clashes in undertones. You’ll realize the cool grey in the wallpaper fights with the warm cream in your cabinets. This process prevents incredibly expensive mistakes and ensures your final look feels intentional and curated, not chaotic.
This is your blueprint for the room’s entire feeling, ensuring every piece contributes to a singular, harmonious vision.
This might seem obvious, but you would be shocked at how many people get it wrong. The ultimate luxury is precision, and the ultimate frustration is running out of wallpaper mid-project, only to find the manufacturer is out of stock or the new batch has a slightly different dye lot. It’s a design catastrophe. You must measure the height and width of every single wall, then calculate the total square footage.
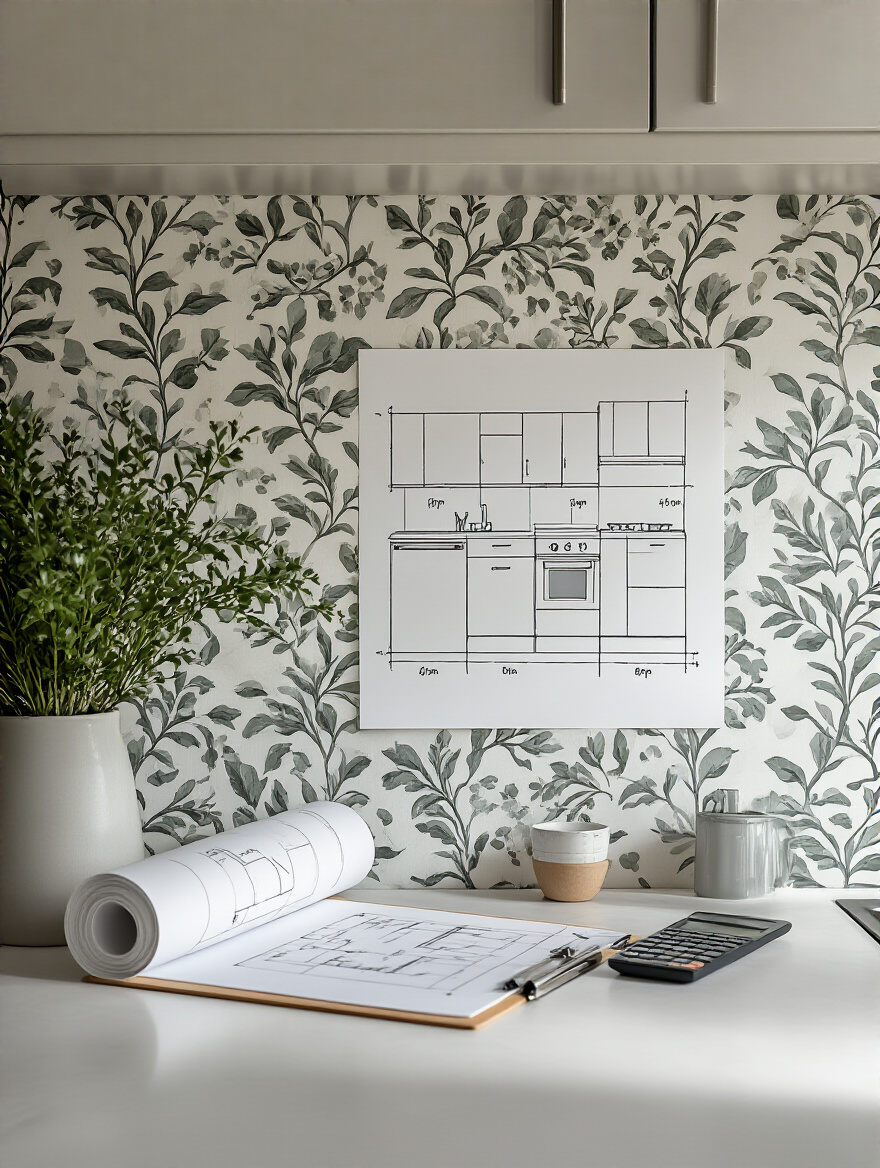
But here’s the pro secret everyone forgets: the pattern repeat. If you have a large pattern, you will need significantly more wallpaper to ensure the pattern aligns perfectly from one strip to the next. The wallpaper supplier can help you calculate this, but a good rule of thumb is to add 15-20% extra to your total square footage. And always, always, buy one extra roll and store it. A future repair from a leak or a scratch will be unnoticeable if you have a roll from the exact same batch. It’s your insurance policy.
This discipline saves you money, time, and the heartbreak of a nearly perfect project ruined by a preventable shortage.
Now that we’ve covered the core creative and practical assessments, let’s talk about the money. A bespoke finish requires a realistic budget, and it’s about more than just the price per roll. Understanding the true cost will empower you to make smart decisions and invest where it truly counts.
A roll of wallpaper is just the beginning. The biggest mistake people make is not accounting for the total cost of the project. You need a quality, moisture-resistant, mold-inhibiting adhesive—do not cheap out on this. You’ll need specific tools: a smoothing tool (not a credit card), a seam roller, and a razor-sharp utility knife with plenty of extra blades. This all adds up.
Then comes the most important question: are you truly equipped to do this yourself, or do you need a professional? If you’ve chosen a complex geometric pattern, a delicate grasscloth, or if your walls are old and uneven, hiring an installer is not a luxury; it’s a necessity. I watched a client lose hundreds of dollars in material trying to hang a difficult metallic paper himself. The seams were a mess, and it was full of air bubbles. He ended up paying an installer to strip it all off and start over. A professional installer is an investment in a flawless finish, and their work will always look better and last longer.
Get quotes, understand the full scope of costs, and allocate a 15% contingency. This is how you execute a project with sophistication and without financial surprises.
With the planning complete, we arrive at the best part: choosing the soul of your space. This is where you infuse personality and style, but strategy is still key. The right pattern in the right place can redefine your kitchen, while the wrong one can overwhelm it.
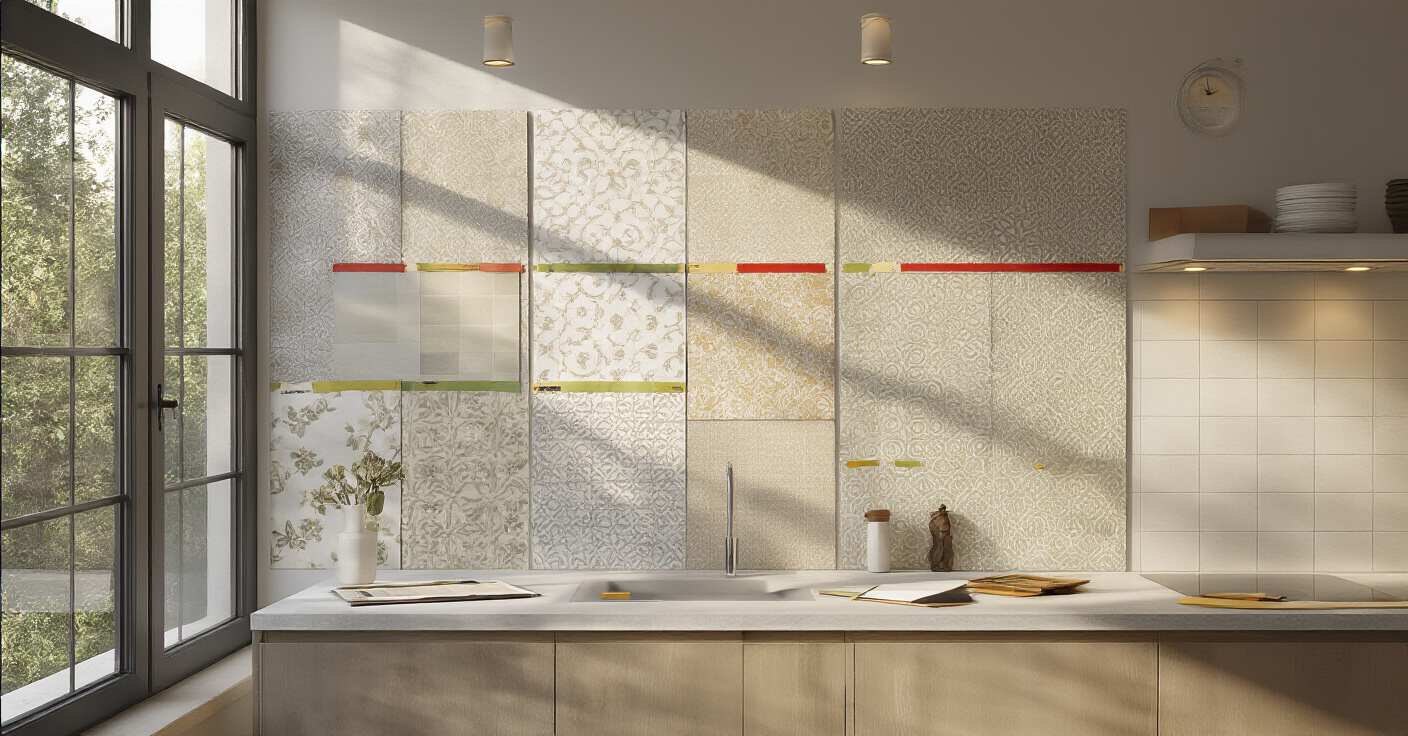
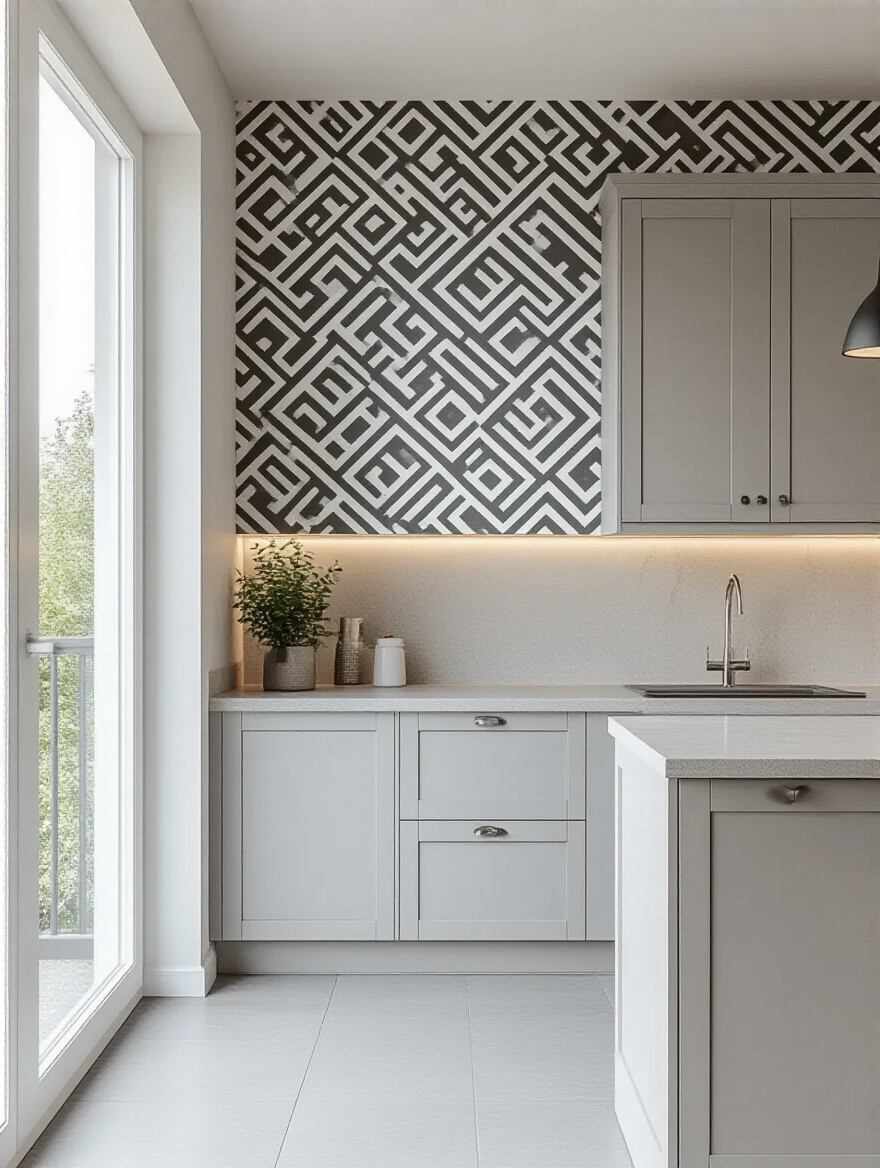
If you want drama, a feature wall is your stage. A single wall behind a breakfast banquette or in a powder room off the kitchen, covered in a large-scale botanical or a striking geometric, is an incredibly sophisticated move. It creates an instant focal point and injects a massive dose of personality without committing the entire room to a loud pattern. It’s the design equivalent of a statement piece of jewelry.

The key is restraint. When you have one “wow” element, everything else should be quiet and supportive. Pair a bold wallpaper with simple, solid-colored cabinetry and countertops. If your wallpaper is the star, don’t make it compete with a busy backsplash tile. This allows the pattern to breathe and have its moment. This is a classic hotel design trick—create one unforgettable feature that guests will photograph and remember. Your kitchen can have that same magnetic quality.
This confident choice signals a well-considered design, turning an ordinary wall into a deliberate work of art.
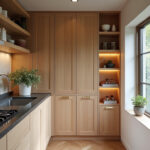
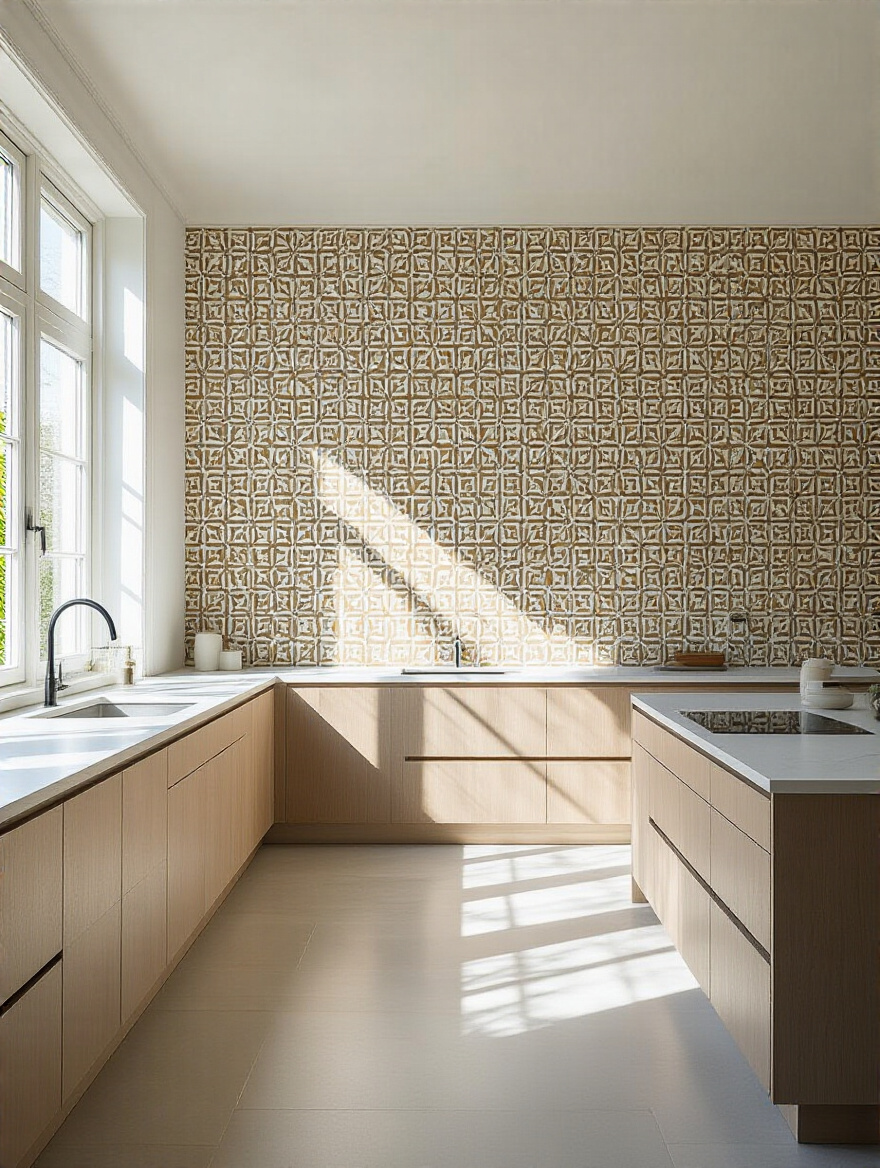
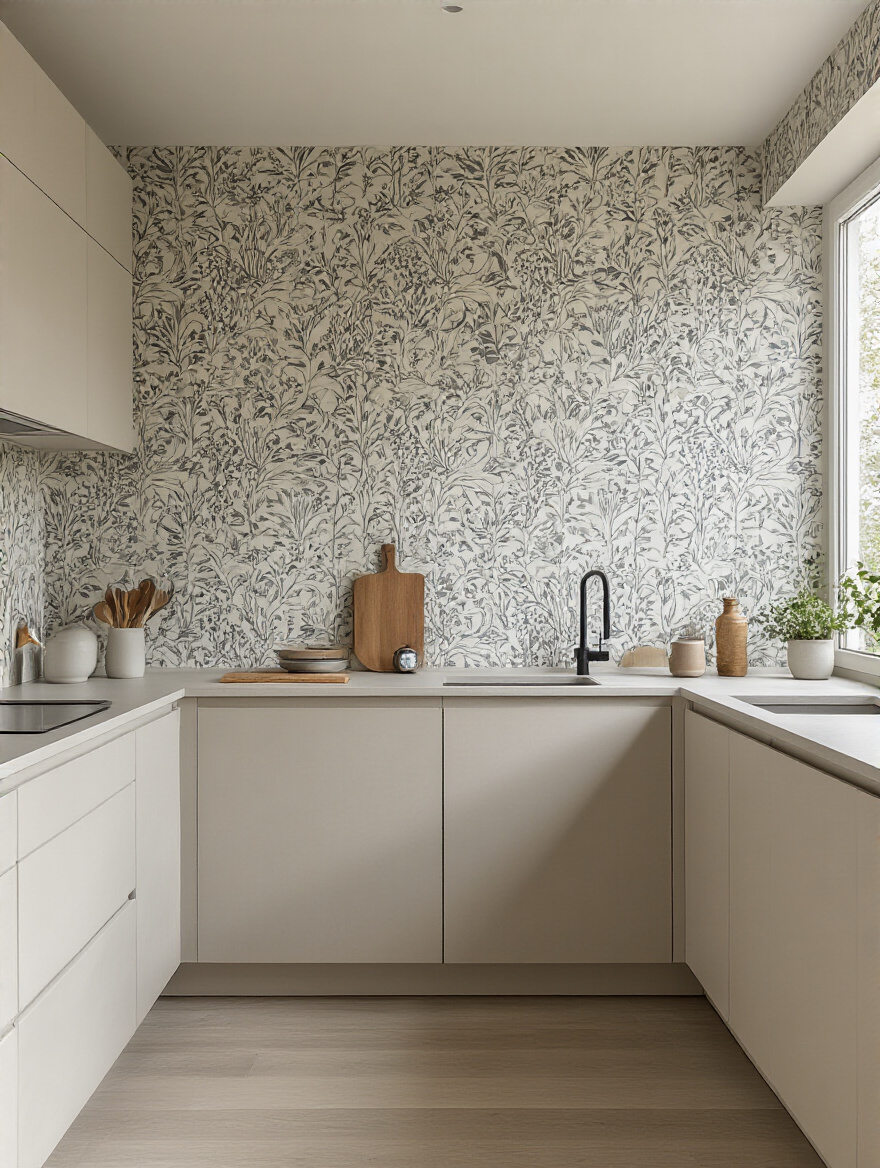
Bold patterns aren’t for everyone, and often, the truest luxury is quiet and textural. Think of a wallpaper that mimics the look of raw silk, linen, or plaster. It doesn’t scream for attention, but when you get close, you feel its quality. This is the secret to making a minimalist kitchen feel warm, layered, and expensive. It adds a tactile dimension that paint simply cannot replicate.
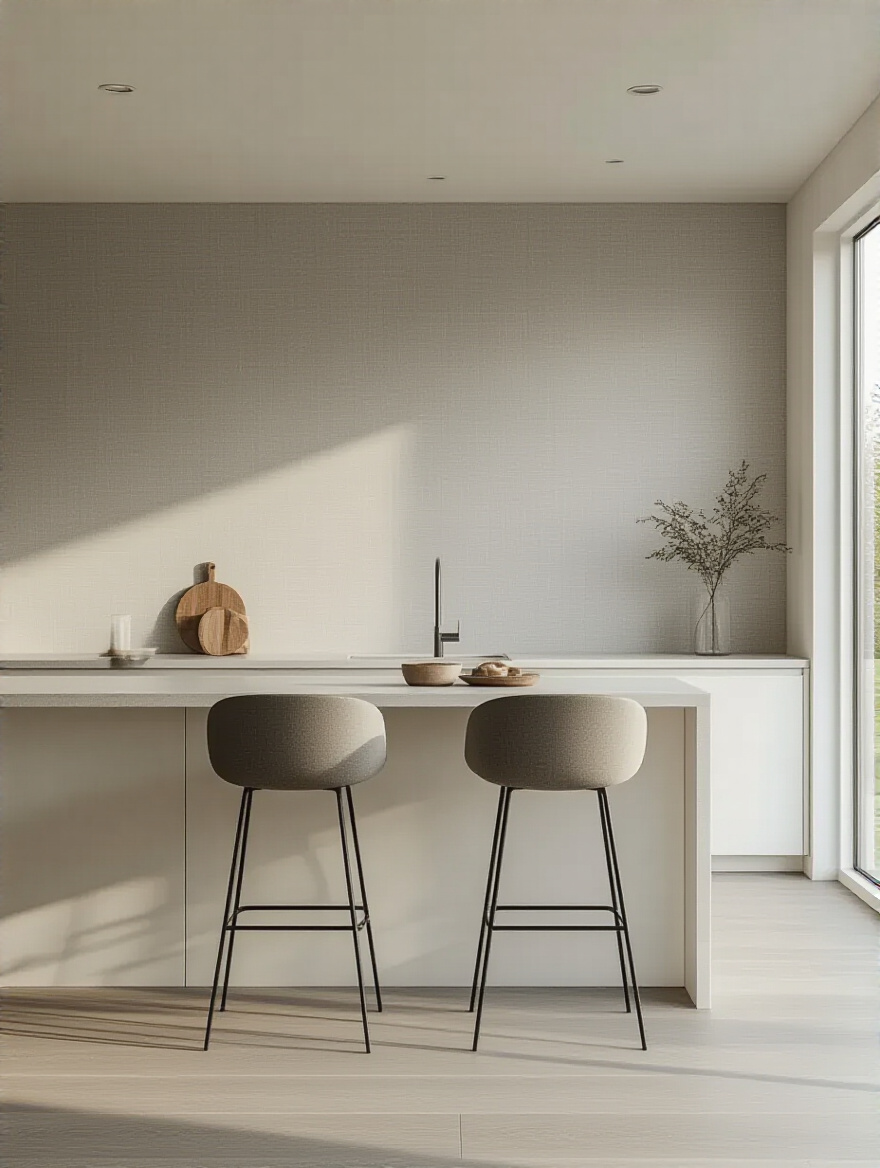
A textural wallpaper is perfect for covering all four walls of a kitchen. Because it’s subtle, it won’t make the space feel smaller or cluttered. Instead, it adds a soft, continuous elegance and depth. This is what we use in high-end hotel suites to create an atmosphere of serene comfort. It’s a move that feels custom and architectural, providing a sophisticated backdrop for your cabinetry and fixtures to shine.
It’s the cashmere sweater of your kitchen—understated, timeless, and impeccably chic.
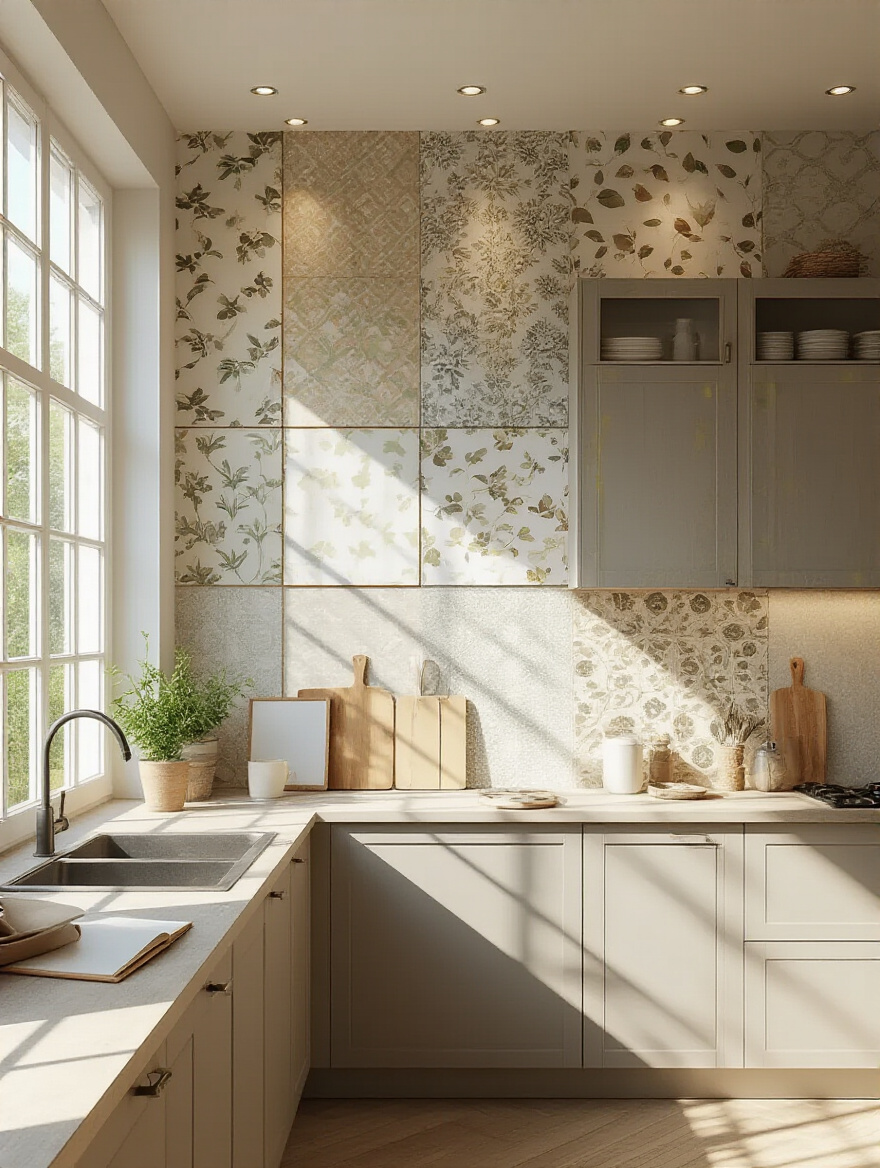
This is one of my absolute favorite hotel design strategies to bring into a home. In a large, open-concept space, wallpaper is the perfect tool for creating a “room within a room.” You can use a distinct pattern to visually separate the dining nook from the cooking area, or to turn a simple butler’s pantry into a hidden gem. Wallpapering the back of open shelves or the interior of a glass-front cabinet is another brilliant touch.
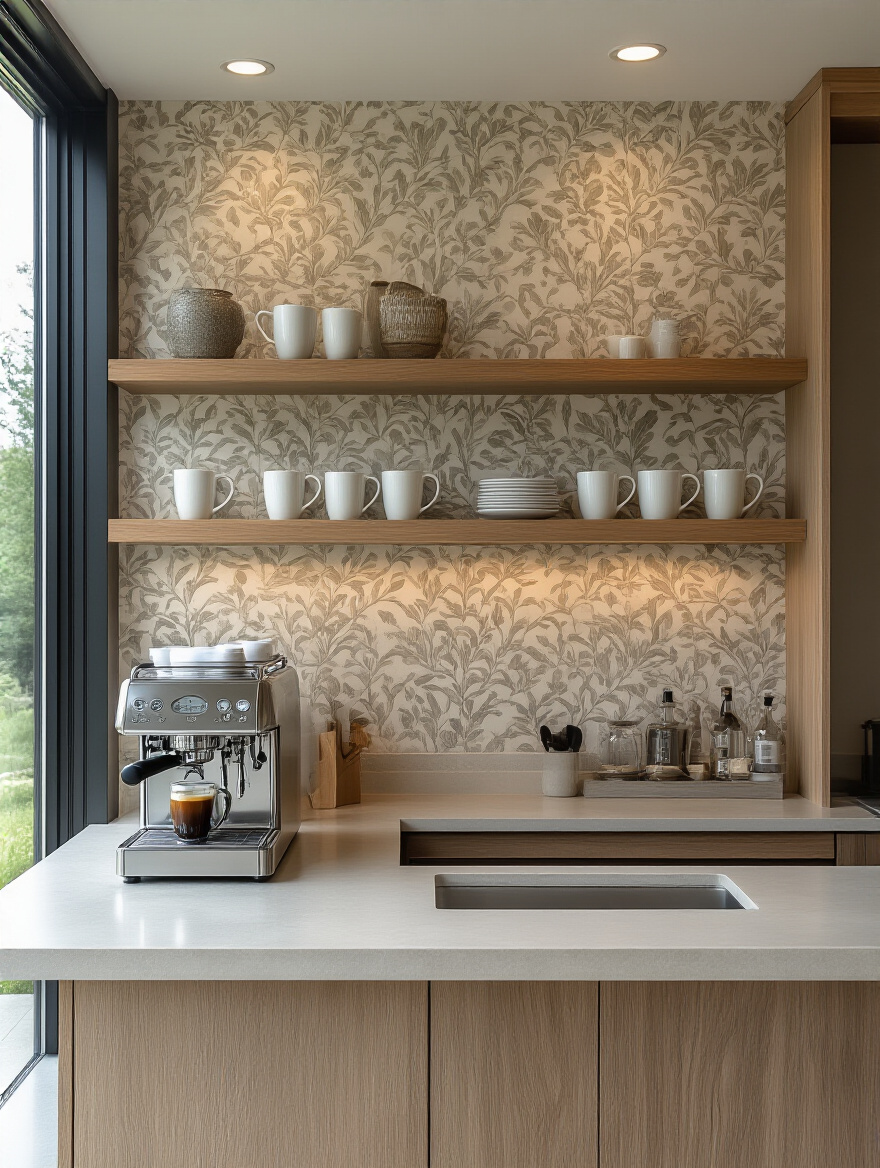
This technique adds layers of interest and makes a space feel more thoughtfully designed and functional. I once specified a beautiful, moody floral wallpaper for the wall behind a built-in coffee bar. It instantly transformed that small corner into a destination—a little morning ritual zone with its own distinct identity. It signals a shift in function and mood without adding a single wall.
By thoughtfully applying pattern to specific features, you’re not just decorating; you’re shaping the experience of the space.
Your wallpaper must have a conversation with the permanent elements in your kitchen. Before you commit, you need to understand the undertones of your existing finishes. Are your “white” cabinets a cool, crisp white or a warm, creamy white? Does your stone countertop have cool grey veins or warm golden flecks? A wallpaper with the wrong undertone will always feel slightly “off,” even if you can’t put your finger on why.
If your countertops have a lot of movement and pattern, like a dramatic marble or granite, choose a simple, textural, or very small-scale wallpaper. Let the stone be the star. Conversely, if you have simple White Quartz Countertops and plain cabinets, you have the perfect canvas for a more expressive wallpaper. The goal is balance. Not every surface can be the lead singer; you need a supporting band to create harmony.
This considered approach ensures your new wallpaper feels like an integral part of the design from day one, not a beautiful but disconnected afterthought.
As we delve deeper into design, let’s explore one of the most brilliant innovations in wallpaper. This option provides immense freedom, particularly for those who love to evolve their style or are in a space where permanent changes aren’t an option.
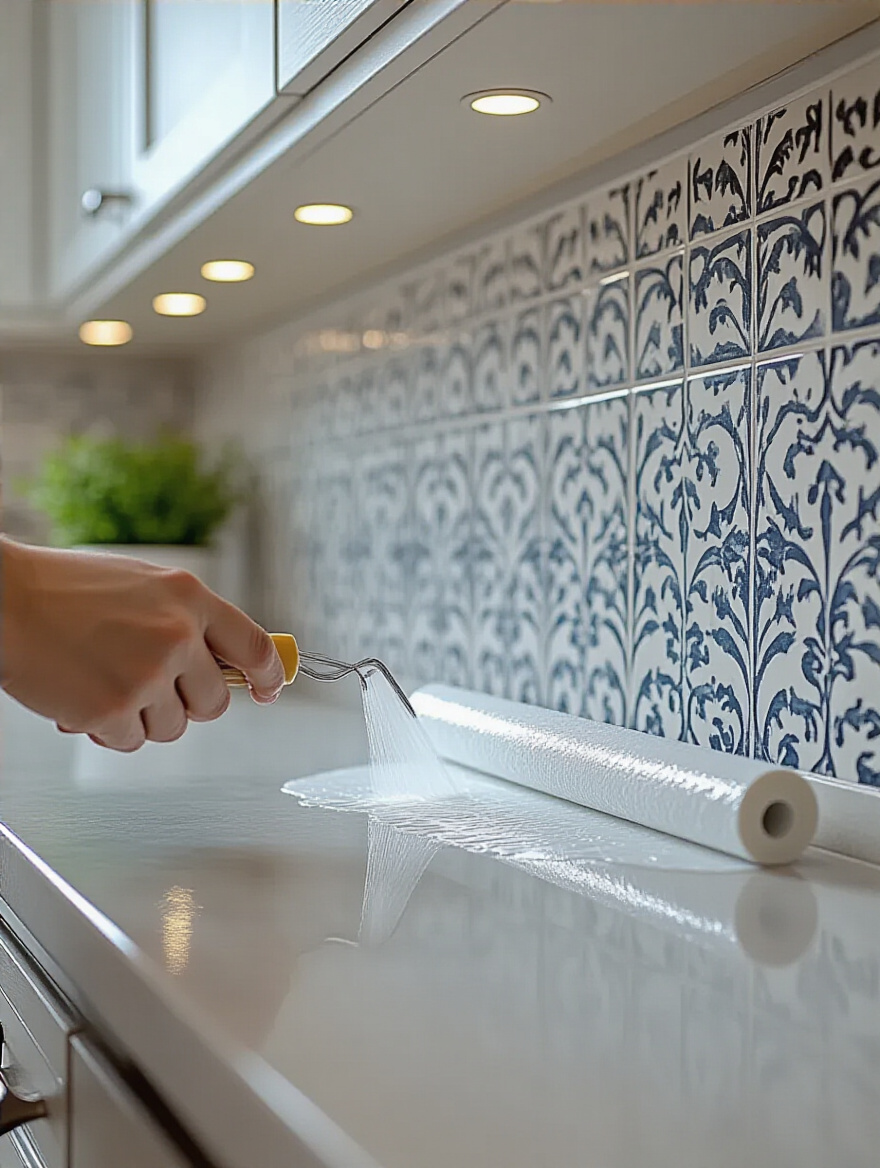
Let’s be honest: commitment can be daunting, especially with a bold trend. This is where peel-and-stick wallpaper becomes your best friend. The quality has improved dramatically in recent years, with luxury brands offering stunning designs on high-quality, removable substrates. It’s the perfect solution for adding personality to a backsplash, a pantry door, or an Accent wall without the permanence of traditional paste.
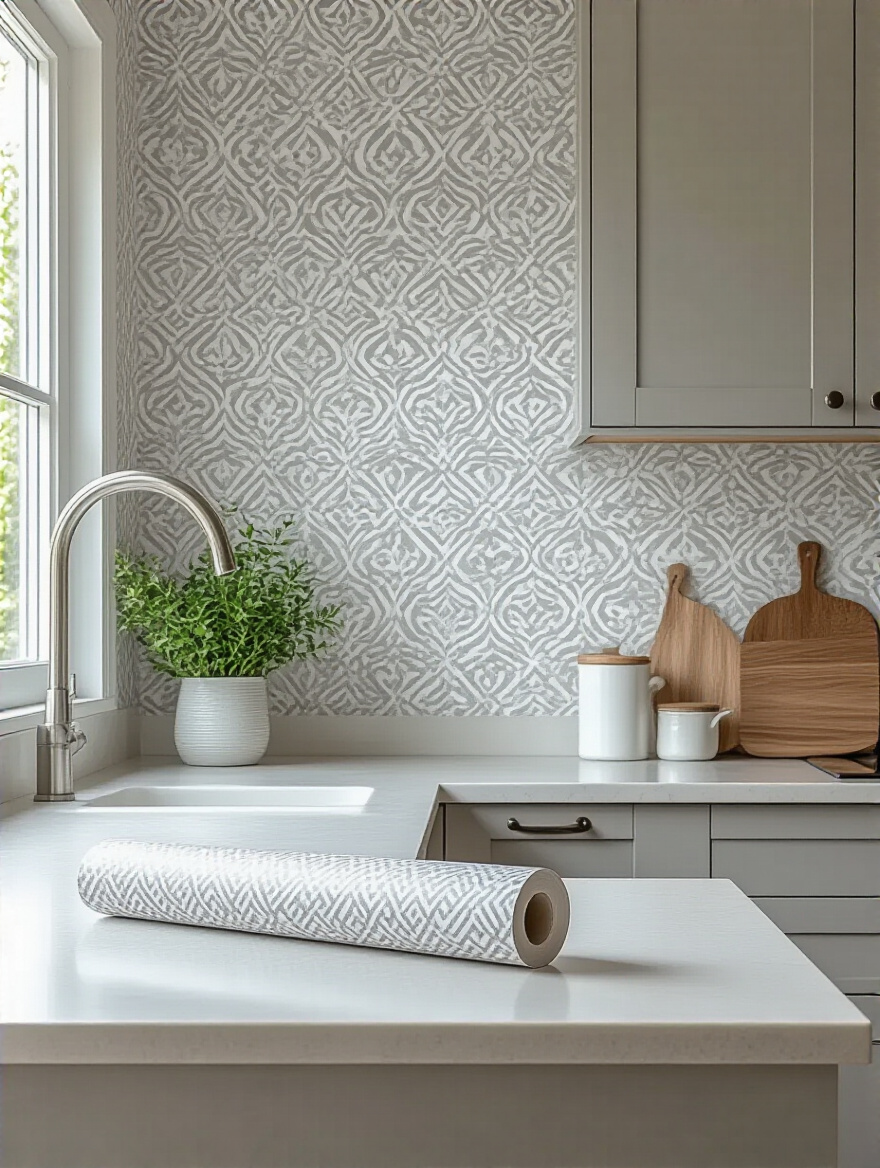
This is a fantastic option for renters, of course, but I recommend it to homeowners all the time. Love that trendy, ultra-bold pattern but worry you’ll tire of it in two years? Use a peel-and-stick version. It allows you to experiment with confidence, knowing you can easily peel it off without damaging the wall underneath. I used a gorgeous, moody floral peel-and-stick to line the inside of a client’s bar cabinet. It was a five-minute project that delivered a massive “wow” factor.
It’s the ultimate in smart, flexible design—all the style, none of the long-term relationship stress.
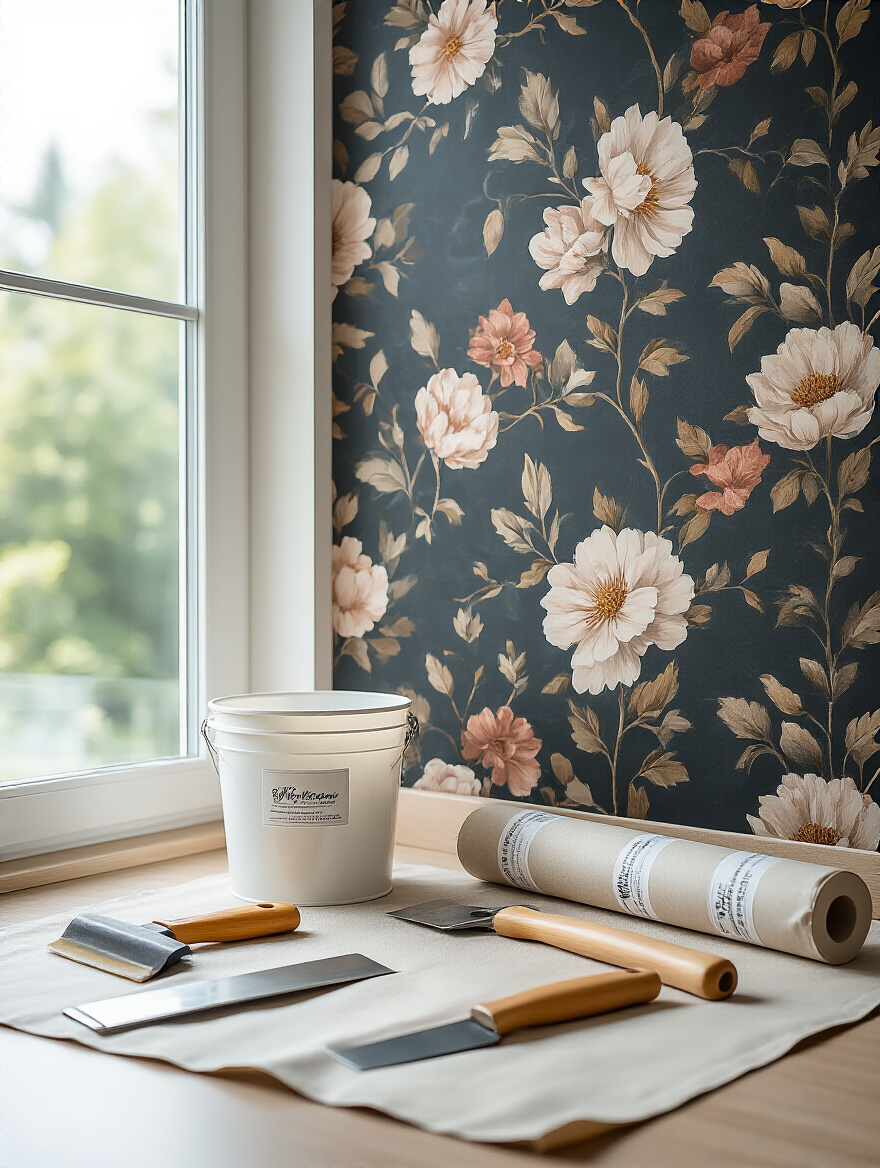
You’ve planned, budgeted, and selected the perfect design. Now comes the moment of truth: the application. A pristine installation is what separates a professional look from a DIY disaster. These next steps are the technical secrets to making your wallpaper last.
This is the most critical and most frequently skipped step. You cannot apply wallpaper to a plain, painted wall, especially in a kitchen. You must start by cleaning the walls with a TSP solution to remove any invisible grease residue. Then, you fill and sand any imperfections—wallpaper will highlight, not hide, every tiny bump and crack.

Most importantly, you must apply a wallpaper-specific primer, often called “sizing.” This does two crucial things: it creates the perfect surface for the adhesive to grip onto, preventing bubbles and peeling, and it seals the wall so that when you eventually want to remove the wallpaper, it comes off cleanly without tearing the drywall. I confess, early in my career, I rushed a project and skipped this. Removing that wallpaper years later was an absolute nightmare. Don’t make my mistake. This step is the foundation of a lasting, beautiful result.
It’s the least glamorous part of the process, and it makes all the difference in the world.
The details betray everything. A sloppy cut around a light switch or a ragged edge in a corner can make even the most expensive wallpaper look cheap. The secret weapon here is simple: a brand-new, razor-sharp blade for every few cuts. A dull blade doesn’t cut; it tears. Always have a pack of fresh blades on hand.
For outlets and switches, please, turn off the electricity first. Then, hang the paper directly over the opening, make a small X-cut over the hole with your knife, and then carefully trim away the flaps, leaving a small border that the faceplate will cover. For corners, use a smoothing tool to press the paper tightly into the seam before running your knife along it for a clean, straight line. Don’t rush these cuts. Patience here is what creates those sharp, professional lines.
It’s this meticulous attention to the small things that results in a seamless, high-end finish.
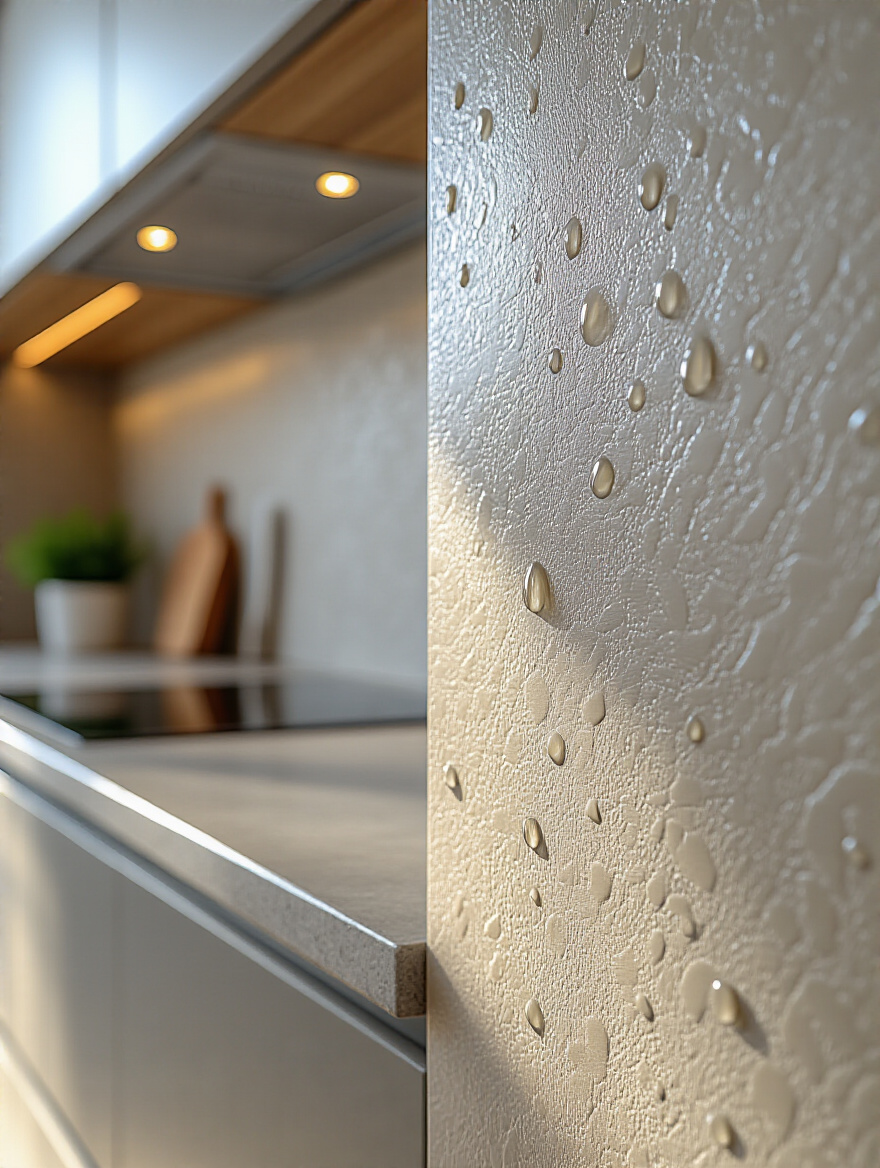
Here’s another pro secret, especially for areas near the sink or stove. Even with scrubbable vinyl wallpaper, the seams are the most vulnerable points for moisture to creep in. Once water gets behind the paper, it’s game over—the adhesive will fail, and it will start to peel.
To prevent this, after the wallpaper is fully installed and dry, apply a tiny, almost invisible bead of clear matte kitchen and bath caulk along the seams in those high-splash zones. Apply it along the bottom edge where the wallpaper meets the countertop or backsplash as well. You smooth it with your finger, wipe away the excess, and it creates a waterproof seal that protects your investment. We do this in every hotel bathroom and bar we design. It’s an essential final touch for longevity.
This tiny step is your best defense against the daily wear and tear of a working kitchen.
For an extra layer of insurance, especially if you’ve fallen for a wallpaper that isn’t a heavy-duty scrubbable vinyl, you can apply a clear protective topcoat. There are products specifically designed for this, often called a “decorator’s varnish,” available in matte, satin, or gloss finishes. You simply roll it on over the top of the installed wallpaper.
This creates a transparent, wipeable film that shields the paper from grease, moisture, and stains. I recommend this particularly for wallpapers behind a dining table or banquette where chairs might scuff the wall, or in a kitchen that sees a lot of heavy, messy cooking. Always test it on a leftover scrap of your wallpaper first to ensure it doesn’t alter the color, but for most, it’s an invisible shield that dramatically extends the life of your wallpaper.
Think of it as the final, protective layer that makes your beautiful design truly ready for real life.
We’ve covered the crucial techniques for a great application. But perhaps the most critical skill is knowing your own limits. The final step in guaranteeing a flawless finish often involves bringing in an expert.
I cannot stress this enough: know when to call a professional. If you have chosen a wallpaper with a complex, large-repeat pattern, a delicate material like grasscloth, or if your home is old with walls that are not perfectly plumb and straight, hiring a professional wallpaper hanger is the smartest money you will spend. They are artists. They know how to prep walls, hide seams, and match patterns perfectly around corners in a way that is nearly impossible for an amateur.
Yes, it’s an additional cost, but it protects your investment in the wallpaper itself. A badly hung expensive wallpaper looks far worse than a perfectly hung inexpensive one. The pro will get it done faster, with less waste and a far superior result. Do your research, check references, and look at their portfolio. The peace of mind and the perfect finish are worth every single penny.
Sometimes, the most sophisticated design decision is to recognize the value of true craftsmanship and hand the job over to an expert.
With the wallpaper perfectly installed, the final phase begins: integrating it into a cohesive design and knowing how to care for it. This is where your kitchen transforms from a room with nice wallpaper into a truly holistic, styled space.
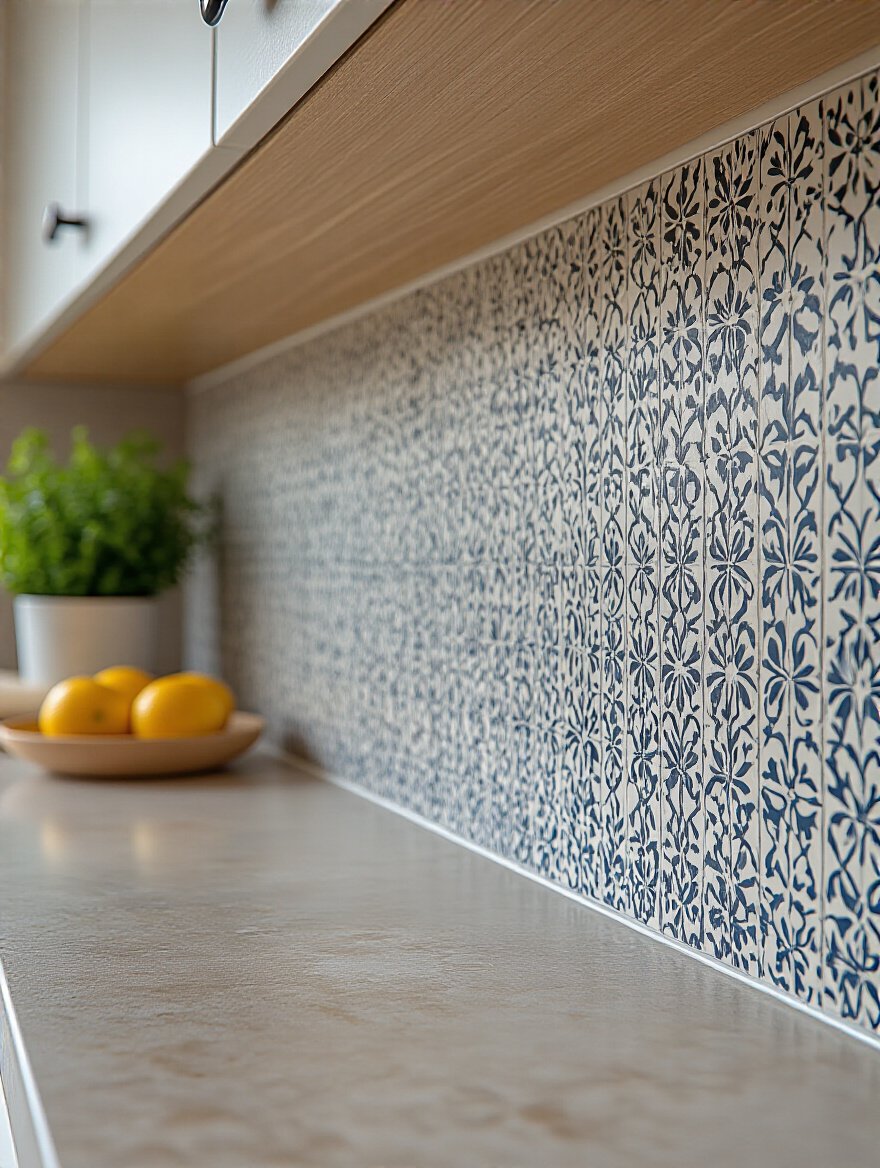
Your wallpaper and your backsplash need to be in a harmonious partnership. This is a critical point of integration. If your wallpaper is the bold, patterned star of the show, your backsplash should be its quiet, elegant supporting actor. A simple, solid-colored tile—like a classic Subway Tile or a large-format porcelain—is perfect. You can create a subtle link by choosing a grout color that picks up on a minor color in the wallpaper pattern.
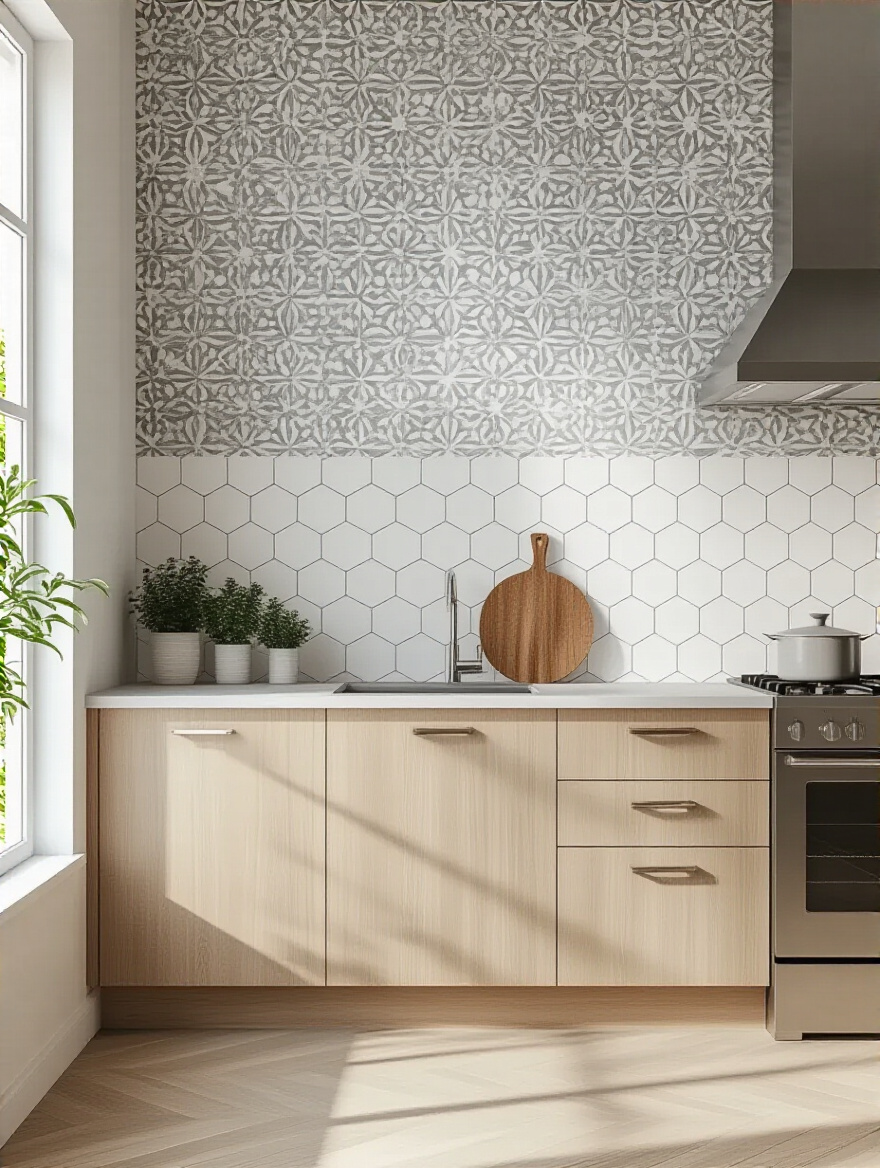
If you’ve opted for a bold, statement backsplash tile, then the roles are reversed. The wallpaper should be textural and subtle, providing a beautiful backdrop that doesn’t compete for attention. The biggest mistake is to have two “diva” patterns right next to each other. It creates visual chaos and diminishes the impact of both. The goal is always balance and a clear design hierarchy.
When these two elements work together, the result is a kitchen that feels layered, sophisticated, and professionally designed.
Open shelving mounted directly onto a wallpapered wall is an incredibly chic and high-impact look. It allows the wallpaper to become the beautiful backdrop for your curated collection of dishes, glassware, and art. The wallpaper isn’t hidden; it’s framed and highlighted by the shelves and the objects on them.
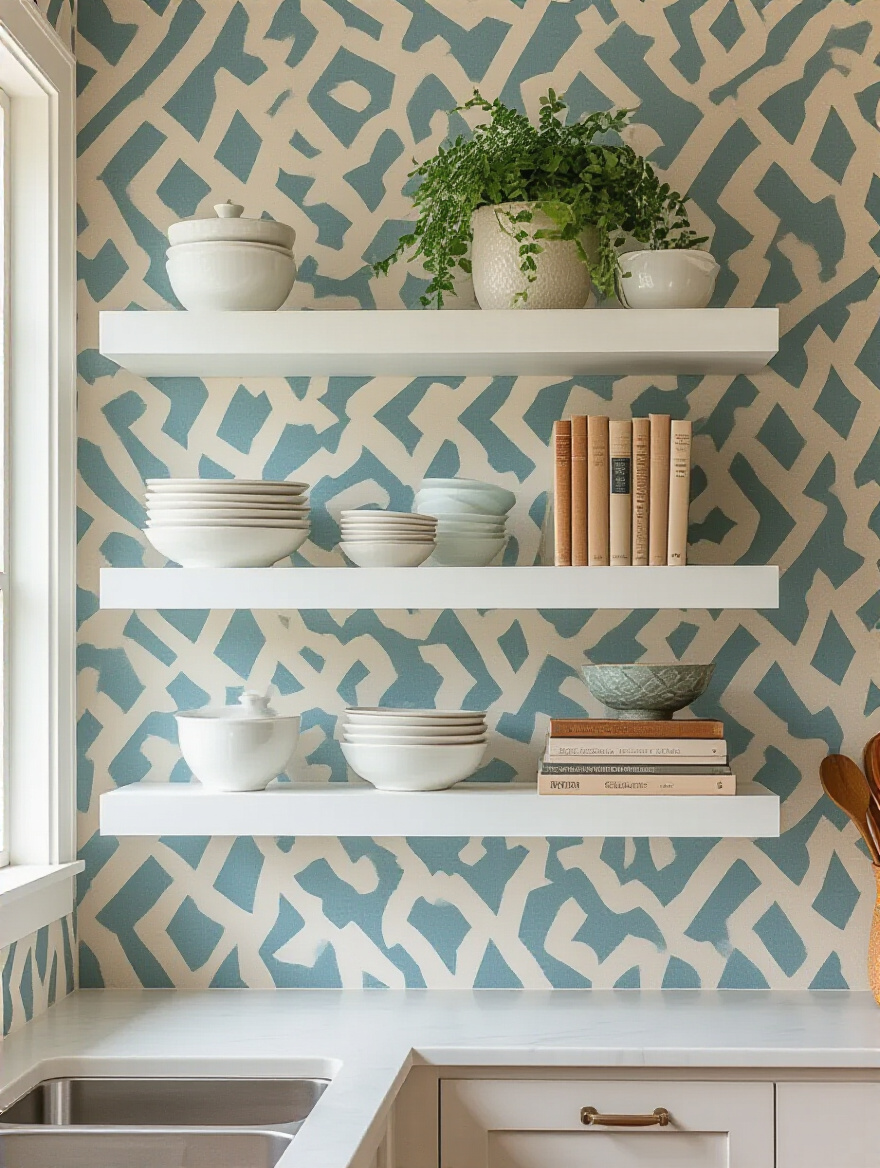
The key to success here is curation. This is not the place for your mismatched mugs and plastic storage containers. This is a space for “functional beauty”—display your most beautiful cookbooks, a row of elegant olive oil bottles, a small potted herb, and stacks of your favorite ceramic bowls. Leave some “breathing room” on the shelves so the wallpaper pattern can peek through. This creates a look that is personal, stylish, and feels effortlessly layered.
This strategy turns a simple storage solution into a dynamic, gallery-like design moment.
Let’s just be blunt about the two biggest mistakes that can ruin a project. First, over-patterning. Unless you have a massive kitchen with soaring ceilings, applying a busy, large-scale pattern to all four walls is almost always a bad idea. It will feel claustrophobic and overwhelming. Use that bold pattern for a feature wall, and pair it with paint or a subtle texture on the other walls. Less is truly more.
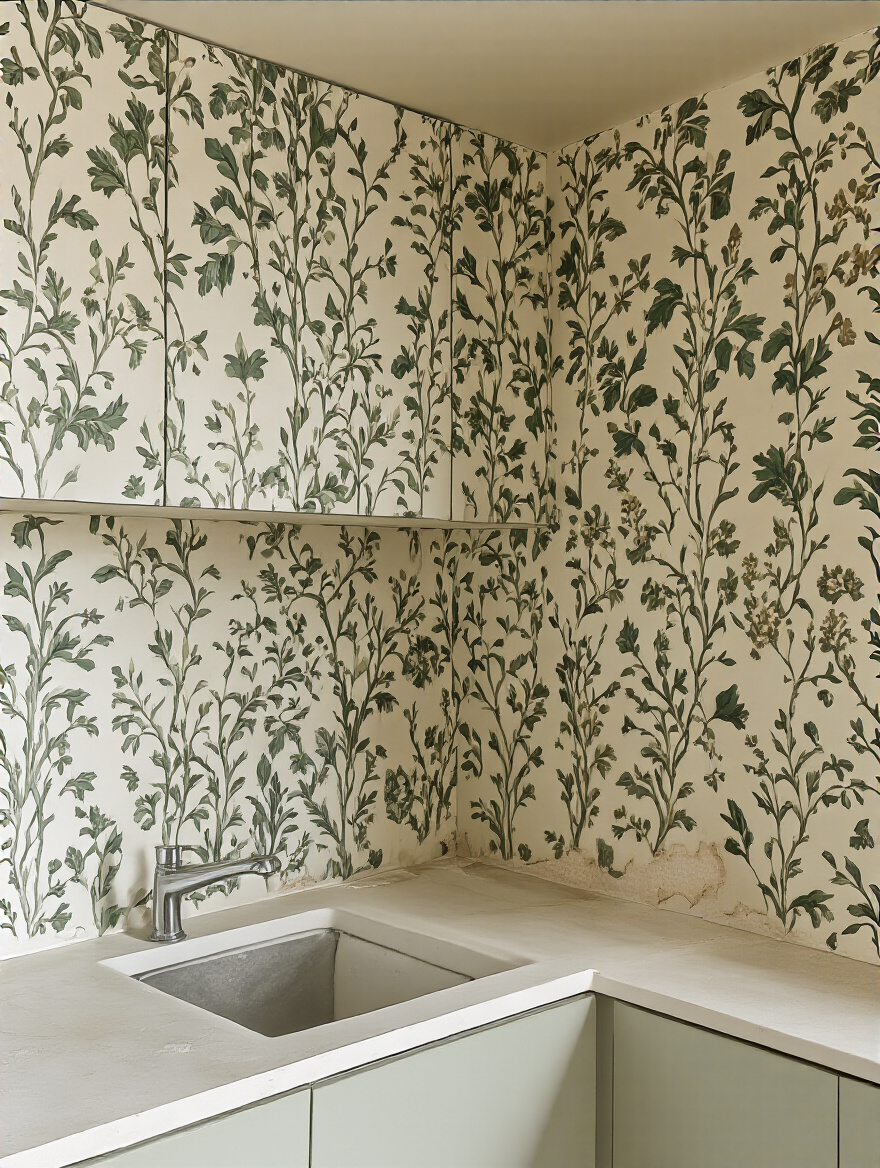
Second, material ignorance. Do not install a delicate, non-vinyl paper directly behind your sink or stove without a protective backsplash of some kind (like a sheet of glass or a stone riser). It will be ruined by water and grease splatters within months. You must either choose a highly durable, scrubbable material for these zones or protect a more delicate paper with another material. Ignoring the functional demands of these areas is a recipe for quick and costly failure.
Avoiding these common pitfalls is 90% of the battle in achieving a kitchen that is both beautiful and built to last.
Your beautiful new wallpaper needs to be cared for properly. Think of it like a fine fabric. For scrubbable vinyls, a regular wipe-down with a soft cloth or sponge with a bit of mild, diluted dish soap is all you need. Never use abrasive cleaners, bleach, or harsh scouring pads, as they can dull the finish or damage the pattern.
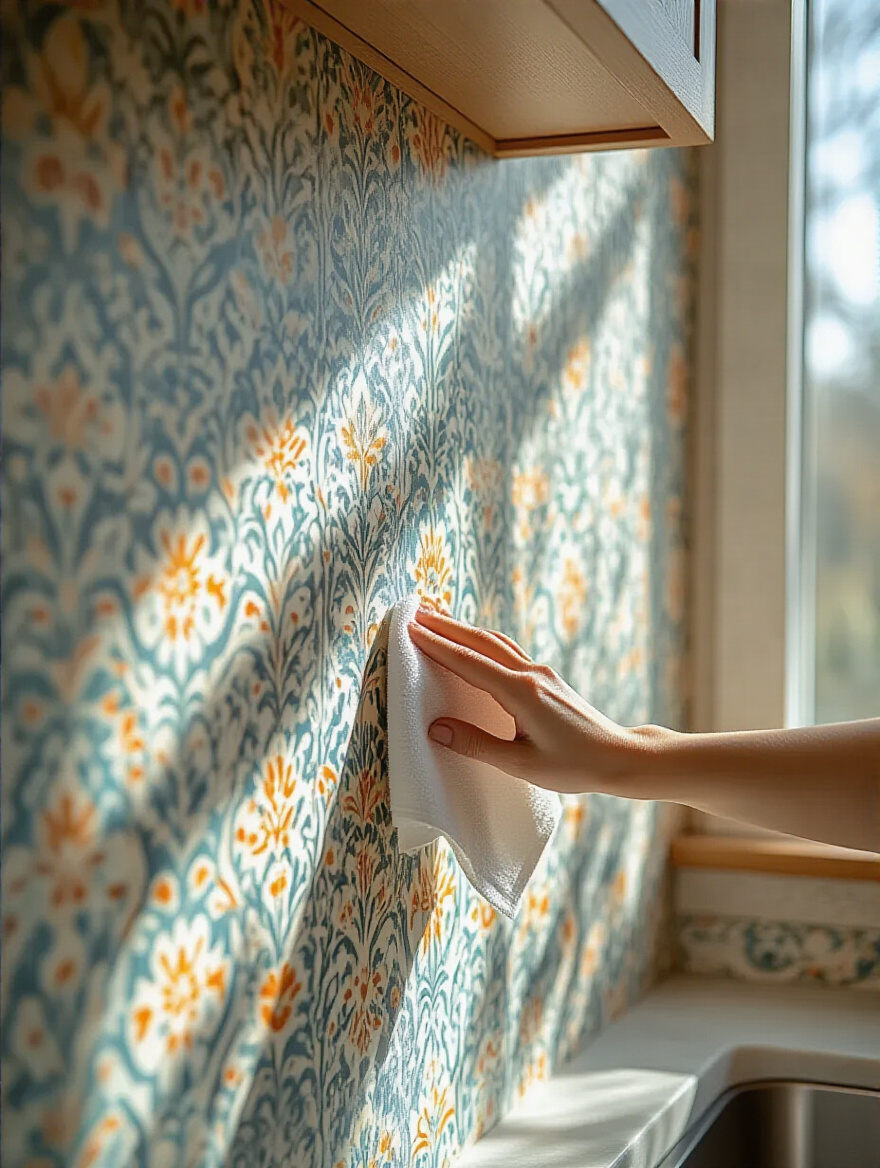
For more delicate, non-vinyl papers, cleaning is more about prevention and dusting. Use a feather duster or the soft brush attachment of your vacuum to keep it free of dust and cobwebs. For any spots or splatters, act quickly and blot gently with a slightly damp cloth. Always check the manufacturer’s cleaning instructions. The key is regular, gentle maintenance to prevent grime from building up in the first place.
Treating your walls with a bit of care will keep them looking pristine and vibrant for years, protecting the beauty of your investment.
Our final consideration is about looking ahead. A truly sophisticated space is one designed with the future in mind, allowing for evolution without requiring a total overhaul. This last piece of advice ensures your kitchen can grow and change with you.
The most brilliant thing about a well-planned wallpaper installation is that it’s not a life sentence. If you prepared your walls properly with a good quality primer, removal will be straightforward when you’re ready for a change in five or ten years. The primer creates a barrier that allows the paper to be stripped off cleanly without shredding and taking the drywall with it.
And if you’ve chosen a peel-and-stick wallpaper for a feature area, your future is even easier. You can literally peel it off in an afternoon and have a blank canvas for your next design inspiration. This foresight is the ultimate luxury. It allows you to fully embrace a design you love today, with the full confidence that you can effortlessly pivot to a new look tomorrow. A well-designed space should never make you feel trapped.
Designing for the future ensures your kitchen remains a joyful and stylish reflection of you, for as long as you call it home.
There you have it. The secret to using wallpaper in a kitchen is that there is no secret—only thoughtful strategy and a commitment to quality. It’s about understanding that wallpaper is more than a decorative layer; it is an architectural finish that can completely redefine the feeling and function of your space. It can bring warmth to a minimalist design, drama to a forgotten corner, and a deep, personal narrative to the heart of your home.
You don’t need a massive renovation to create a seismic shift in your kitchen’s style. You just need intention. So, I encourage you to look at your kitchen not for what it is, but for what it could be. Imagine that bland wall behind your dining table transformed into a lush botanical scene. Picture the back of your open shelving alive with a subtle, sophisticated texture. The power to create a truly bespoke, hotel-worthy culinary space is right there, waiting in a roll of beautifully designed paper. Your dream kitchen is closer than you think.