Physical Address
304 North Cardinal St.
Dorchester Center, MA 02124
Physical Address
304 North Cardinal St.
Dorchester Center, MA 02124
Discover 19 expert living room lighting tips to create perfect ambiance. From layered lighting to smart controls, transform your space today.
Of all the elements that make a room work, lighting is the one that speaks most directly to our subconscious. It’s the first thing we feel and the last thing we think about. After years of designing spaces for musicians—rooms that need to be acoustically precise and emotionally resonant—I’ve seen how the right light can make an instrument sing before a note is even played. Poor lighting, on the other hand, is like a nagging, out-of-tune hum that throws everything off. You can have a million-dollar Steinway in a room, but if it’s lit by a single, harsh overhead fixture, the space will feel dead.
Your living room is the heart of your home, where you unwind, connect, and maybe even create. Yet, so many people are fighting against their lighting, relying on that one ceiling light or a couple of random lamps that create more glare than comfort. Good lighting isn’t just about being able to see. It’s about shaping a mood, enhancing the texture of your life, and making your home feel like a sanctuary.
Ready to move beyond basic illumination? Forget just flipping a switch. Let’s talk about how to conduct light like a symphony. These 19 strategies are the principles I use to build spaces that don’t just look good, but feel right.
Think of lighting a room like mixing a track. You wouldn’t just have one lead vocal track cranked to the max. You need the rhythm section, the harmonies, and the subtle atmospheric pads to create a full, rich sound. Great lighting works the same way. It’s built on three layers: ambient, task, and accent. Without all three playing together, a room feels sterile and flat, no matter how nice your furniture is.
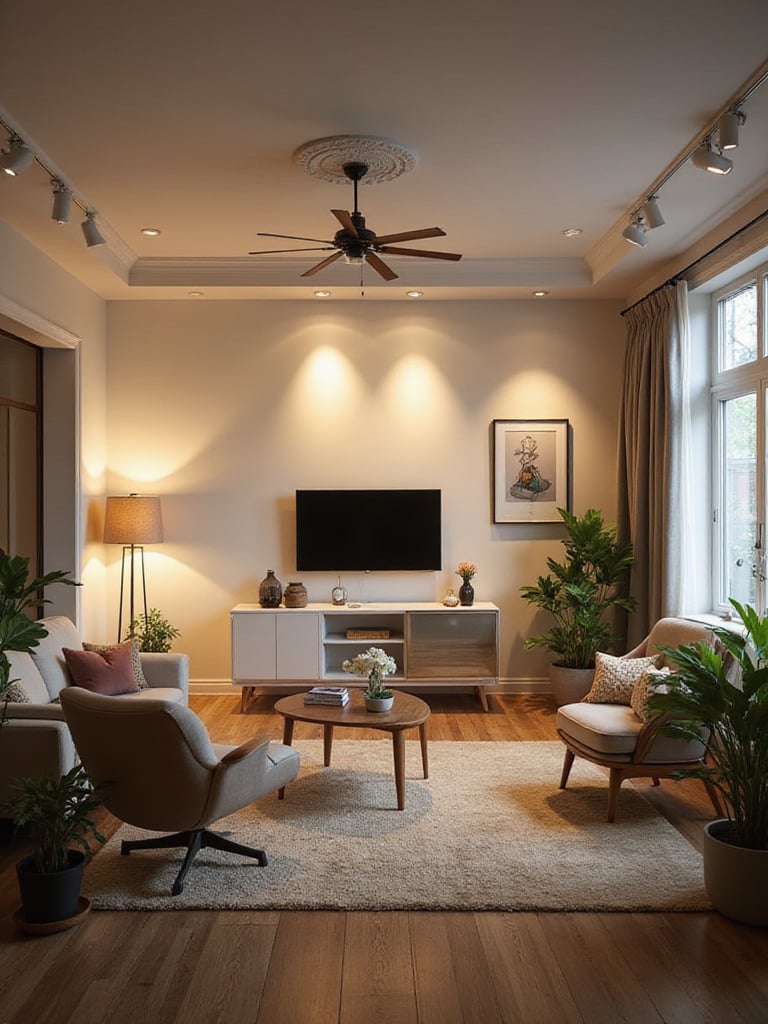
First, you have your ambient light—this is your foundational rhythm section. It’s the general, diffuse light that lets you navigate the space safely, provided by things like recessed lights or a central fixture. Then comes the task lighting, your lead vocal. This is focused, brighter light for specific activities: a floor lamp by your reading chair, a pendant over the piano keys, or under-cabinet lights where you prep coffee. Finally, you add accent light. This is the magic, the reverb, the delay. It’s the focused light that draws your eye to what matters—your art, a beautiful architectural detail, or your collection of vintage guitars on the wall.
The real artistry comes from putting each of these layers on its own dimmer. Just like a mixing board, this gives you independent control to create an infinite number of scenes for any mood or activity. That’s how you go from a functional space to an extraordinary one.
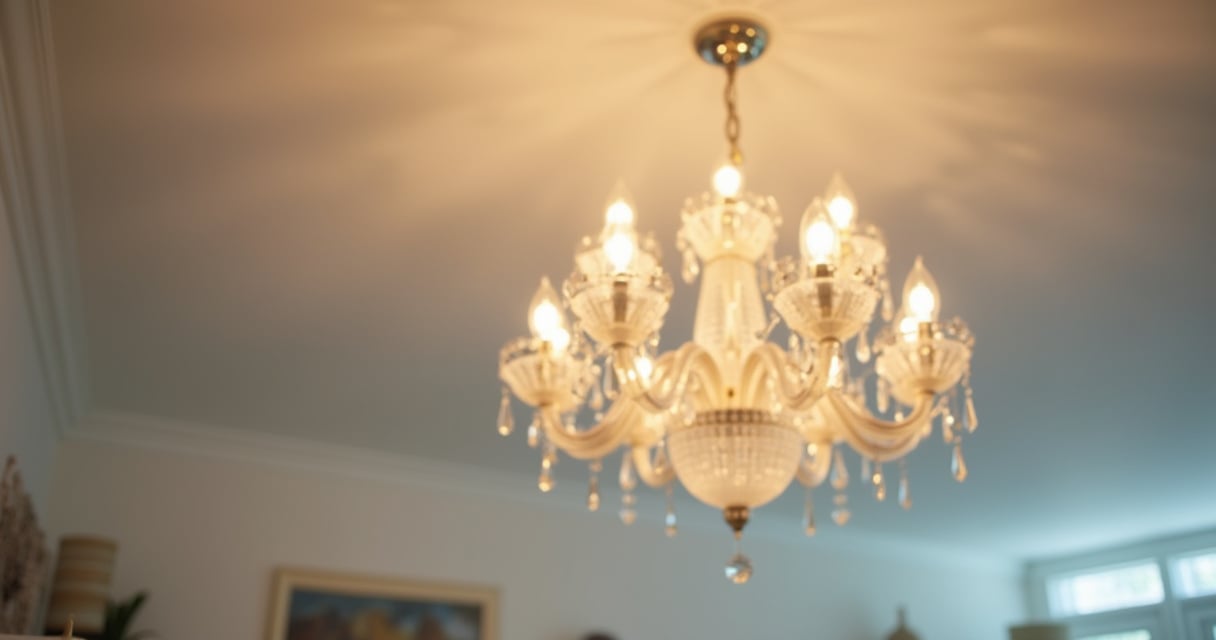
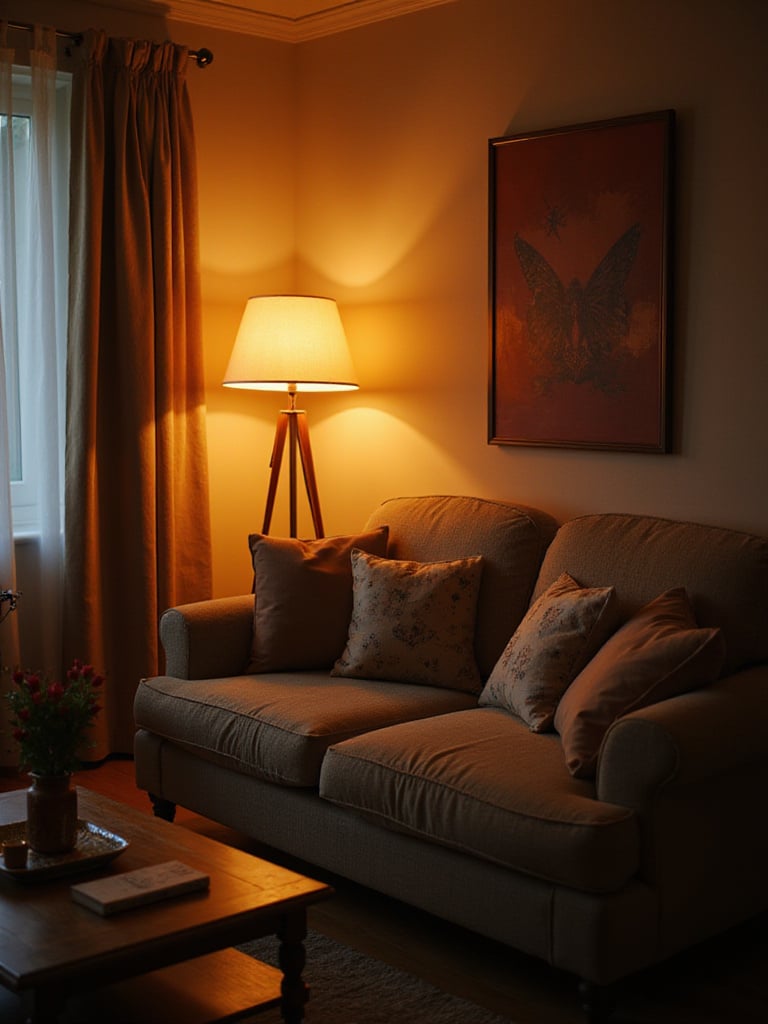
The color of your lightbulbs, measured in Kelvin (K), has a massive impact on how a room feels. Have you ever walked into a space and just felt… off? It could easily be the light temperature. Cool, bluish light (4000K and up) sends a signal to your brain that says “daylight, time to work.” It’s sterile and, frankly, unflattering. For a living space, you’re fighting the very feeling you want to create—one of comfort and relaxation.
I always recommend warm white light, somewhere in the 2700K to 3000K range. This range mimics the golden, inviting glow of old-school incandescent bulbs or even candlelight, tapping into a primal sense of comfort and home. It’s not just a vibe; warm light helps your body’s natural circadian rhythm wind down in the evening. Plus, that warm glow makes wood tones richer, fabrics cozier, and skin tones look healthier. It’s the kind of light that pulls people in and makes them want to stay.
Don’t just take my word for it. Buy a few bulbs of different temperatures and test them in your space. Your wall color and furniture will change how the light appears, so see what feels best to you.
Floor lamps are workhorses, but placing them poorly is a cardinal sin of lighting. We’ve all been there: you’re trying to relax on the sofa, and the blinding glare from a bare bulb across the room is searing itself into your retinas. This is a problem of sight lines, and it’s an easy fix. A floor lamp should provide light without you ever having to see the bulb itself.
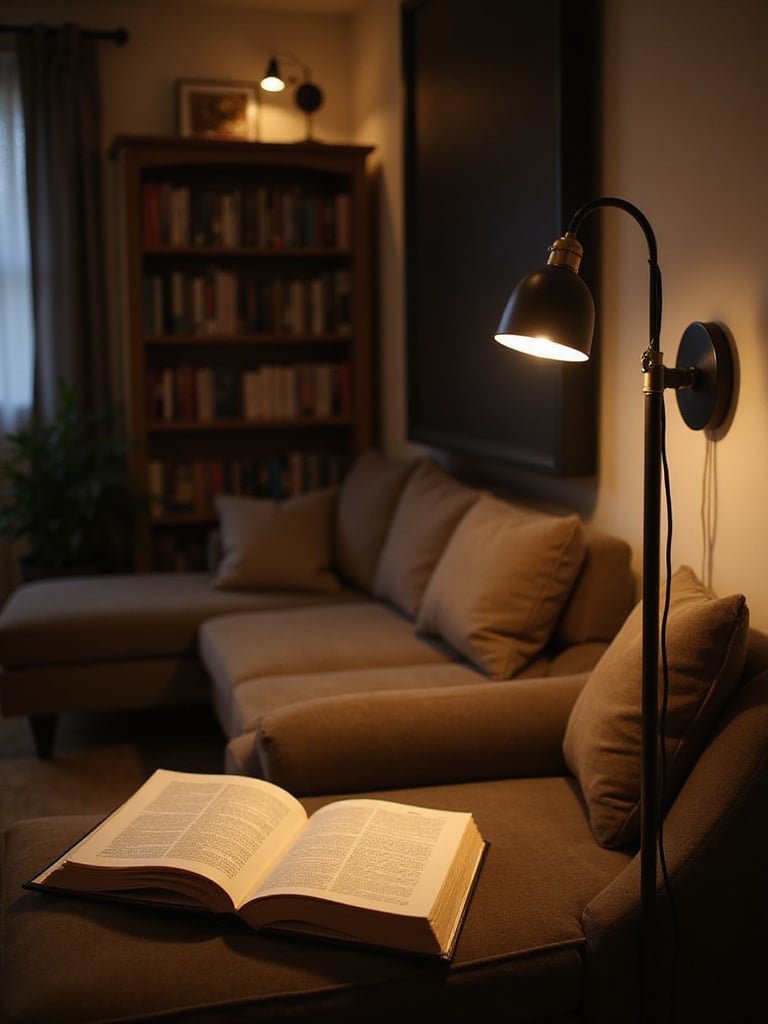
The trick is to place floor lamps slightly behind or to the side of where you sit. Think about it from a performance standpoint—on a stage, you light the performer, you don’t point the spotlight in the audience’s eyes. In your living room, you are the audience. For reading, the light should come from over your shoulder, illuminating the page. I suggest placing it on your non-dominant side to avoid casting shadows with your hand as you turn a page. And please, be mindful of the TV. A badly placed lamp will create a reflection on the screen that ruins the whole experience.
Also, choose lampshades wisely. An opaque or translucent shade that diffuses the light and directs it up and down is almost always better than a clear one that exposes the bulb. This simple detail is often the difference between amateur and professional-looking design.
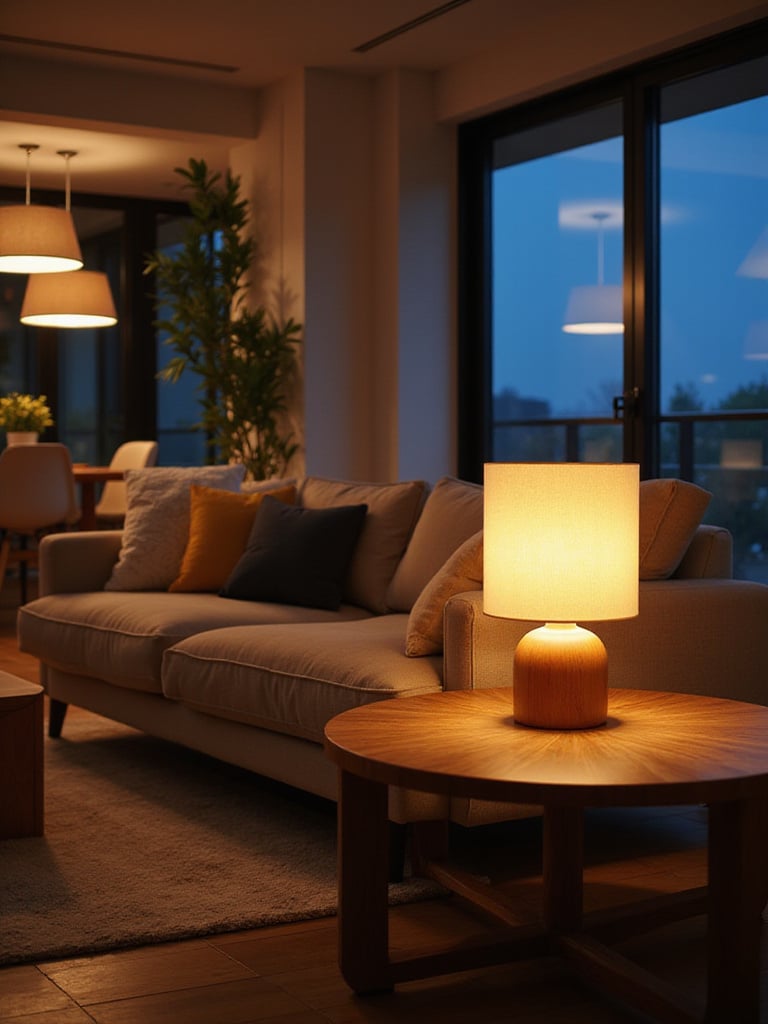
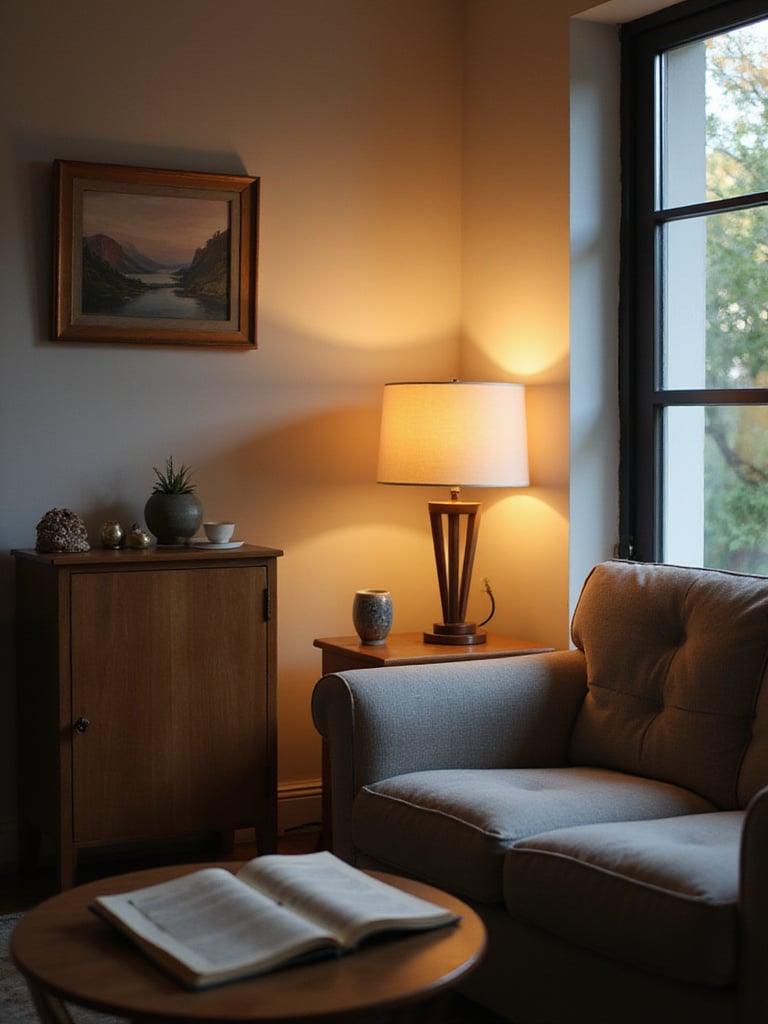
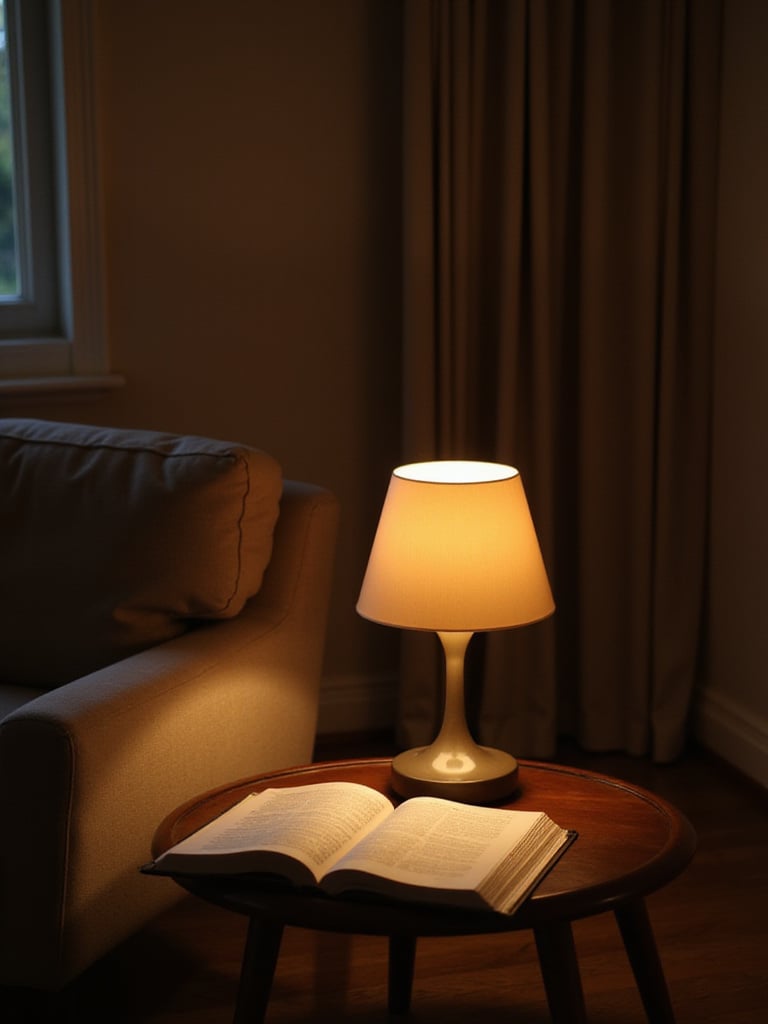
A good table lamp can instantly turn an unused corner into an irresistible reading retreat. It’s more than just light; it’s an invitation to slow down. Unlike overhead light, which often casts a shadow right where you’re looking, a well-placed table lamp provides focused light that reduces eye strain and helps you get lost in a book. It carves out a little sanctuary in the room.
Here’s the key: the bottom of the lampshade should be roughly at your eye level when you’re sitting down. This directs the light onto the book while shielding your eyes from the bright bulb. And, just like with floor lamps, put the lamp on your non-dominant side to avoid casting shadows with your own hand. If you’re right-handed, the lamp goes on your left.
Lamps with adjustable or swing arms are fantastic for this because you can really dial in the perfect position. And a dimmer is a must—it lets you go from bright reading light to a soft, ambient glow in seconds.
If you do only one thing to upgrade your lighting, install dimmers. Seriously. It’s the single most impactful change you can make. Dimmers are the volume knobs for your light. They turn a static, one-note fixture into a dynamic instrument that can adapt to anything—a bright, energetic party; a quiet, intimate conversation; or a focused practice session.
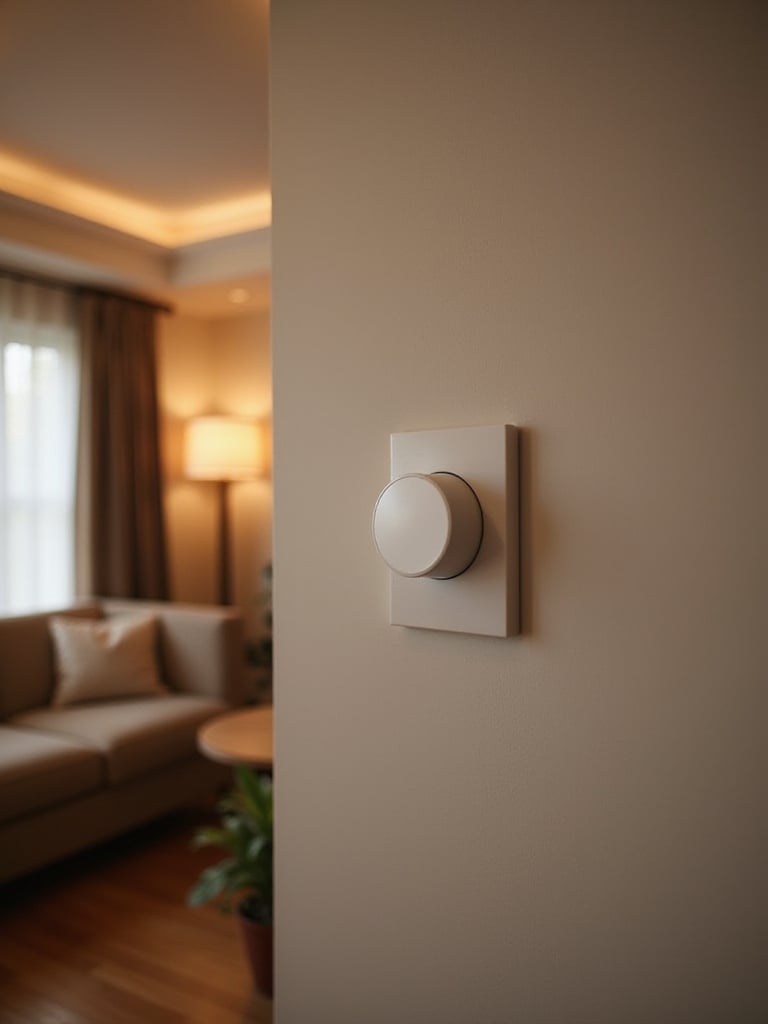
It’s not just about mood, either. Dimmers save energy and dramatically extend the life of your bulbs. Just be sure to get modern dimmers that are rated for LEDs to avoid that awful buzzing or flickering. I’m a big fan of Lutron dimmers; they’re rock-solid. And if you want to take it a step further, smart dimmers let you create and save scenes. Imagine hitting one button labeled “Movie Night” and watching as all your lights crossfade to the perfect levels. That’s not a gimmick; it’s true control over your environment.
My professional opinion? Every circuit in a living room should be on a dimmer. Period. It’s the foundation upon which all other good lighting decisions are built.
Smart Lighting Systems have completely changed the game. At first, I was skeptical—seemed like a techy solution in search of a problem. But after installing a Philips Hue system for a client who wanted to shift the mood of his home studio from a focused “tracking” environment to a relaxed “listening” vibe, I was converted. Smart lighting gives you wireless control over not just brightness, but color temperature and even color, right from your phone or with your voice.
This goes way beyond party tricks. You can schedule your lights to gently warm and brighten in the morning, supporting your natural wake cycle. Or have them automatically shift from a cooler, focus-enhancing temperature during the day to a warmer, relaxing tone in the evening. Many systems use geofencing to turn lights on as you arrive home or off when you leave, which is both convenient and great for security. It’s about making your lighting responsive to your life.
A little pro tip: start with smart switches (like the Lutron Caseta line) instead of individual bulbs. One switch can control an entire circuit of existing fixtures, which is often more practical and cost-effective for a whole room.
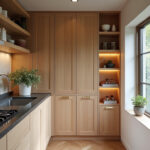
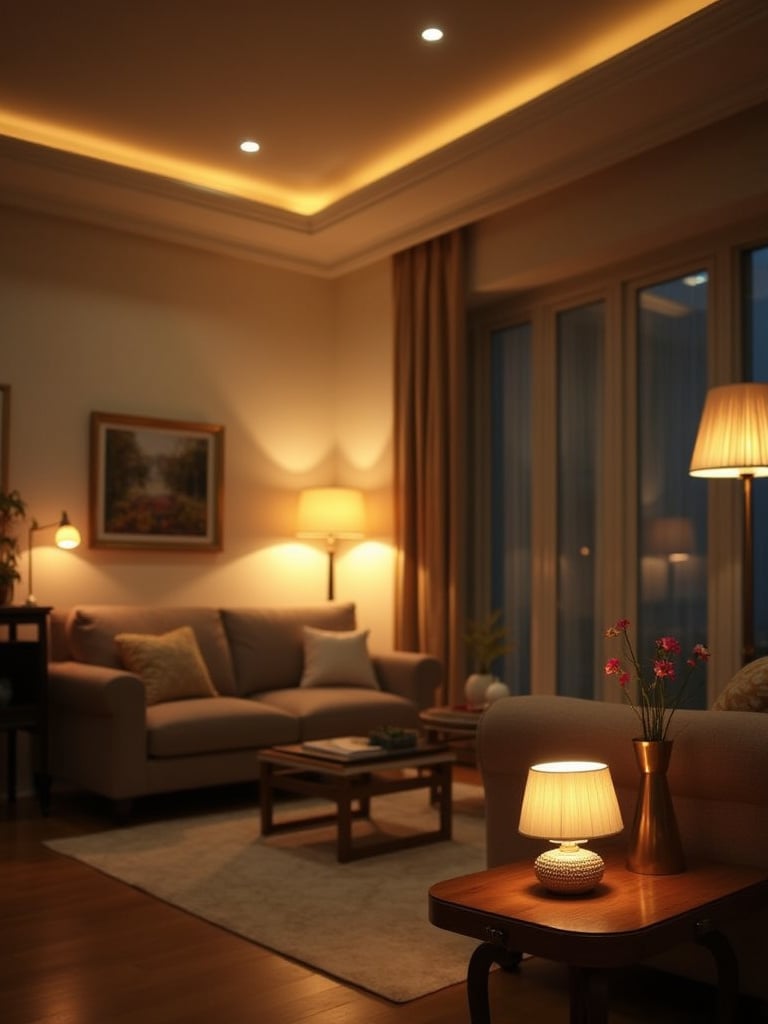
So many rooms suffer from the same problem: all the light comes from either the ceiling or from lamps on the floor. This leaves a dark, murky zone in the middle of the walls, making the room feel flat and closed-in. Wall sconces are the answer. They introduce a crucial mid-level layer of light that adds dimension and balance, instantly making a space feel more complete and professionally designed.
Where you place them and what kind you choose depends on the job you want them to do. Uplighting sconces are fantastic for creating soft, ambient light by bouncing it off the ceiling. This can make a low ceiling feel higher. Downlighting sconces create more dramatic pools of light, which can be great for highlighting a textured wall. And my personal favorite for music spaces: adjustable-arm sconces next to a sofa or chair, which provide perfect task lighting without taking up any table space.
The way sconces play off your other light sources is what creates that rich, layered feel. It’s a subtle touch, but it makes a world of difference.
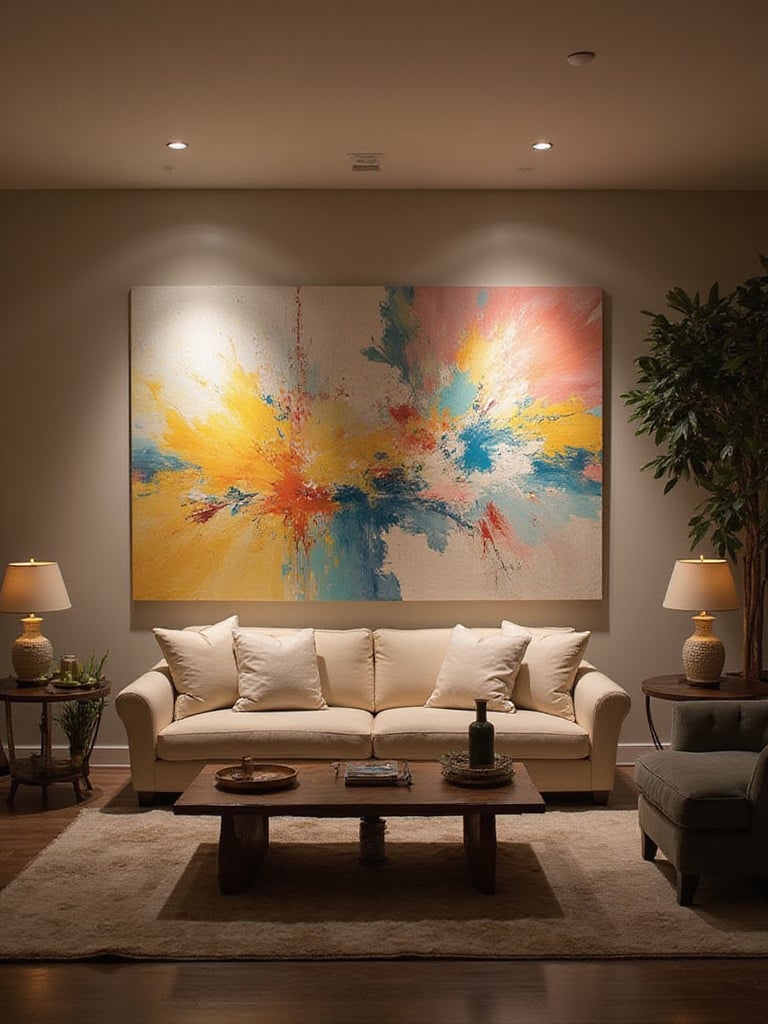
The art on your walls—whether it’s a painting, a photograph, or a beautifully crafted guitar—is personal. It deserves to be seen properly. Throwing light at it isn’t enough; you have to shape that light. Precision accent lighting transforms a piece from just another object on the wall into a true focal point. When you do it right, it adds a layer of sophistication that elevates the entire room.
This is where the engineer in me gets excited. For both aesthetics and art preservation, the details really matter. You want to light art from about a 30-degree angle to avoid creating distracting reflections on the glass or canvas. And crucially, you need a light source with a high Color Rendering Index (CRI)—90 or higher is the professional standard. A low CRI bulb will make colors look dull and inaccurate. Modern LEDs are perfect for this because they produce a focused beam with virtually no heat or damaging UV rays.
Track lighting with adjustable heads is a very flexible option, allowing you to re-aim the light if you rearrange your art. Just avoid lighting pieces from directly overhead; it almost always creates ugly shadows.
Recessed lighting gets a bad rap, and honestly, it’s usually deserved. Most of the time, it’s installed in a rigid, thoughtless grid that makes a living room feel like an office or an airport runway. The goal isn’t to create pools of light on the floor. The goal is to provide a smooth, even wash of ambient illumination that seamlessly fills the room. When done well, you shouldn’t even notice the individual fixtures.
The key is spacing, which is determined by your ceiling height. A common rule of thumb is to divide the ceiling height by two. So, for an 8-foot ceiling, you’d space the lights about 4 feet apart. But—and this is a big but—you have to consider the beam angle of the fixtures. My preferred method is “wall washing.” Instead of centering the lights in the room, place them about 18-24 inches from the walls and aim them slightly. This bounces light off the vertical surfaces, which makes the room feel larger and brighter.
Before you let an electrician cut holes in your ceiling, use an online calculator or even just draw it out. And please, put different zones on separate switches. You don’t always need every light on at once.
The best light source you have is free, and you can’t beat its quality. Natural daylight has a perfect Color Rendering Index (CRI) of 100, meaning it shows true colors better than any artificial source. It boosts our mood and saves energy. Maximizing it is one of the smartest things you can do in your living room design.

This is about more than just having big windows. Your design choices can either trap that light or amplify it. Light-colored walls and ceilings are the easiest win; they act like a giant reflector, bouncing daylight deeper into the room. A well-placed mirror is another classic trick; putting one opposite a window can nearly double the amount of light in that area. And think about your Window Treatments. Sheer curtains or light-filtering blinds are your friend—they cut glare and add privacy while still letting that beautiful, full-spectrum light pour in.
Think of daylight as your primary ambient layer during the day. A design that embraces it will feel more alive and will require far less artificial light.
It’s time to have a frank conversation about LEDs. I know, the early ones were terrible. They flickered, the light was cold and vaguely blue, and the color rendering was awful. But that was then. Modern LEDs are a completely different technology. Making the switch today is a no-brainer for their incredible efficiency, longevity, and light quality.

LEDs use about 75-80% less energy than old incandescent bulbs and can last for 25,000 hours or more. That means you might go decades without having to change a bulb in a recessed fixture. But for me, the quality is the real story. You can now get LEDs in any color temperature, with excellent dimming performance and, most importantly, a high Color Rendering Index (CRI) of 90 or more. This is critical for making the colors of your decor, your art, and even your food and skin look right.
When you’re shopping, look for the ENERGY STAR label to ensure you’re getting a quality-tested product. The initial cost is a bit higher, but the energy savings and long life make them far cheaper in the long run.
Open-concept floor plans are great, but they present a huge lighting challenge. Without walls, how do you define the different areas for living, dining, and cooking? The answer is to use light as invisible architecture. By creating distinct “zones” of light, you can give each area its own character and function, preventing the whole space from feeling like one big, undifferentiated box.

This is where your layers really come into play. A dining area, for example, is perfectly defined by a statement pendant light hung low over the table, creating a pool of intimacy. The adjacent living area might use softer, indirect light from floor lamps and sconces to create a more relaxed vibe. The key is independent control. Each zone needs its own switches or smart controls, so you can light the kitchen for cooking without blasting the living area with bright light.
Track lighting is another powerful tool here, offering the flexibility to aim different heads at different zones, and then easily change them when you rearrange the furniture.
Dark corners are vibe-killers. They feel heavy and visually shrink a room. But with one simple trick, you can turn those dead spaces into sources of beauty and light: uplighting. Placing a small light source on the floor and aiming it upwards washes the corner and ceiling with soft, indirect light. This technique immediately makes a room feel more spacious and inviting.

This works especially well behind a large plant, creating dramatic shadows of the leaves on the wall and ceiling. You can also place an uplight behind a speaker, a sculpture, or in an architectural alcove to turn a boring corner into a feature. It adds a layer of depth without introducing any harsh, direct light into your field of view.
You can buy dedicated uplighting fixtures, but honestly, a simple can light from the hardware store sitting on the floor works just as well. It’s an incredibly high-impact trick for very little effort.
A light fixture isn’t just a utility; it’s a piece of functional sculpture. I’ve seen it time and again: a stunning room completely undermined by a cheap, generic light fixture that was clearly an afterthought. The style, material, and scale of your fixtures should feel like a deliberate part of your overall design, reinforcing the room’s character.

This isn’t about being rigid; it’s about being intentional. A mid-century modern room sings with clean lines and brass or walnut accents. A farmhouse aesthetic calls for weathered wood and black iron. A minimalist space can handle a bold, sculptural pendant that acts as a piece of art in its own right. The key is to find harmony. Look at the other finishes in your room—the cabinet hardware, the furniture legs, the window frames—and echo those materials in your light fixtures.
And it’s perfectly okay to mix and match fixture types—a pendant, sconces, and a floor lamp—as long as they share a consistent stylistic thread.
We’ve touched on this already, but it’s so critical it deserves its own point. A room lit from a single source is a flat room. To create real visual depth and a sense of sophistication, you absolutely must combine different types of light at different heights. Think of it as creating a soundstage for your room—you have sounds coming from close up, far away, left, and right. Lighting works the same way.

A great living room lighting scheme will have a mix of sources working together. Maybe you have recessed lights for your base ambient layer, table lamps for mid-level fill and task lighting, and a floor lamp or two for height and flexibility. This layering of sources, heights, and intensities is what gives a room that rich, complex character you feel in high-end hotels and beautifully designed homes.
The goal is to create a lighting scheme that feels dynamic and interesting as you move through the space, revealing different details and textures from different angles.
This is one of the oldest and most effective tricks in the book for a reason. A well-placed mirror is a passive amplifier for light. It grabs both natural and artificial light and bounces it around the room, making the space feel brighter and larger without adding a single fixture or using an extra watt of electricity.

But placement is everything. Don’t just hang a mirror on any empty wall. Position it to intentionally capture and redirect light. The classic move is to place a large mirror directly opposite a window to throw daylight deep into the room. You can also place a mirror where it will reflect an attractive light source, like a beautiful chandelier or a collection of candles, effectively doubling its impact.
Just be mindful of what you’re reflecting. A mirror is only as good as the view it shows. Make sure it’s capturing light and beauty, not a cluttered corner or an unappealing view.
Picture lights are a specialized tool for a specific job, and they do it beautifully. They give your most treasured art pieces the spotlight they deserve, creating the focused, intimate feel of a private gallery. These fixtures mount directly to the wall or the frame and cast an even wash of light down across the surface, revealing color and detail in a way that a ceiling light never could.

Getting the size and placement right is key. The light fixture should be about two-thirds to three-quarters the width of the artwork’s frame to ensure even coverage from edge to edge. To avoid glare, it should be positioned at a 30-degree angle to the surface of the art. And thanks to modern LEDs, you don’t have to worry about the heat or UV damage that old incandescent picture lights caused.
For situations where hardwiring is difficult, there are excellent battery-powered wireless options available now. It’s a truly sophisticated touch that adds visual anchors and rhythm to your room.
Glare is the enemy of comfort. It causes eye strain and can make a beautifully designed room feel actively hostile. In a living room, you’re usually fighting glare from two sources: windows during the day and your TV screen at night. Managing it requires thinking about how light reflects off these surfaces.

For windows, you need adjustable treatments like blinds, shades, or curtains. The sun moves, so your solution needs to be able to adapt. For your television or computer monitor, the worst thing you can do is place a lamp directly behind you where it will create a perfect reflection on the screen. Side lighting is always better. Even better is something called “bias lighting”—placing a soft, neutral light source behind the TV. This actually reduces eye strain by decreasing the harsh contrast between the bright screen and the dark wall around it.
Controlling glare isn’t the most glamorous part of lighting design, but it’s absolutely essential for making a room livable, especially if you’re a musician using screens for DAWs or digital sheet music.
This is my final piece of advice, and it’s a simple one: clean your lights. It’s the equivalent of changing the strings on your guitar or dusting your piano keys. It’s not glamorous, but it’s essential for peak performance. A dusty bulb and a grimy fixture can cut light output by 30% or more, making your whole carefully planned system feel dim and dreary.

It’s a quick job. Once every few months, turn off the power at the breaker, let the bulbs cool, and give everything a wipe-down. Use a microfiber cloth for metal and glass, and a vacuum with a brush attachment for fabric shades. While you’re up there, give the fixtures a gentle wiggle to make sure all the connections are still secure. It’s a simple habit that protects your investment and ensures your lighting sounds as good as the day it was installed.
A well-maintained lighting system will continue to perform beautifully for years, filling your living room with the kind of functional, gorgeous light that truly makes a house a home.
Transforming your living room with light isn’t about some massive, expensive renovation. It’s about understanding how to shape the space with intention. It’s about learning to see light not as a simple utility, but as a design material—one that can create depth, evoke emotion, and tune the atmosphere of your home. You’ve now seen how the pros build layers, choose the right tones, and add those touches that turn a bland room into a vibrant one.
The path forward is simple. Start with one thing. If you’re constantly squinting to read, get a good task lamp. If your evenings feel harsh and overlit, install dimmers. Those foundational changes will make such an immediate difference that you’ll be inspired to keep going. Add a second layer, then a third. Experiment. Play.
Your living room is where your life happens. The right lighting honors those moments, making every memory a little warmer and brighter.