Physical Address
304 North Cardinal St.
Dorchester Center, MA 02124
Physical Address
304 North Cardinal St.
Dorchester Center, MA 02124
Transform your cooking space with these 24 expert kitchen design layout tips from a fitness space specialist. Learn how proper flow, zones, and placement create an efficient, functional kitchen that works as hard as you do.
The kitchen isn’t just where meals happen—it’s where life happens. As a fitness space designer who’s obsessed with functional flow, I’ve seen how a well-planned kitchen design layout can transform your daily routine just as dramatically as a properly organized home gym. Both spaces share a crucial quality: when designed thoughtfully, they make demanding physical tasks feel effortless.
Whether you’re planning a full renovation or looking to optimize your current space, understanding the core principles of kitchen design layout is essential. I’ve compiled these 24 tips to help you create a kitchen that works as hard as you do—a space where meal prep becomes as efficient and rewarding as a well-executed workout routine.
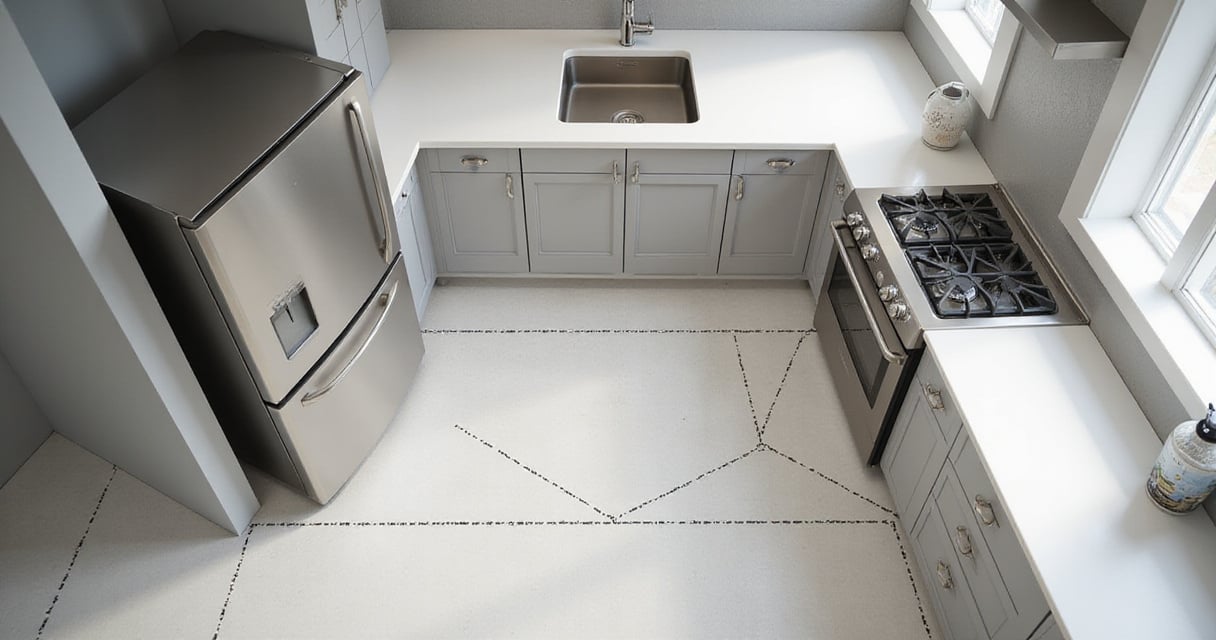
The Kitchen Work Triangle concept remains the gold standard for efficient movement, connecting your refrigerator, sink, and stove in a configuration that minimizes steps while maximizing productivity. For optimal flow, aim for a total triangle perimeter between 12 and 26 feet, with no leg shorter than 4 feet or longer than 9 feet. This creates a workout-like efficiency to your cooking routine—every movement has purpose, nothing is wasted.
 Kitchen Layout showing the refrigerator, sink, and stove connected by lines forming the kitchen work triangle.” class=”wp-image-7708″/>
In larger kitchens, I often recommend thinking beyond the triangle to create dedicated work zones instead. This approach groups related items and appliances—like a baking station with your mixer, measuring tools, and baking sheets all within arm’s reach. The goal remains the same: minimize movement between related tasks while ensuring clear pathways throughout your kitchen.
The magic of this piece lies in its ability to reduce unnecessary steps and streamline your kitchen workflow, making cooking feel less like a chore and more like a well-choreographed routine.
Kitchen traffic flow is the invisible current that determines whether your space feels chaotic or controlled. Just as I design home gyms with clear pathways between equipment stations, your kitchen needs unobstructed routes between work zones. Poor flow creates bottlenecks, collisions, and potential hazards, while optimized flow ensures seamless movement that reduces both time and effort.
For single-cook kitchens, maintain walkways at least 36 inches wide. In multi-cook kitchens or high-traffic areas, increase this to 42 inches minimum. Carefully consider appliance door swings—a refrigerator door that blocks a main pathway or traps someone in a corner creates the same frustration as poorly placed exercise equipment.
The environmental story behind effective traffic flow begins with safety but extends to enjoyment—when movement feels natural and unimpeded, cooking becomes a more pleasurable, stress-free experience that encourages healthier meal preparation.
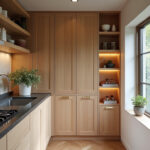
A galley kitchen, with its parallel countertops and streamlined walkway, offers the same efficiency as a well-designed circuit training setup. This layout minimizes wasted movement by placing all essentials within a few steps, creating a highly effective work corridor that’s perfect for single cooks or space-challenged homes. One side typically focuses on cooking and prep, while the other handles cleaning and storage.

The key challenge with galley kitchens is preventing a cramped feeling. Combat this with Light colors, reflective surfaces, and strategic lighting. Ensure your walkway measures at least 36 inches wide (preferably 42) to prevent that claustrophobic feeling. Maximize vertical storage with ceiling-height cabinets and consider slimline appliances if space is extremely tight.
Unlike conventional options, the galley layout offers unmatched efficiency in a compact footprint—making it ideal for active individuals who appreciate direct paths and minimal wasted movement.
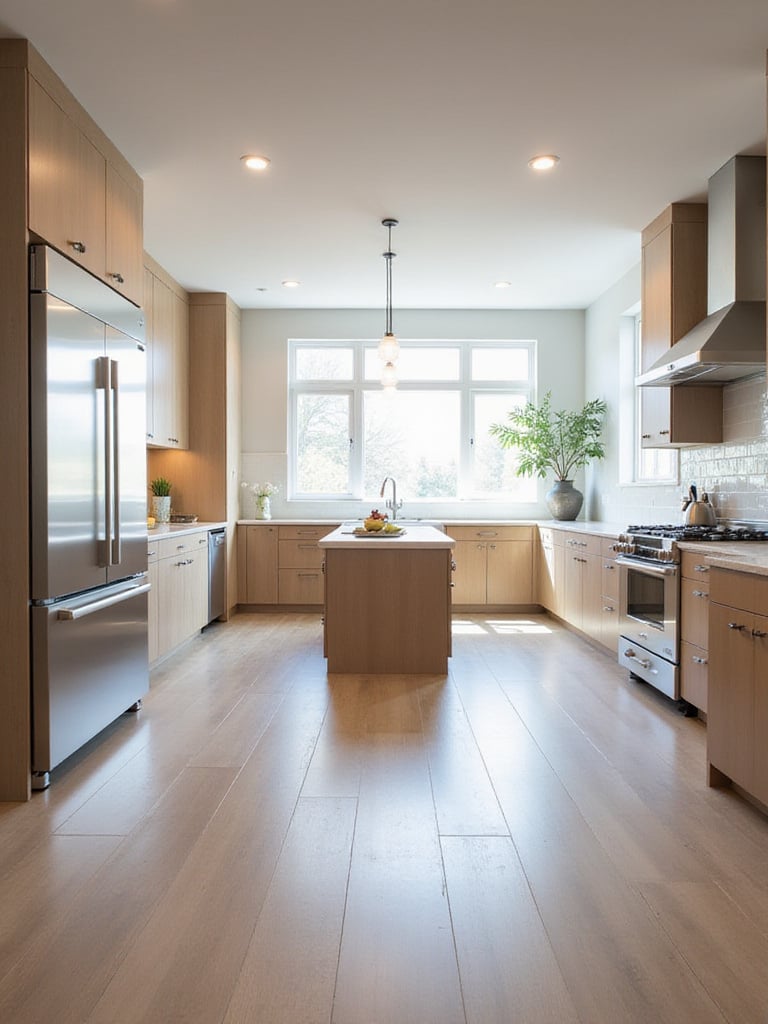
An L-shaped kitchen layout functions like a well-designed corner in your home gym—it maximizes previously awkward space while creating a natural flow between activities. This configuration naturally establishes an efficient work triangle within the “L” while keeping traffic patterns open and accessible. Its versatility shines in small, medium, and large spaces alike, making it one of the most adaptable kitchen design layouts available.

The primary challenge with L-shaped kitchens is effectively utilizing the corner where cabinets meet. This potential “dead zone” requires specialized solutions like lazy susans, pull-out shelves, or blind corner organizers to ensure no space goes to waste. Adding an island opposite the “L” can significantly enhance functionality by providing additional prep space, storage, and often a casual dining area.
The craftsmanship reveals itself in how seamlessly the two legs of the “L” work together—creating a kitchen design layout that feels intuitive while efficiently handling everything from quick breakfast prep to elaborate dinner parties.
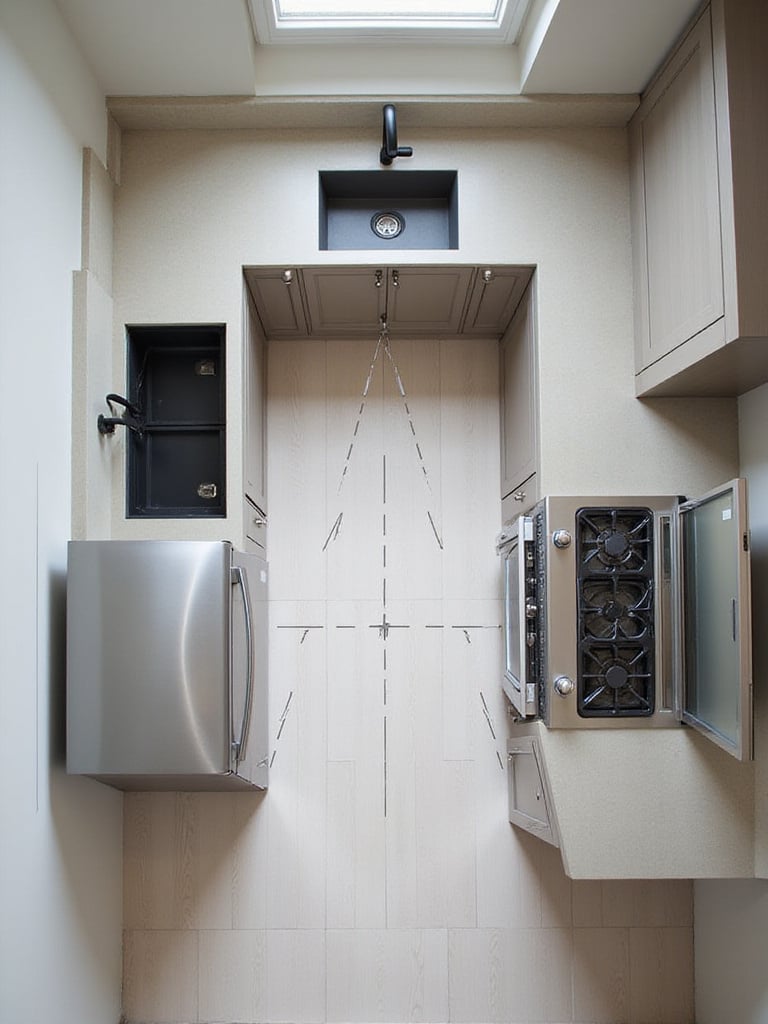
A U-shaped kitchen layout wraps three walls of cabinetry and countertops around you like a command center, putting everything within reach. This design excels at maximizing both counter space and storage, making it ideal for serious cooks who need extensive prep areas and organization options. The layout naturally creates a contained workspace that minimizes steps between key zones while keeping the primary cook comfortably enclosed in their domain.
 Integrated Appliances, designed for maximizing space and efficiency.” class=”wp-image-7712″/>
For optimal functionality in a U-shaped kitchen design layout, position your sink, stove, and refrigerator on different legs of the “U” to create an efficient work triangle. Ensure the space within the “U” measures at least 40-48 inches across to prevent a cramped feeling and allow comfortable movement. Corner cabinets require special attention—invest in quality pull-out systems or lazy susans to make these potentially awkward spaces fully accessible.
The unexpected environmental benefit of a U-shaped kitchen comes from its energy efficiency—with a compact work triangle, you’ll spend less time moving between tasks, reducing both physical effort and the time appliances need to run.
A functional kitchen island serves as the centerpiece of your kitchen design layout much like a power rack anchors a home gym—it’s where the most important work happens. Unlike purely decorative elements, a functional island enhances workflow through purposeful design that might include prep space, a secondary sink, integrated appliances, accessible storage, or comfortable seating. The best islands seamlessly integrate into your kitchen’s overall traffic pattern while serving multiple roles.

When planning an island, size and clearance are crucial considerations. Maintain at least 36 inches of clearance around all working sides, increasing to 42-44 inches for primary walkways or areas with seating. Use painter’s tape to outline your proposed island dimensions on the floor, then walk around it to test the flow before committing. Remember to plan for power if you’ll need outlets for small appliances or charging devices.
The styling mistake most people make is prioritizing aesthetics over function when designing an island. Instead, start by identifying exactly how you’ll use it—for prep work, cooking, dining, storage, or some combination—then design around those specific needs.
A peninsula can transform your kitchen design layout the way a strategically placed bench can enhance a workout space—by creating a multipurpose area that serves several functions without requiring additional room. Unlike a freestanding island, a peninsula extends from existing cabinetry or a wall, making it ideal for kitchens where space constraints prevent a full island. This addition creates valuable counter space, defines zones within open plans, and provides casual seating without disrupting workflow.

For comfortable seating at your peninsula, ensure a countertop overhang of at least 12-15 inches for knee space and allow 24 inches of width per person. The space in front of seating should measure at least 36 inches (preferably 42-48 inches) to allow for movement when chairs are pulled out. Consider how the peninsula affects your work triangle—ideally, it should enhance rather than obstruct the flow between your sink, refrigerator, and range.
The unexpected pairing that always works is a peninsula with integrated storage on the kitchen side and a clean, overhung counter on the seating side—creating a multifunctional element that improves both workflow and social interaction.
The single-wall kitchen design layout presents the same challenge as a compact home gym: maximizing function in a limited linear space. This configuration places all appliances, countertops, and storage along one wall, requiring strategic planning to create an efficient workflow. Without the traditional triangle possibility, you’ll need to create a linear “work corridor” that minimizes steps while providing adequate space for each essential function.

Optimize your single-wall layout by placing the sink in the center, flanked by the refrigerator on one end and the range on the other. This arrangement creates the most efficient workflow possible within the constraints. Maximize vertical storage with ceiling-height cabinets and consider space-saving appliances like slimline dishwashers or combination microwave/ovens. Ensure you have at least 36 inches of continuous counter space for comfortable food preparation.
The artisan’s journey toward an efficient single-wall kitchen involves seeing limitations as opportunities—each inch must serve a purpose, much like a well-designed compact workout space where every piece of equipment earns its place.
The kitchen sink serves as the hub of activity in your kitchen design layout, much like a power station in a fitness circuit. It’s where you’ll spend more time than at any other station—washing produce, filling pots, cleaning hands, and tackling dishes. Its placement fundamentally affects your workflow, determining how efficiently you move between food storage, preparation, cooking, and cleanup.

Placing your sink under a window offers natural light and pleasant views, making cleanup less tedious. Alternatively, positioning it in an island creates a social cooking experience where you can interact with family or guests while working. Regardless of location, ensure adequate “landing space” on both sides—at least 18 inches on one side and 24 on the other—for stacking dishes and placing items being washed.
As morning light filters through, the perfect sink placement transforms mundane tasks into pleasant moments, creating a kitchen design layout that feels intuitive and enjoyable rather than merely functional.
Positioning your range or cooktop in your kitchen design layout requires the same careful consideration as placing heavy equipment in a fitness space—safety must come first, followed closely by functionality. Avoid locations near flammable materials like curtains, away from high-traffic pathways where collisions might occur, and clear of drafty areas that could affect flame stability or blow lightweight items onto hot surfaces.

The most functional range location is typically between the sink and refrigerator, creating one leg of your work triangle. Ensure sufficient counter space on both sides—at least 12 inches on one side and 15 on the other—to provide essential landing zones for hot pots and prepped ingredients. If possible, position the range on an exterior wall to simplify ventilation installation, allowing for direct outside venting.
The design language evolved from traditional kitchens where ranges were centrally located for heat distribution throughout the home to modern kitchen design layouts where placement optimizes workflow while maintaining safety as the primary consideration.
Your refrigerator is the starting point for most kitchen activities, similar to how a water station anchors a workout space—everyone uses it, often multiple times per session. The ideal location in your kitchen design layout is typically at the outer edge of the work triangle, allowing family members or guests to grab drinks or snacks without disrupting the cook’s workflow. Consider placing it near an entrance for convenient grocery unloading.

Avoid common refrigerator placement mistakes like positioning it where an open door blocks traffic flow or directly beside heat sources like ovens or dishwashers, which force it to work harder. Ensure adequate clearance for door swing—at least 90 degrees, preferably 180 degrees for full access to drawers and shelves. The refrigerator type also matters; French door models require more frontal clearance while counter-depth units create a sleeker profile that minimizes intrusion into walkways.
The evolution of this trend reflects how kitchen design layouts have adapted to changing family dynamics, with refrigerators moving from utility spaces to centralized locations that support both cooking efficiency and casual grazing.
Placing your dishwasher immediately adjacent to your sink creates a cleanup zone that functions like a dedicated recovery station in a well-designed fitness space—it’s where the restoration happens. This proximity minimizes drips across your floor when transferring wet dishes and creates a contained area for handling cleanup. The plumbing connections are simplified, and the workflow becomes intuitive: scrape, rinse, load, all within a compact zone.

For right-handed individuals, positioning the dishwasher to the left of the sink often works best, allowing you to hold dishes in your left hand while rinsing with your right, then pivot slightly to load. However, proximity to dish storage cabinets may be even more important than hand dominance—ideally, your dishwasher should be close to where clean dishes are stored to streamline the unloading process. Ensure the dishwasher door can open fully without obstructing walkways or other appliances.
Beyond the obvious placement, consider incorporating a pull-out trash bin between your sink and dishwasher to create a complete cleanup station within your kitchen design layout, further enhancing efficiency.
Dedicated prep zones in your kitchen design layout function like specialized stations in a circuit workout—they consolidate related activities to minimize wasted movement and maximize efficiency. By designating specific areas for tasks like chopping, mixing, and assembling, you create a focused approach that streamlines cooking and reduces the risk of accidents from scattered tools or ingredients.

An effective prep zone requires several key elements: ample counter space (ideally 3-4 feet of continuous surface), proximity to water, convenient waste disposal, nearby storage for essential tools, and good task lighting. Position your primary prep zone between the refrigerator and cooking area to support the natural flow of food from storage to preparation to cooking. For larger kitchens or households with multiple cooks, consider creating secondary prep zones to prevent bottlenecks.
When clients ask us about balancing style with comfort, we often recommend making prep zones the priority in kitchen design layout planning—because no matter how beautiful a kitchen looks, if food preparation feels awkward or inefficient, the space ultimately fails its primary purpose.
The cleaning zone in your kitchen design layout deserves the same strategic planning as a recovery area in your fitness routine—it’s essential for maintaining order and preparing for the next session. This zone centers around your sink and dishwasher but should also include designated spaces for trash and recycling bins, plus storage for cleaning supplies like dish soap, sponges, and towels.

Position your cleaning zone between the cooking and food storage/prep areas to support a logical workflow progression. This arrangement allows for a smooth transition from preparation to cooking to cleanup. Pull-out cabinet systems for trash and recycling bins keep these necessities hidden yet easily accessible. For maximum efficiency, store cleaning supplies in the cabinet under the sink or in nearby drawers where they’re readily available but out of sight.
The challenge of awkward spaces becomes easier when you view the cleaning zone as an integrated system rather than separate elements. A well-designed kitchen design layout connects these components into a cohesive unit that makes maintenance almost effortless.
Your cooking zone functions as the power center of your kitchen design layout—like the main lifting platform in a well-designed gym, it’s where the transformation happens. This zone encompasses your range or cooktop, the ventilation hood above it, and the immediate surrounding counter space that serves as landing areas for hot pans and ingredients waiting to be cooked.

Safety and efficiency should guide your cooking zone design. Avoid placing the cooktop under windows with flammable curtains or in high-traffic pathways where collisions could occur. Ensure adequate heat-resistant counter space on both sides—at least 12-18 inches—for placing ingredients and hot cookware. Position frequently used cooking tools, spices, and oils within easy reach, either in nearby drawers or on accessible shelves, to minimize steps while cooking.
The interplay between the colors and textures in your cooking zone can enhance its functionality—consider using different countertop materials or backsplash treatments to visually define this area within your overall kitchen design layout.
Storage in your kitchen design layout functions like equipment organization in a fitness space—when everything has a designated place that’s easily accessible, your performance improves dramatically. Begin by conducting a thorough inventory of everything you currently store in your kitchen, categorizing items by type and frequency of use. This assessment provides the foundation for determining how much storage you truly need.

Make storage more accessible by incorporating specialized hardware like pull-out shelves, full-extension drawers, lazy susans for corners, and vertical dividers for baking sheets. Prioritize drawers over shelves in base cabinets whenever possible—they bring contents into full view and eliminate awkward reaching. Group items by function and store them near where they’ll be used: cooking utensils near the stove, food prep tools near your main work surface, and cleaning supplies near the sink.
The craftsmanship reveals itself in details like how seamlessly storage solutions integrate into your kitchen design layout—creating a space where everything feels intentionally placed rather than simply stowed away.
Countertop space in your kitchen design layout is like floor space in a home gym—you need enough room to perform movements comfortably without feeling constrained. Professional kitchen designers recommend a minimum of 150-180 total inches of usable countertop length, strategically distributed throughout your kitchen. Aim for at least 30-36 inches next to your primary prep area, 24 inches adjacent to your range, and 18-24 inches beside your refrigerator.

The distribution of counter space matters as much as the total amount. Each work zone requires its own dedicated surface area: the prep zone needs the largest continuous stretch, the cooking zone requires heat-resistant landing spaces on both sides of the range, and the cleaning zone benefits from staging areas for dirty and clean dishes. Consider increasing counter depth beyond the standard 24 inches in key areas to create more comfortable work surfaces.
The composition comes together when you map your typical cooking workflow and ensure sufficient clear counter space exists exactly where you need it for each step—creating a kitchen design layout that anticipates your movements before you make them.
Lighting your kitchen design layout requires the same layered approach as illuminating a fitness space—different activities demand different types of light. A well-designed kitchen incorporates three essential layers: ambient lighting for general illumination, task lighting for focused work areas, and accent lighting to highlight architectural features or add visual interest. Relying on a single overhead fixture creates shadows and poorly lit areas, making your kitchen less functional and less inviting.

Task lighting deserves special attention in work zones. Under-cabinet LED strips illuminate countertops directly without casting shadows from your body. Pendant lights over islands or sinks provide focused illumination where detailed work happens. Choose light sources with a high Color Rendering Index (CRI of 90+) to ensure food colors appear true. Install dimmers on all circuits to adjust brightness levels according to time of day or activity, creating a kitchen design layout that transitions seamlessly from bright morning prep to atmospheric evening dining.
The mood shifts dramatically when you add smart lighting technology that allows wireless control via smartphone or voice commands. Programmable scenes can instantly transform your kitchen from a bright workspace to a cozy entertainment area without changing a single fixture.
Ventilation in your kitchen design layout is as crucial as proper air circulation in a workout space—it removes pollutants that would otherwise compromise your health and comfort. Kitchen ventilation systems fall into two main categories: ducted systems that expel air outside (always preferred) and ductless systems that filter and recirculate air within the room. The choice significantly impacts both air quality and the long-term condition of your kitchen surfaces.

Determining the proper power for your range hood depends on your cooking style and appliance type. For standard ranges, calculate 100 CFM (cubic feet per minute) per linear foot of range width. High-BTU professional-style gas ranges require more powerful ventilation—approximately 1 CFM for every 100 BTU. Hood styles include under-cabinet models for standard kitchens, wall-mount designs where no cabinets exist above the range, island hoods suspended from the ceiling, and downdraft systems that rise from behind the cooktop when needed.
While trendy, this element has staying power because proper ventilation protects both your health and your home’s structure—making it one of the most important functional decisions in your kitchen design layout planning.
Universal design principles in kitchen design layout create spaces that work well for everyone, regardless of age, ability, or physical characteristics—similar to how the best fitness spaces accommodate various body types and mobility levels. Features like varied counter heights, wider walkways, easy-grip hardware, and accessible Appliance Placement ensure the kitchen remains functional and comfortable for all users throughout different life stages.

For wheelchair accessibility, maintain clear floor space with at least 30-inch wide pathways and a 60-inch turning radius. Include knee space under key work areas like the sink and cooktop, with counters at 30-34 inches high rather than the standard 36 inches. Choose side-by-side refrigerators or models with bottom freezers, and opt for wall ovens at accessible heights. Ergonomic considerations benefit everyone: incorporate anti-fatigue mats in high-activity zones, position frequently used items between shoulder and knee height, and select hardware that’s easy to grip even with limited hand strength.
For those worried about maintenance, universal design features often simplify cleaning and upkeep while enhancing resale value—making them practical investments in your kitchen design layout regardless of current household needs.
Kitchen corners present unique challenges in your kitchen design layout, similar to awkward spaces in home fitness areas that require creative equipment placement. These 90-degree junctions where cabinets meet can create deep, difficult-to-access storage areas that waste valuable space if not addressed thoughtfully. Without specialized solutions, items stored in corners often become forgotten or frustrating to retrieve.

Several hardware options can transform these problematic spaces into highly functional storage. Lazy Susans with rotating shelves bring items from the back to the front with a simple spin, making them excellent for pots, pans, or pantry staples. Blind corner pull-outs feature shelves or baskets that pull forward and then swing out, providing access to the deepest recesses of corner cabinets. Diagonal corner cabinets with a single door facing outward offer simpler access than standard configurations, though they don’t fully utilize the deepest portions of the corner.
The design problem this product uniquely solves is the inefficiency of standard corner cabinets in kitchen design layouts—transforming potentially wasted space into some of your kitchen’s most useful storage.
Trash and recycling management in your kitchen design layout requires the same strategic thinking as recovery zone planning in a fitness space—it’s essential but often overlooked until problems arise. Proper bin placement near key work zones, particularly the main prep area and sink, minimizes drips and reduces steps needed for disposal during cooking and cleaning. Integrating bins within cabinets improves aesthetics, contains odors, and creates a more pleasant environment.

Modern kitchens accommodate multiple waste streams through dedicated pull-out drawer systems designed to hold separate bins for trash, recycling, and compost. These systems allow for easy separation while keeping everything contained in a single, convenient location. When planning, consider your household’s typical waste volume and local recycling requirements to ensure adequate capacity for each category. Position these systems within easy reach of primary work zones but away from food storage areas.
The unexpected environmental benefit comes from how smart bin placement in your kitchen design layout makes recycling and composting feel effortless—encouraging better habits through thoughtful design rather than relying solely on willpower.
The choice between open and closed kitchen design layouts mirrors the decision between open-concept or separate workout spaces—each offers distinct advantages depending on your lifestyle and preferences. An open kitchen integrates with adjacent living areas, creating a spacious, connected feel that promotes interaction. It features clear sightlines, often incorporates an island or peninsula as a divider, and allows hosts to prepare food while socializing with guests.

A closed kitchen, conversely, offers privacy and containment. This traditional layout encloses the kitchen with walls and a door, effectively containing cooking noise, odors, and messes. It maximizes wall space for cabinetry and appliances, allows for a purely functional design without needing to coordinate with adjacent rooms’ aesthetics, and provides a dedicated space for serious cooking without distractions or interruptions.
The revival of this classic form comes with a twist as many homeowners now choose “semi-open” kitchen design layouts—using partial walls, oversized islands, or glass partitions to create visual connection while maintaining some separation between cooking and living spaces.
Entry and exit points function as the transition zones in your kitchen design layout—like the areas between stations in a circuit workout, they determine how smoothly you move from one activity to another. Well-planned entry points allow unimpeded movement into and out of the kitchen without interfering with critical work areas. Ideally, the main work triangle should be situated away from primary through-traffic paths to prevent disruptions and safety hazards.

Safety considerations should guide doorway placement. Avoid entries that lead directly into high-activity zones like the area immediately adjacent to the stove or oven. Consider door swing direction carefully to ensure it doesn’t block pathways or trap someone when open. The number of entry points depends on your kitchen’s size and configuration—a single entry works well for many kitchens, while two strategically placed doorways can improve flow in larger spaces or through-kitchens.
The finishing touch that elevates the entire look of your kitchen design layout is thoughtfully positioned entry points that create a natural flow between the kitchen and adjacent spaces—making the entire home feel cohesive and well-considered.
Creating an effective kitchen design layout is remarkably similar to planning a high-performance fitness space—both require thoughtful consideration of movement patterns, clear zones for specific activities, and an intuitive flow that makes physical tasks feel effortless. By implementing these 24 tips, you’ll create a kitchen that functions as efficiently as a well-designed workout routine.
Remember that the perfect kitchen design layout is one that aligns with your specific needs and habits. Just as I customize home gyms for clients based on their fitness goals, your kitchen should reflect your cooking style, household dynamics, and entertainment preferences. The result will be a space that not only looks appealing but actively enhances your daily life—making healthy meal preparation more enjoyable and your home more functional for years to come.