Physical Address
304 North Cardinal St.
Dorchester Center, MA 02124
Physical Address
304 North Cardinal St.
Dorchester Center, MA 02124
Discover 22 stunning bathroom wallpaper ideas to elevate your home. Get hotel-inspired design secrets on moisture-resistant materials, smart application, and expert care.
Picture this: You’re standing in the guest bathroom of a five-star hotel. The air is calm, the lighting is perfect, and the walls are wrapped in a stunning, Textured Wallpaper that feels both luxurious and deeply personal. It transforms a simple, functional room into an experience. Now, imagine feeling that every single day in your own home.
People always ask me if wallpaper is really a smart choice for a bathroom. They’ve heard horror stories about peeling seams and moisture damage, and I get it. For years, it was a legitimate concern. But the game has completely changed. The materials we have now are not your grandmother’s floral paper. They’re durable, beautiful, and designed for this exact environment.
The real secret to creating that hotel-level sanctuary isn’t about spending a fortune. It’s about being deliberate. It’s about understanding the foundation—the right materials, the right preparation, the right design choices—that turns a simple room into your own private retreat. Let’s cut through the noise and talk about how to do it right.
This is the phase where projects are made or broken, long before a single roll is unfurled. Getting these foundational steps right is the difference between a bathroom that looks stunning for a decade and one that’s peeling within a year. It’s the unglamorous part of the process, but honestly, it’s the most important.
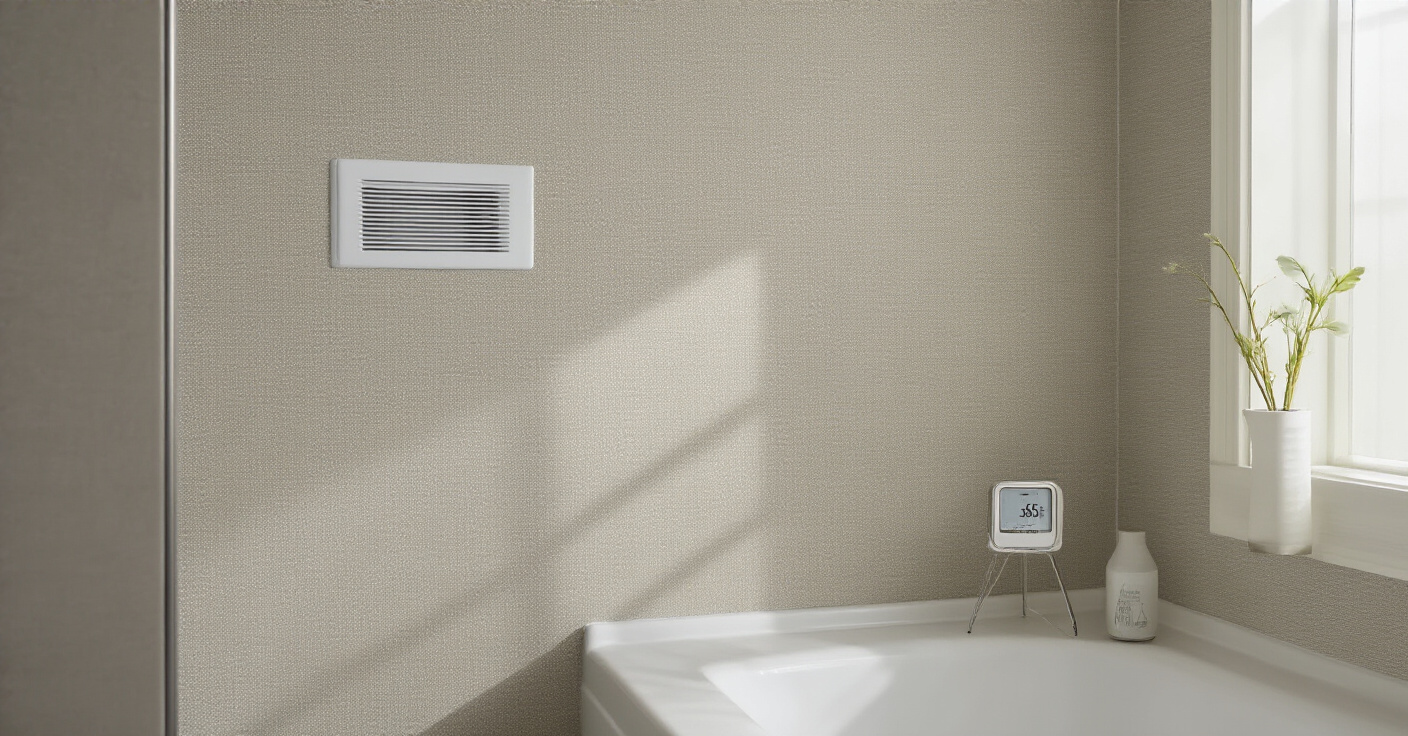
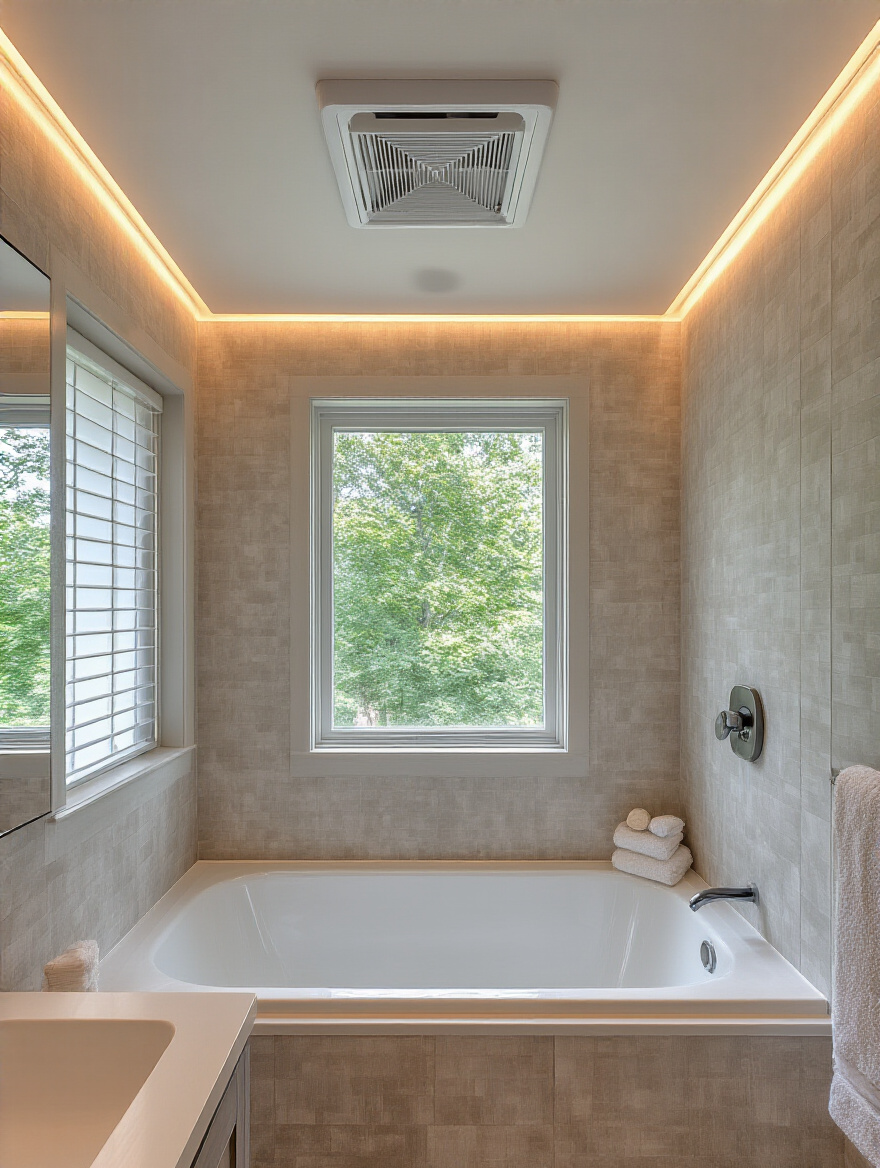
Can we talk about my biggest pet peeve? It’s seeing a gorgeous, expensive wallpaper—think hand-painted silk or a beautiful grasscloth—installed in a bathroom with a dinky, builder-grade fan that barely works. I once watched a client’s investment literally peel off the wall six months after installation because her master bath had the ventilation of a shoebox. It was heartbreaking and entirely avoidable.
Before you even think about patterns, you need to be brutally honest about your bathroom’s humidity. Is your exhaust fan powerful enough? Does it vent outside? Do you see condensation on the mirrors and walls long after you shower? If so, that’s your first project. A high-quality, properly rated exhaust fan isn’t an accessory; it’s the foundation of a successful Bathroom design. Upgrading it is the cheapest insurance you’ll ever buy for your wallpaper.
So please, forget the endless scroll on Pinterest for a moment. Your first step is to become an expert on your room’s environment. Fix any moisture issues now, and your wallpaper will thank you for years to come.
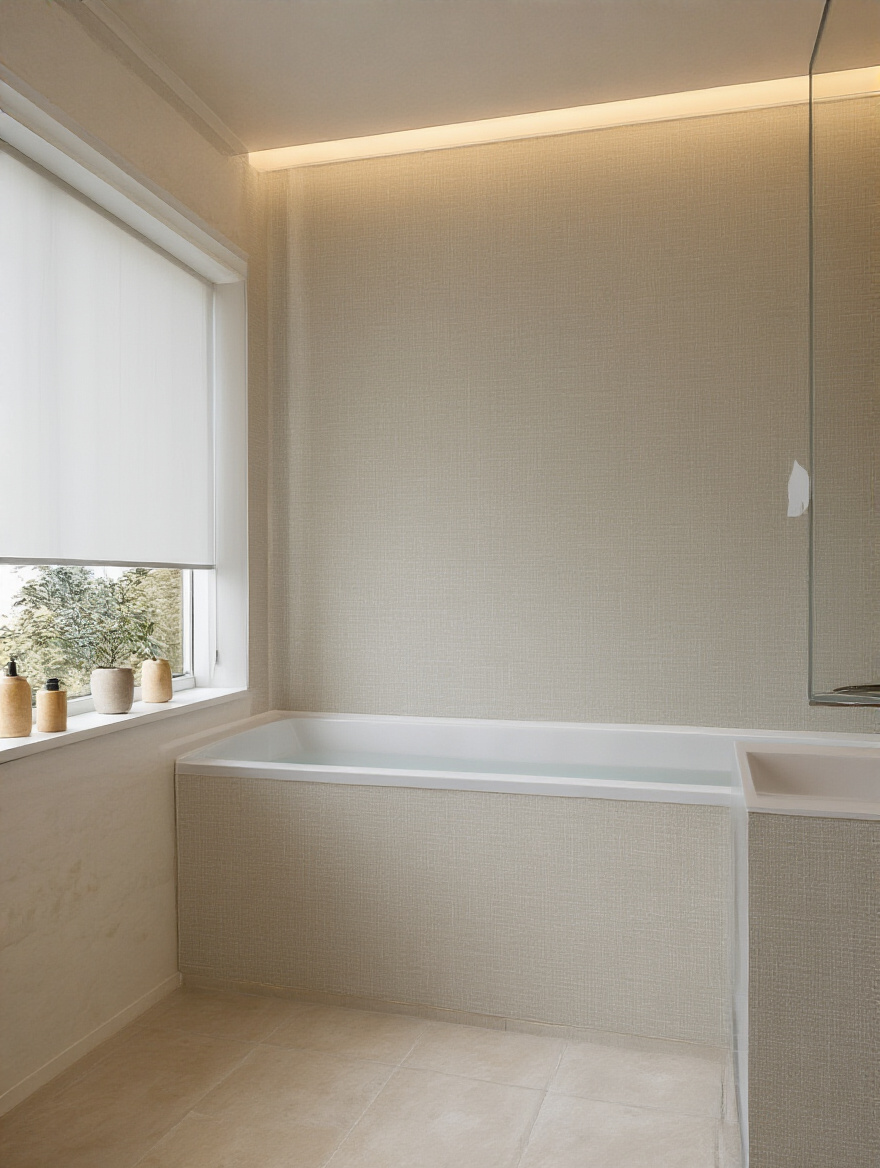
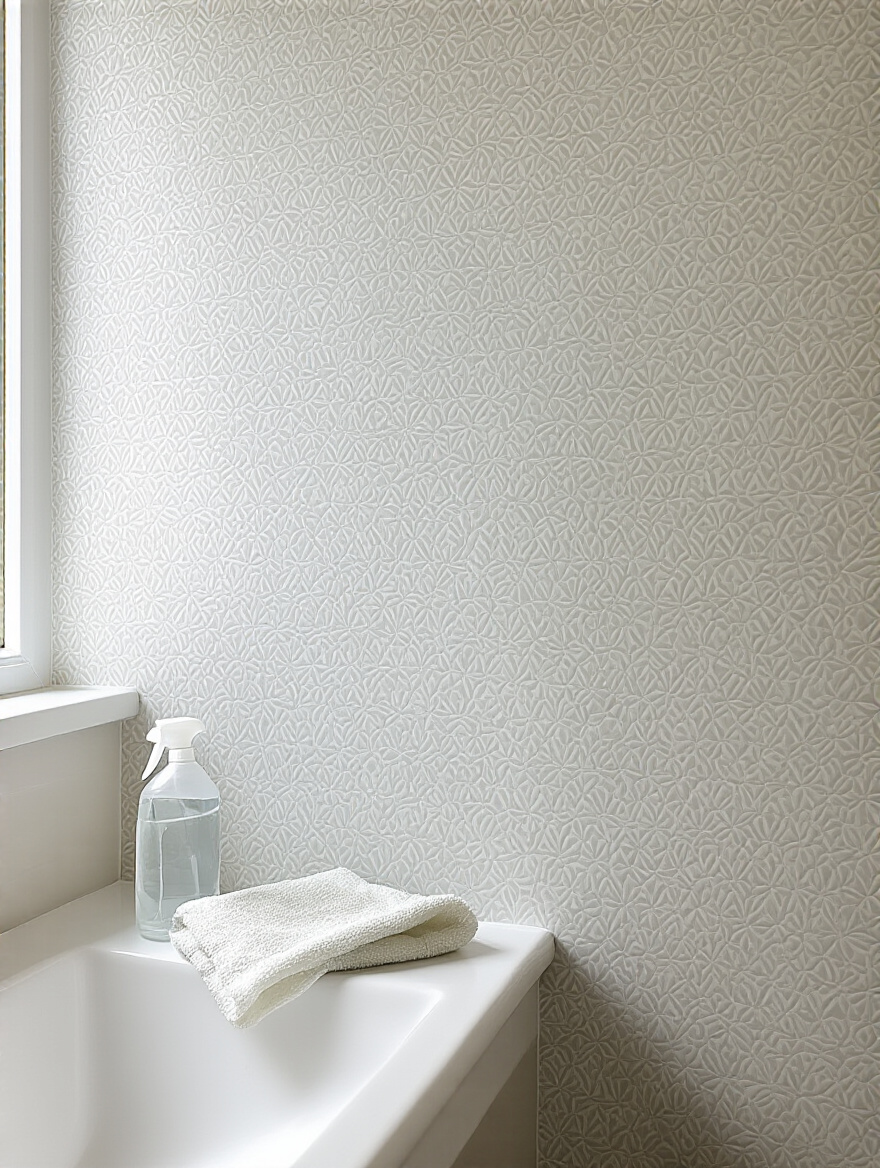
Alright, let’s clear up some major confusion. Everyone sees labels like “washable” and assumes it means “waterproof.” It doesn’t. Washable simply means you can gently wipe off a smudge. What you need for a room with a shower is something truly water-resistant. The absolute gold standard is solid vinyl. Think of it as a beautiful, high-performance raincoat for your walls. It’s impermeable, durable, and can handle direct splashes without breaking a sweat.
There are other options, of course, like vinyl-coated paper, which is a good compromise for guest baths with less steam. But don’t fall for the marketing trap of putting delicate, unsealed paper in a high-traffic family bathroom. It simply won’t last. I learned this the hard way on an early project where a client insisted on a beautiful paper-backed wallcovering for her kids’ bath. It looked incredible for about a month. Then the peeling started. Now, I’m uncompromising. For any bathroom that gets steamy, it’s solid vinyl or nothing.
When you’re shopping, you need to be a detective. Look at the material specs. Ask the salesperson pointed questions. And if you’re unsure, order a sample and run it under the faucet. The truth will reveal itself quickly.
I have a confession: early in my career, I tried to “eyeball” a wallpaper order for a small powder room. It was a simple geometric, how hard could it be? It was a disaster. I came up one strip short, and by the time I tried to reorder, the company had moved on to a new dye lot. The new roll was just a fraction of a shade off from the original, but it was enough to make the entire back wall look patchy and cheap. We had to strip the whole room and start over.

That expensive lesson taught me the golden rule: always order at least one extra roll. Always. Wallpaper is printed in batches called dye lots, and the color can vary slightly from one batch to the next. If you run short and have to reorder, you’re gambling that the new roll will match. It’s a gamble you will probably lose. An extra roll feels like an unnecessary expense at the time, but it’s the cheapest insurance policy in the entire design world. It protects you from miscalculations, installation errors, or the need for a future repair.
And please, don’t forget to account for the pattern repeat. The bigger the pattern, the more paper you’ll need to waste to line everything up perfectly. Most online wallpaper calculators will help you with this, but when in doubt, buy the extra roll. Trust me on this.
People tend to think of mood boards as a fluffy, “fun” part of the process, but from a professional standpoint, they are a critical diagnostic tool. It’s where you prevent catastrophic design mistakes before you’ve spent a single dollar. A wallpaper pattern might look incredible on its own, and you may love your tile choice. But will they love each other? The mood board is how you find out. I once had a client who was adamant about pairing a busy, Art Deco Wallpaper with an equally busy mosaic floor tile. Separately, they were stunning. Together, they looked like a design war zone.
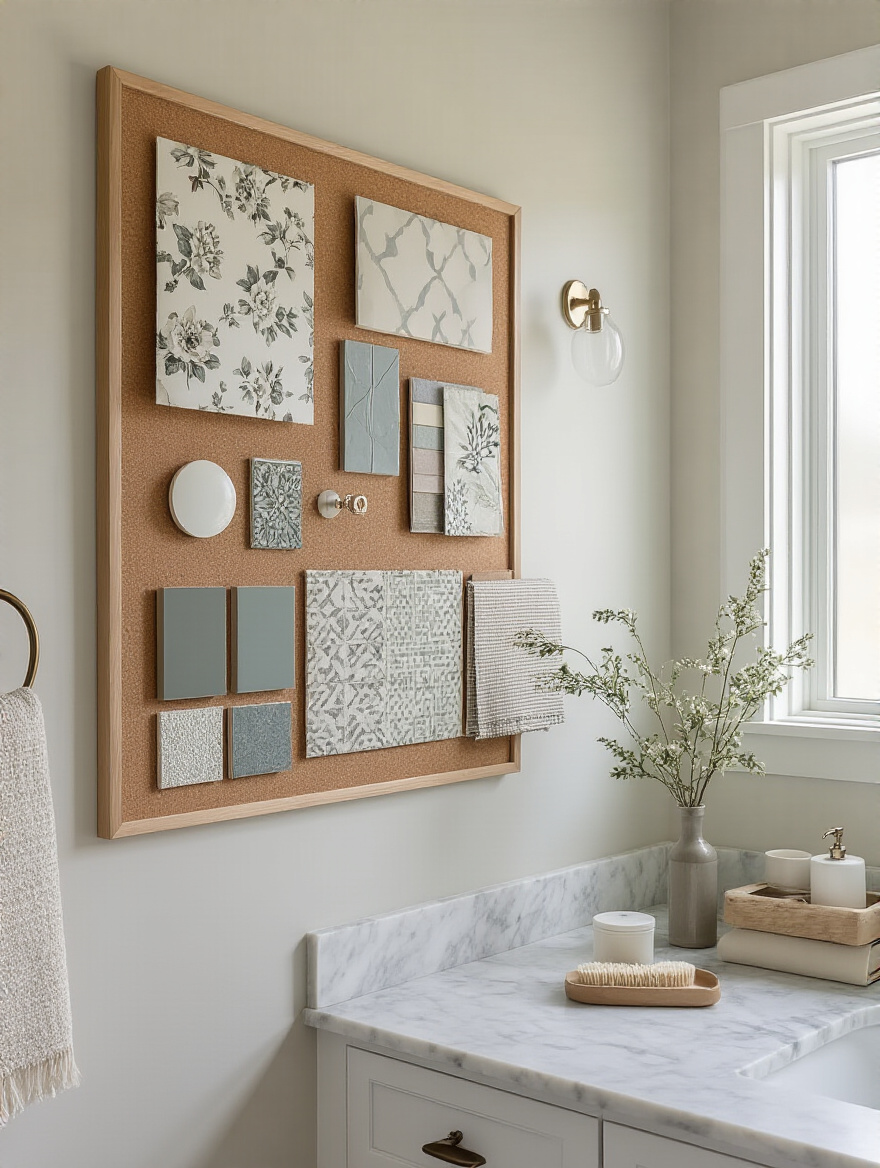
A digital board on Pinterest is a great place to gather inspiration, but you absolutely must create a physical one. Get a real sample of your wallpaper—a big one. Get a tile sample. Get paint chips for the trim and vanity. Grab a metal swatch that matches your faucet. Pin them all to a piece of foam core and live with it in your bathroom for a few days. See how the light hits them at different times of day. This simple step is what separates an amateur-looking room from a professionally designed space.
It’s the moment you see everything together that you can say with confidence, “Yes, this works,” or, more importantly, “Oh, wow, that was a close call.”
Once you’ve curated your physical mood board, the next step is the most revealing. It’s time to move from a small collection of swatches to a real-world test. This is where you see how your vision truly interacts with the one thing you can’t control: the light in your own home.
I’m going to make a bold statement: you should never, ever choose a wallpaper based on a tiny swatch you saw in a store or a picture you saw online. It’s the single biggest rookie mistake you can make. That perfect, subtle dove grey that looked so serene under the store’s fluorescent lights can turn into a depressing, flat beige in your north-facing powder room. The lighting in your home is unique, and it has the power to completely transform colors.
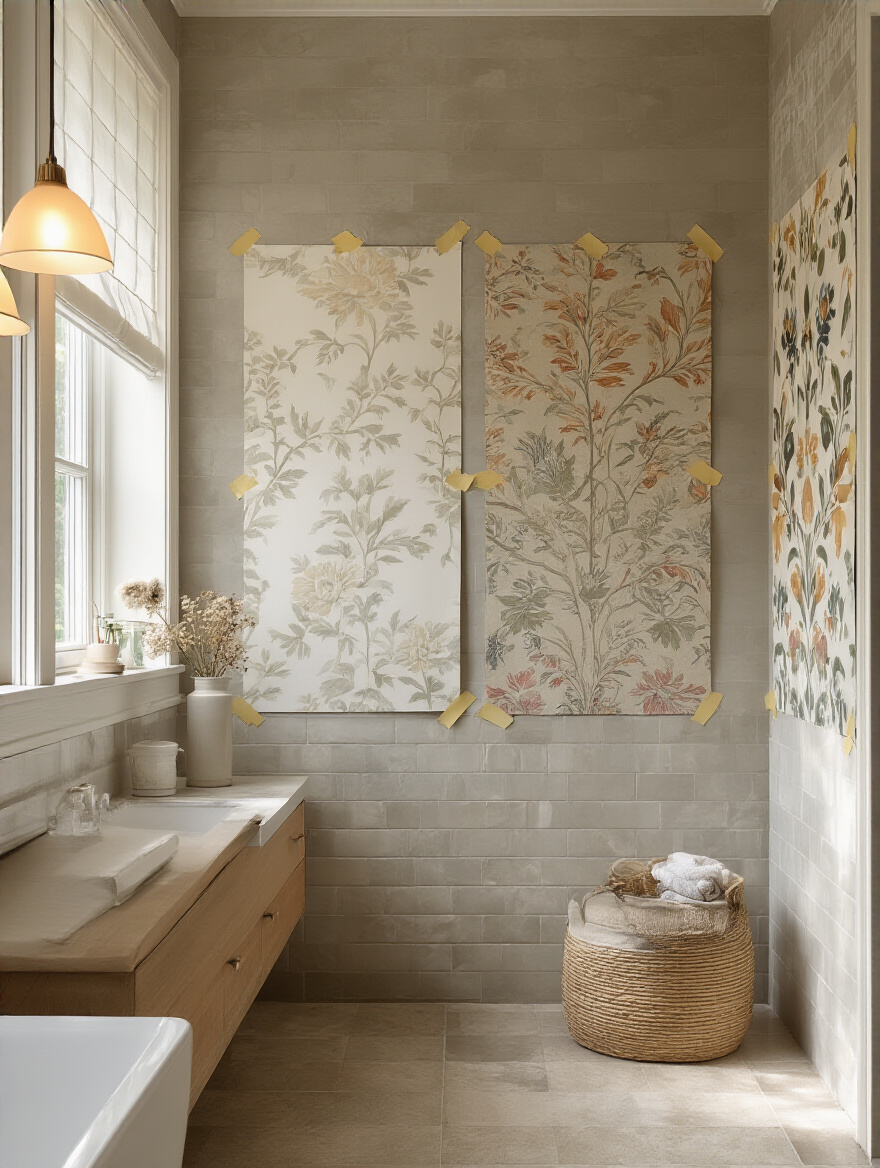
I’ll never forget a client who fell in love with a beautiful cream-textured wallpaper for her master bath. We taped up a large sample, and over the course of two days, we watched it. In the morning light, it was warm and inviting. But in the afternoon, when the sun hit it directly, it looked completely washed out and yellow. By evening, under the vanity lights, it took on a strange greenish hue. She was shocked. Had we not tested it, she would have spent thousands on a wallpaper she only liked for two hours a day. We ended up choosing a different shade that looked consistently beautiful in her specific light.
This is why you must get the largest samples you can find and use painter’s tape to stick them on multiple walls in the bathroom. Live with them for at least 48 hours. Observe them in the morning, at noon, and at night with the lights on. This is the only way to know for sure what you’re truly getting.
Now for the exciting part. You’ve done your due diligence, and you’re ready to make the final selections. This is where we translate all that planning into a design that feels cohesive, intentional, and absolutely stunning. Let’s bring that hotel-level luxury to life.
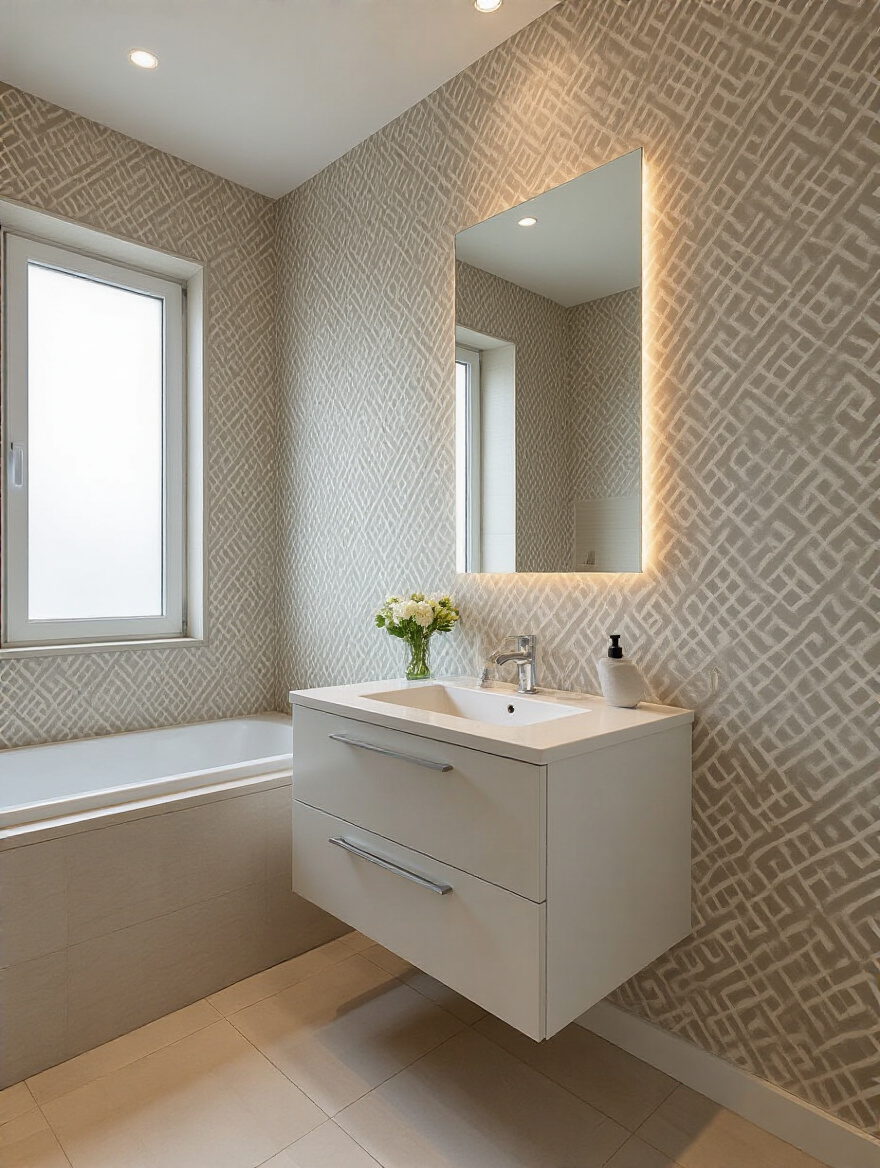
You’ve probably heard the advice to use small patterns in small rooms, but most people don’t explain why it works. It’s not just about avoiding something that feels overwhelming; it’s a brilliant optical illusion. A small, repetitive pattern creates a seamless texture. Your eye doesn’t have a large, singular motif to focus on, so it reads the surface as a whole. This lack of a clear focal point tricks the brain into seeing the walls as further away than they actually are, making the space feel more expansive.
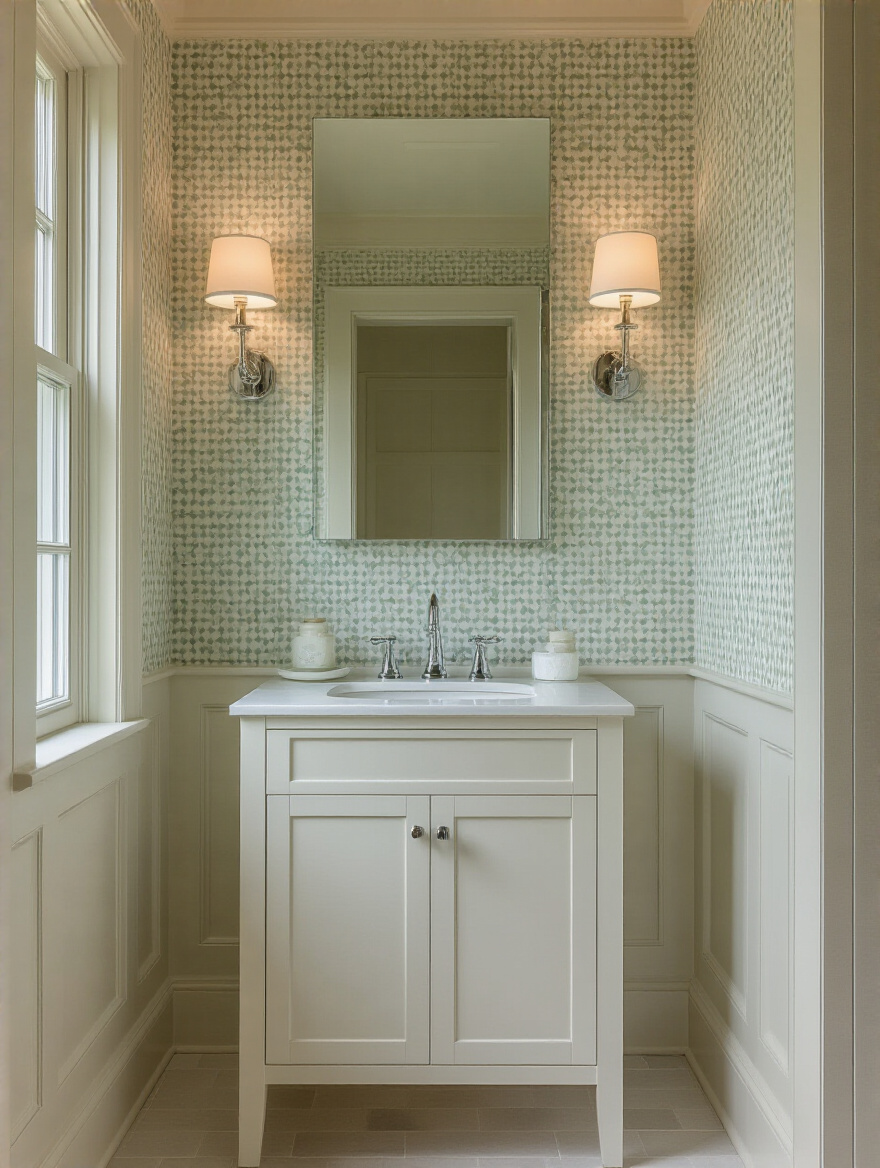
In hotel design, we call this the “jewel box” effect. We take a tiny powder room and wrap it, ceiling included, in a beautiful, small-scale print—like a delicate geometric or a subtle toile. This creates an immersive, transportive experience. Instead of feeling cramped, the room feels intentional and precious, like a little escape. The key is to commit fully. Don’t just do one accent wall; envelop the space in the pattern for maximum impact.
This approach allows you to add immense character and sophistication without visually shrinking the room. It’s the perfect strategy for transforming a forgettable guest bath into a memorable moment.
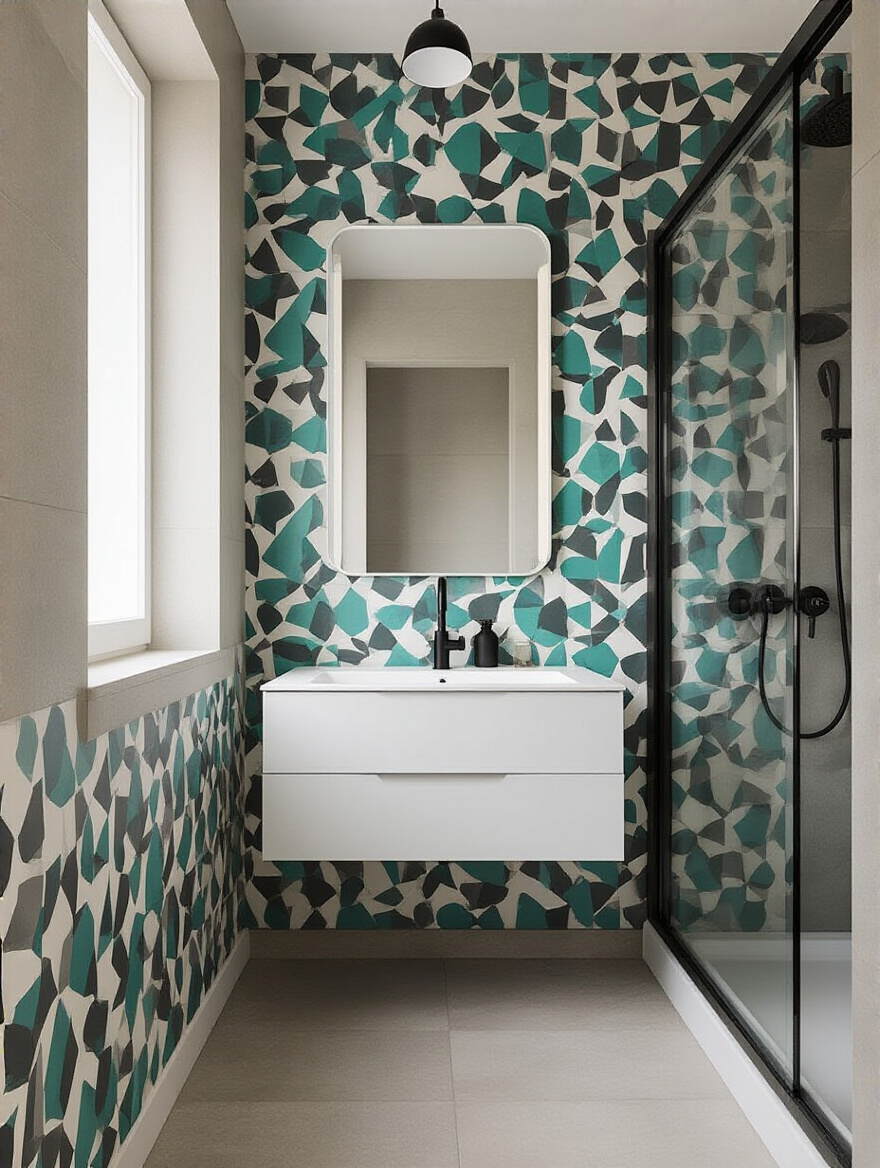
A bathroom can often be a room of soft edges—towels, water, steam. Integrating a bold geometric wallpaper is like giving the space an architectural backbone. The clean lines, the crisp repetition, the structured order—it all provides a stunning contrast to the softer elements and instantly makes a room feel more modern and grounded. It’s a trick we use in hotels to add a touch of masculine energy or an urban edge to a design.

What’s wonderful about geometric prints is their versatility. A large-scale black and white pattern behind a vanity creates a powerful, high-contrast focal point that feels incredibly chic. A more subtle, tone-on-tone honeycomb pattern wrapped around an entire room can add texture and depth without shouting for attention. It can define a space, guide the eye, and add a layer of sophistication that paint simply cannot achieve.
My favorite application is using a geometric with a subtle metallic thread woven into it. In the right light, it catches the eye and adds just a hint of glamour and reflectivity—perfect for making a windowless powder room feel a little brighter and a lot more luxurious.
Let’s have an honest chat about peel-and-stick wallpaper. A decade ago, I wouldn’t have even considered it for a high-end project. But the quality has improved dramatically, and it absolutely has its place. It’s the perfect solution for anyone who wants to experiment with a bold trend without a long-term commitment, or for those living in a rental where traditional wallpaper is out of the question. Think of it as a low-risk, high-reward design tool.
However, here’s the BS everyone seems to believe: that all peel-and-stick is created equal. It absolutely is not. The cheap, papery versions you find everywhere will look… well, cheap. They tear easily and often have a plastic-like sheen. If you’re going to use it, you need to invest in a high-quality, heavyweight vinyl option from a reputable brand. These have better texture, richer colors, and much more forgiving adhesives that allow you to reposition them without losing their stick.
I often recommend it for powder rooms, where moisture is less of an issue, or for an accent wall behind a vanity. It’s a fantastic way to get a taste of wallpaper’s transformative power before you commit to the investment and labor of a traditional, professionally installed product.
Can we just agree on something? Some things are not meant to be DIY projects, and hanging expensive, intricate wallpaper is one of them. I cannot tell you how many panicked calls I’ve received from clients who bought a stunning $2,000 mural, tried to hang it themselves to “save money,” and ended up with a bubbly, misaligned mess. They end up paying for the ruined paper and for my installer to come fix it.
A professional installer isn’t just someone who knows how to apply paste. They know how to prep walls to perfection. They understand how to calculate and match a complicated pattern repeat across crooked walls. They have the tools and the touch to create invisible seams. For specialty materials like grasscloth, silk, or anything with a metallic finish, their expertise is non-negotiable. These materials are incredibly unforgiving and will show every single flaw underneath.
Hiring a professional isn’t a cost; it’s an investment in getting the flawless, luxury finish you’re paying for. Think of it this way: you wouldn’t buy a couture gown and then try to tailor it yourself, would you? The same principle applies here.
Once you’ve made your selections and decided on your installation plan, the focus shifts to the final, critical steps. These are the details that ensure the wallpaper not only looks beautiful on day one but stays that way for years. It all comes down to what’s happening underneath.
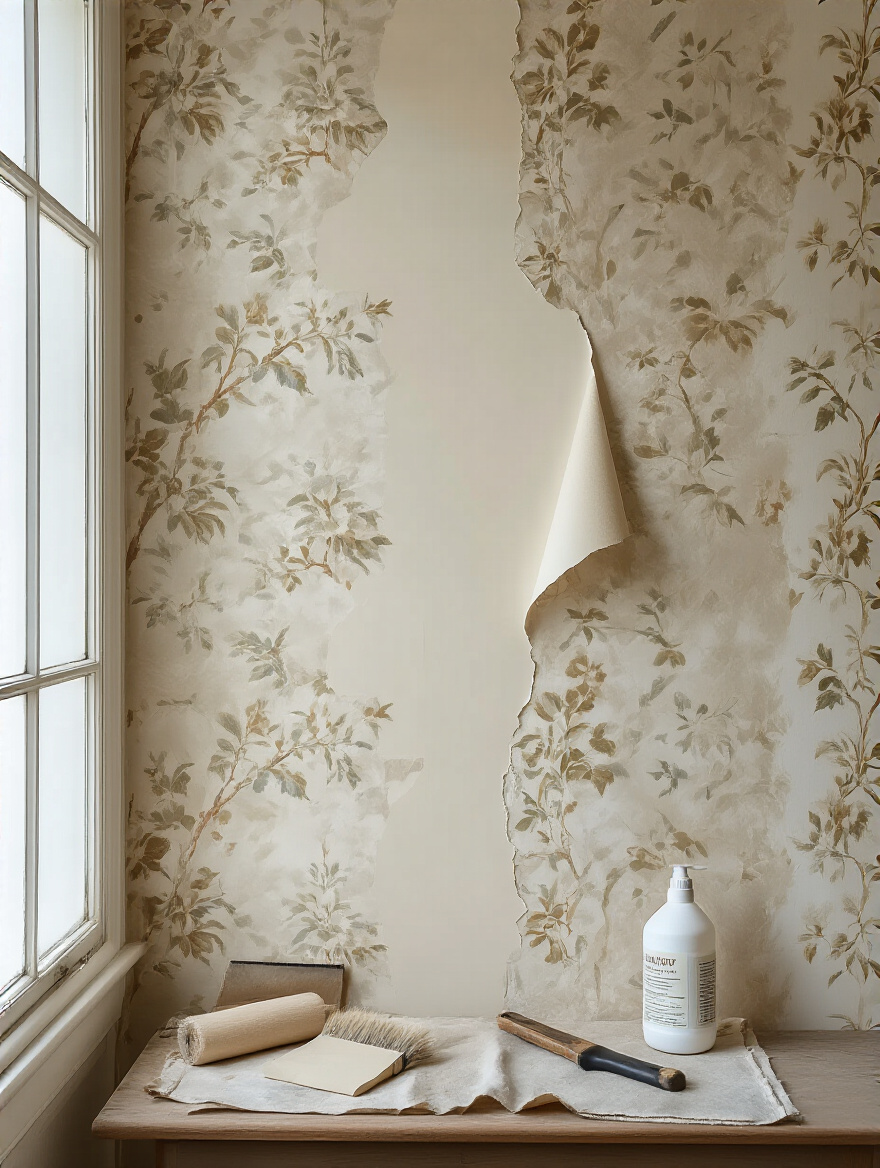
Let’s talk about the most important part of any wallpaper job—the part that no one ever sees. You wouldn’t put a beautiful designer suit on over muddy clothes, would you? Of course not. The same logic applies to your walls. The BS I hear all the time is that a quick wipe-down is sufficient preparation. It’s not. Your walls need to be surgically clean, bone dry, and as smooth as glass.
Any tiny bump, nail hole, or uneven patch will be magnified a hundred times once the wallpaper is up, especially if it has any kind of sheen. This means methodically filling every crack, sanding it down perfectly, and then cleaning off every speck of dust. It’s tedious, painstaking work, but it is the absolute bedrock of a professional finish. It’s the difference between a wall that looks like a smooth, seamless work of art and one that looks like, well, paper stuck on a bumpy wall.
So, take your time with this step. If you’re hiring a professional, make sure they are equally meticulous. A good installer will spend more time preparing the walls than they will hanging the paper. That’s how you know you’ve hired the right person.
If wall prep is the foundation, then primer is the critical magic ingredient that holds everything together. Specifically, you need a wallpaper primer, sometimes called “sizing.” This is not the same thing as paint primer. I repeat: this is not the same thing. Regular primer is designed to help paint adhere; wallpaper primer is designed to do two things: create a uniform surface for the wallpaper adhesive to grip onto, and, crucially, to create a barrier.
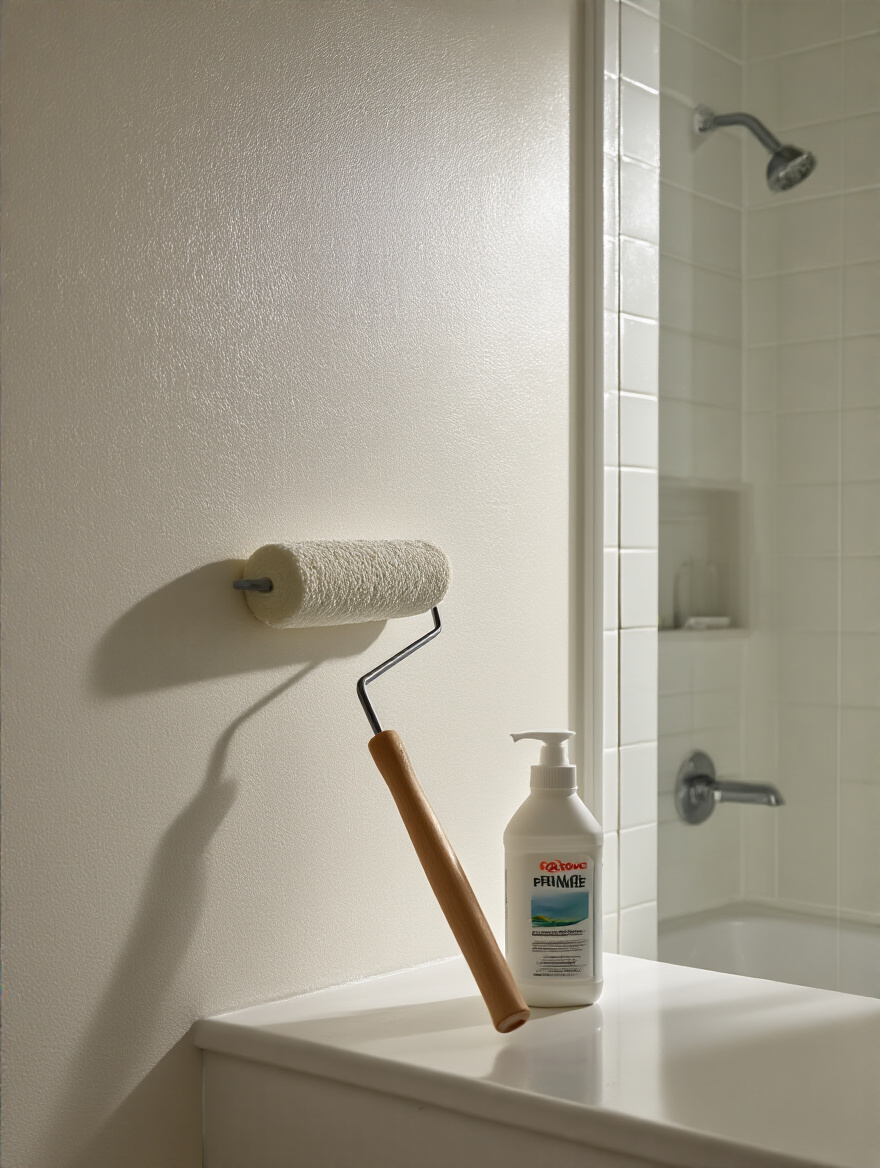
In a bathroom, that barrier is everything. A high-quality, mold-resistant wallpaper primer seals the drywall, preventing moisture and steam from being absorbed into the wall itself. This not only protects your walls from potential damage but also prevents the wallpaper adhesive from being compromised over time. It’s the essential link in the chain that ensures your wallpaper stays put, even in a steamy environment.
And here’s the pro secret that no one thinks about until it’s too late: using the right primer also makes eventual removal a thousand times easier. The primer creates a “slip” layer, so when you’re ready for a change years from now, the paper will peel off cleanly instead of taking chunks of your wall with it. Skipping this step is a decision you will deeply regret later.
Now that we’ve covered the technicals, let’s get into the art. This is where you can start playing with design concepts to create a space that feels truly bespoke. These are the strategies we use in hotel design to create memorable, high-impact spaces.
The accent wall is a classic for a reason: it delivers maximum impact with minimal commitment. It’s a brilliant way to use that spectacular, over-the-top wallpaper you fell in love with but are hesitant to use in an entire room. In a bathroom, the perfect candidate is almost always the wall behind the vanity or, in a larger space, the wall behind a freestanding tub. It’s the natural focal point your eye is drawn to the moment you walk in.
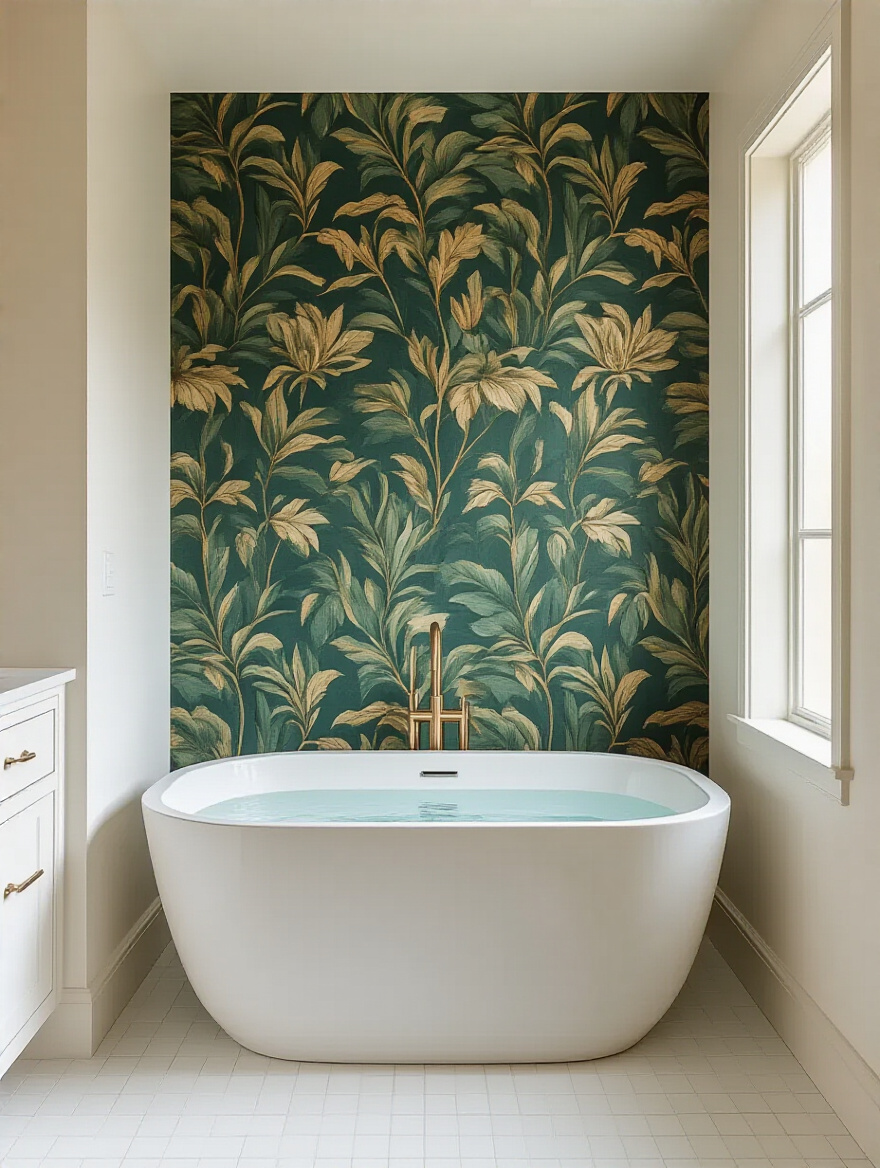
This strategy allows you to invest in a truly premium wallpaper without the premium price tag of doing all four walls. Imagine a stunning, large-scale floral mural behind your mirror. It instantly elevates the vanity, turning a functional spot into a dramatic design statement. It’s the backdrop for your daily routine, and it frames the most important feature in the room.
We use this trick constantly in boutique hotel suites. It adds a custom, art-like element to the space and makes it feel incredibly luxurious and thoughtfully designed. Just be sure the wall you choose is the star of the show and not cluttered with towel bars or other fixtures that would break up the pattern.
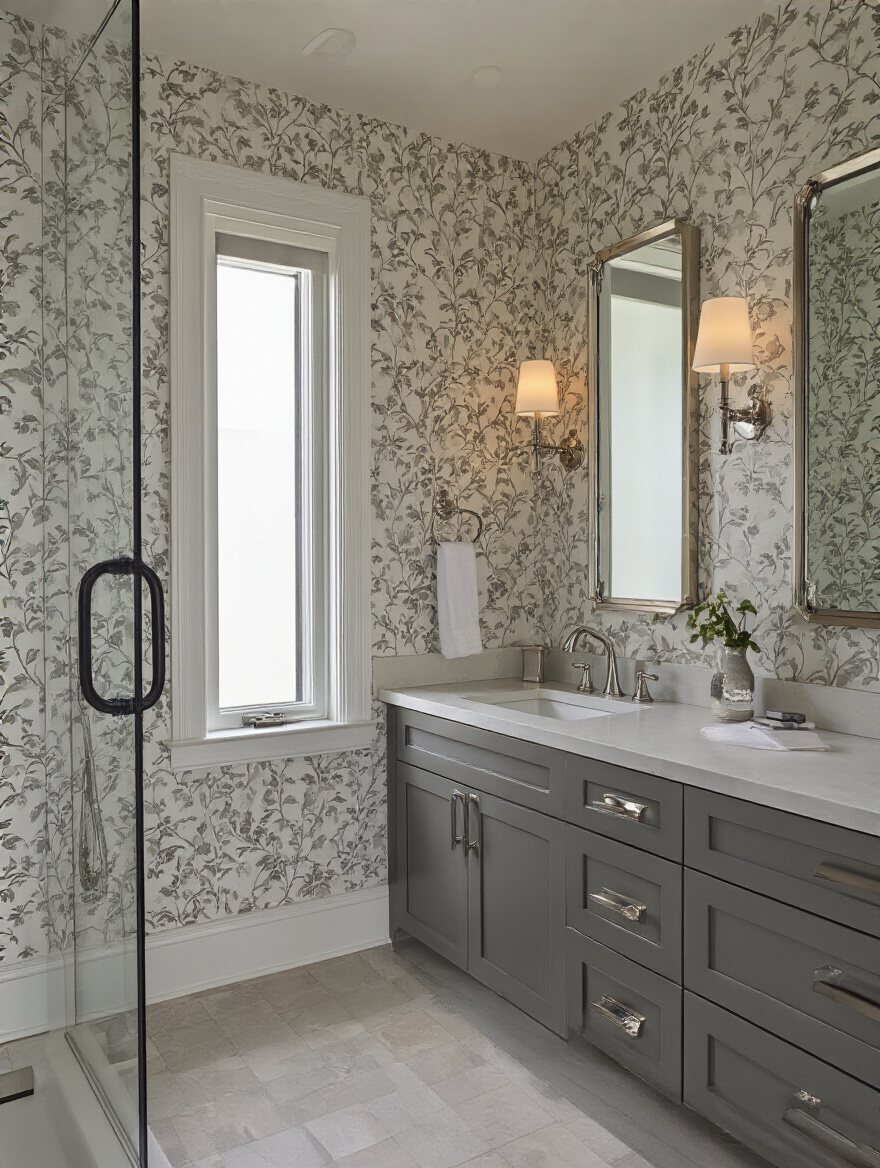
There is something undeniably elegant and timeless about pairing wallpaper with wainscoting. This combination adds a layer of architectural character and depth that makes a bathroom feel custom-built and substantial. The wainscoting—whether it’s classic beadboard or a more formal raised panel—grounds the space and provides a durable, protective layer on the bottom half of the wall, which is perfect for high-traffic bathrooms.
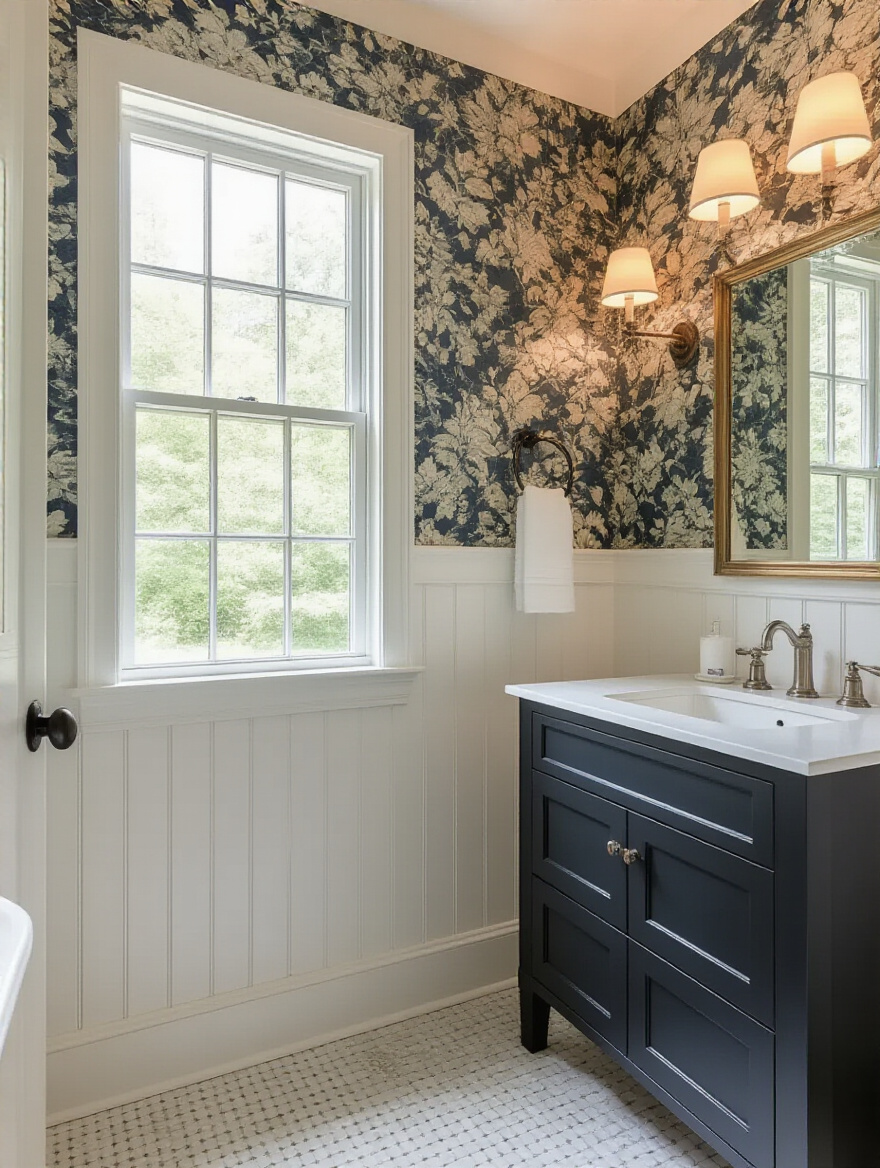
Above the wainscoting, you have the perfect canvas for your wallpaper. This pairing allows you to be bolder with your pattern choice because it’s only on the top portion of the wall. A vibrant botanical or a sophisticated geometric suddenly feels perfectly balanced when anchored by crisp, white woodwork below. It’s a classic look that feels both traditional and fresh at the same time.
In my own home, I have white beadboard wainscoting in our powder room topped with a dramatic, deep navy grasscloth. The contrast is stunning. The texture of the wallpaper adds warmth and sophistication, while the wainscoting keeps it feeling bright and clean. It’s a combination that truly never goes out of style.
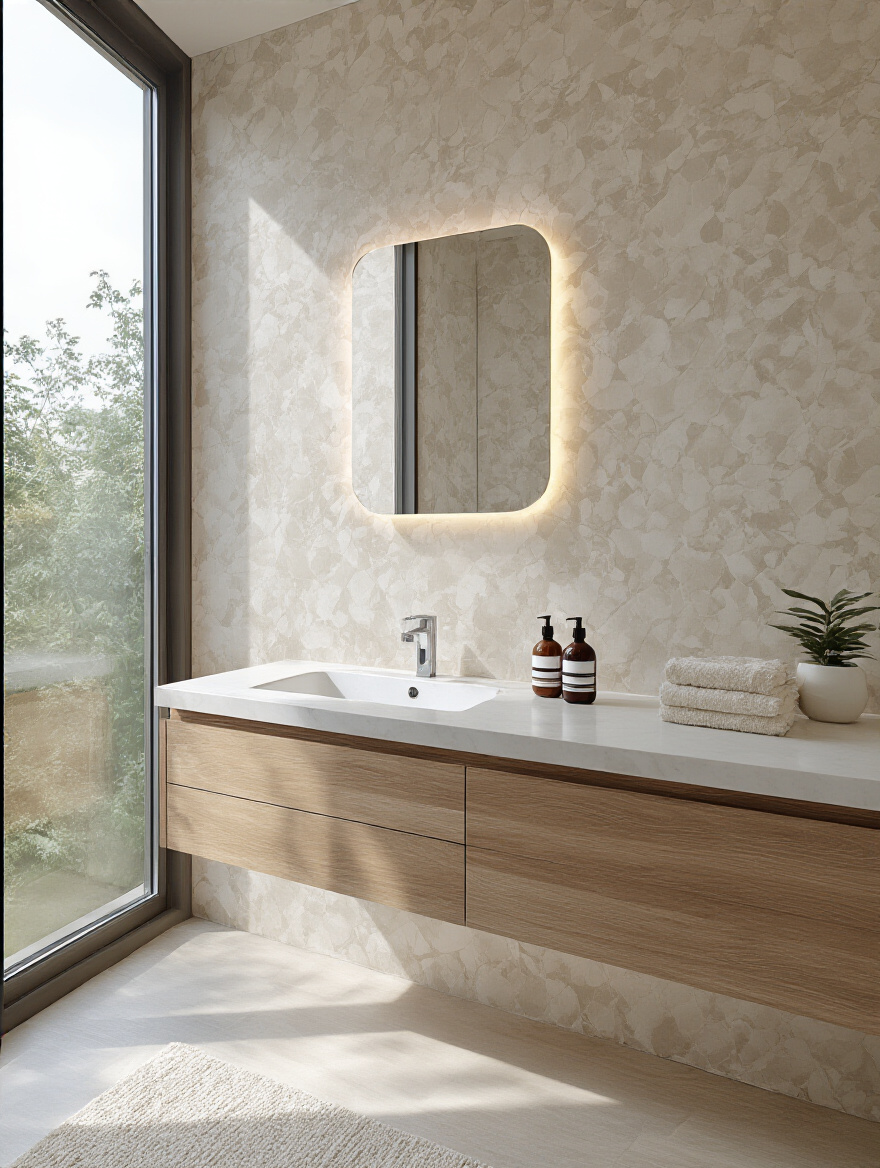
This is a subtle detail that makes a world of difference. To achieve that truly cohesive, high-end look, your wallpaper shouldn’t just exist in a vacuum; it needs to be in conversation with the other finishes in the room. Are your fixtures modern matte black? Look for a wallpaper with a bold, graphic quality to match that clean-lined aesthetic. Do you have warm, unlacquered brass hardware? A wallpaper with gold metallic accents or a pattern with warm undertones will feel harmonious and intentional.
This doesn’t mean everything needs to match perfectly. In fact, that can look a little dated. It’s more about creating a relationship between the elements. Think about the style of your faucets. Are they angular and modern or curved and traditional? Let that inform the style of the pattern you choose. The goal is to create a visual through-line so that the room feels like a single, unified design vision rather than a collection of disparate nice things.
My shortcut for this is simple: once you have your final wallpaper contenders, get a sample of your hardware and hold it right up against the paper. You’ll see instantly which one feels right.
There’s a reason so many luxury spas are filled with greenery and natural motifs. Biophilic design—the concept of connecting with nature indoors—has been proven to reduce stress and create a sense of calm. Bringing a tropical or botanical print into your bathroom is the fastest way to transform it from a purely functional space into a personal oasis. It’s an instant escape.
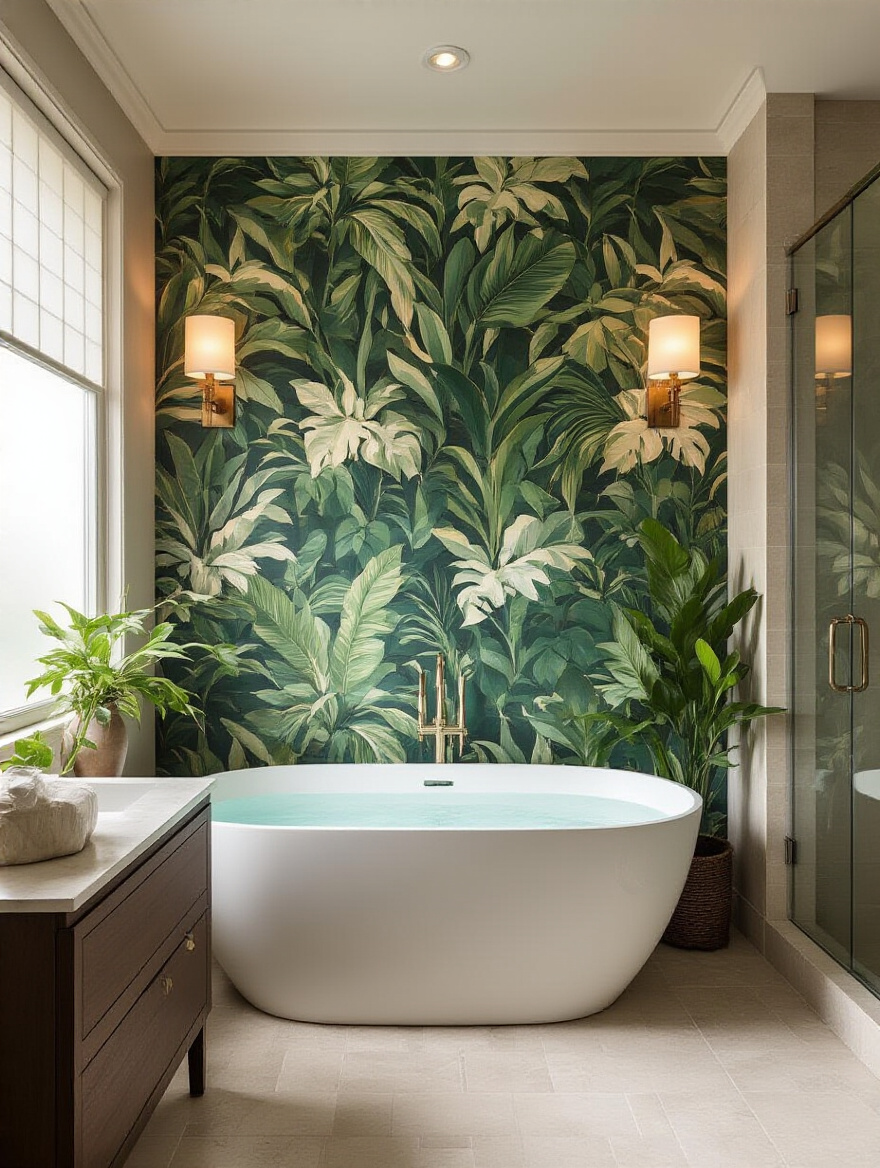
The beauty of these prints is their ability to feel both energizing and serene. A large-scale palm frond or banana leaf print can create a dramatic, immersive experience, especially in a small powder room where it feels like you’ve stepped into another world. For a more subtle, spa-like feel in a master bath, a delicate fern pattern or a soft, watercolor floral can provide a beautiful backdrop for relaxation.
Just remember to balance these powerful prints. If you choose a bold, vibrant botanical, keep the other elements in the room relatively simple and neutral. Let the wallpaper be the star, and pair it with natural textures like wood, rattan, and linen to complete that serene, oasis-like atmosphere.
As we delve deeper into styling, we move from the foundational choices to the signature moves. These are the techniques that create surprise, add a touch of drama, and truly elevate a design from merely beautiful to absolutely unforgettable.
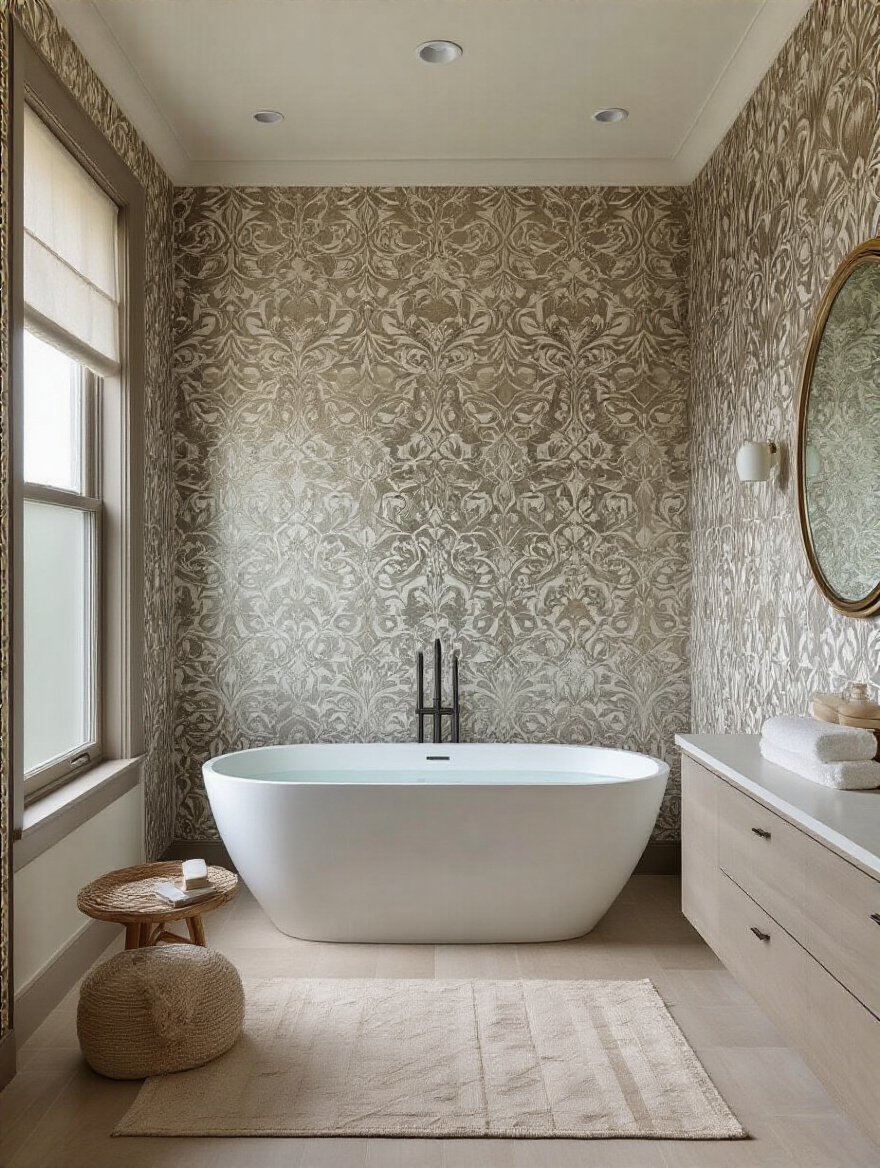
If you want to instantly dial up the glamour in a bathroom, nothing does the job faster than a wallpaper with a metallic or deeply textured finish. These options move a wall from a simple, two-dimensional surface into a rich, tactile experience. A metallic wallpaper—whether it’s a subtle shimmer, a bold geometric with gold accents, or a full-on metallic foil—interacts with light in a magical way. It reflects the glow from your vanity sconces, making the whole room feel brighter, more spacious, and infinitely more luxurious.
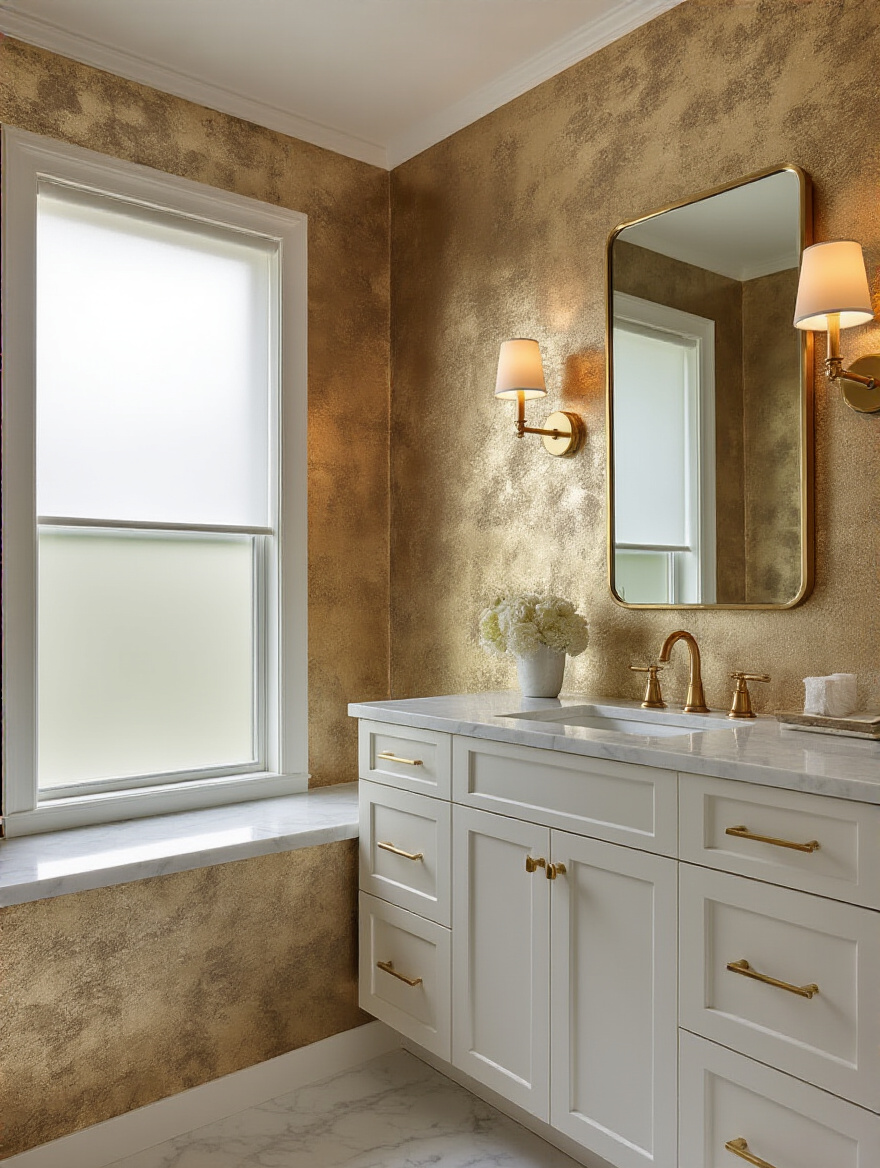
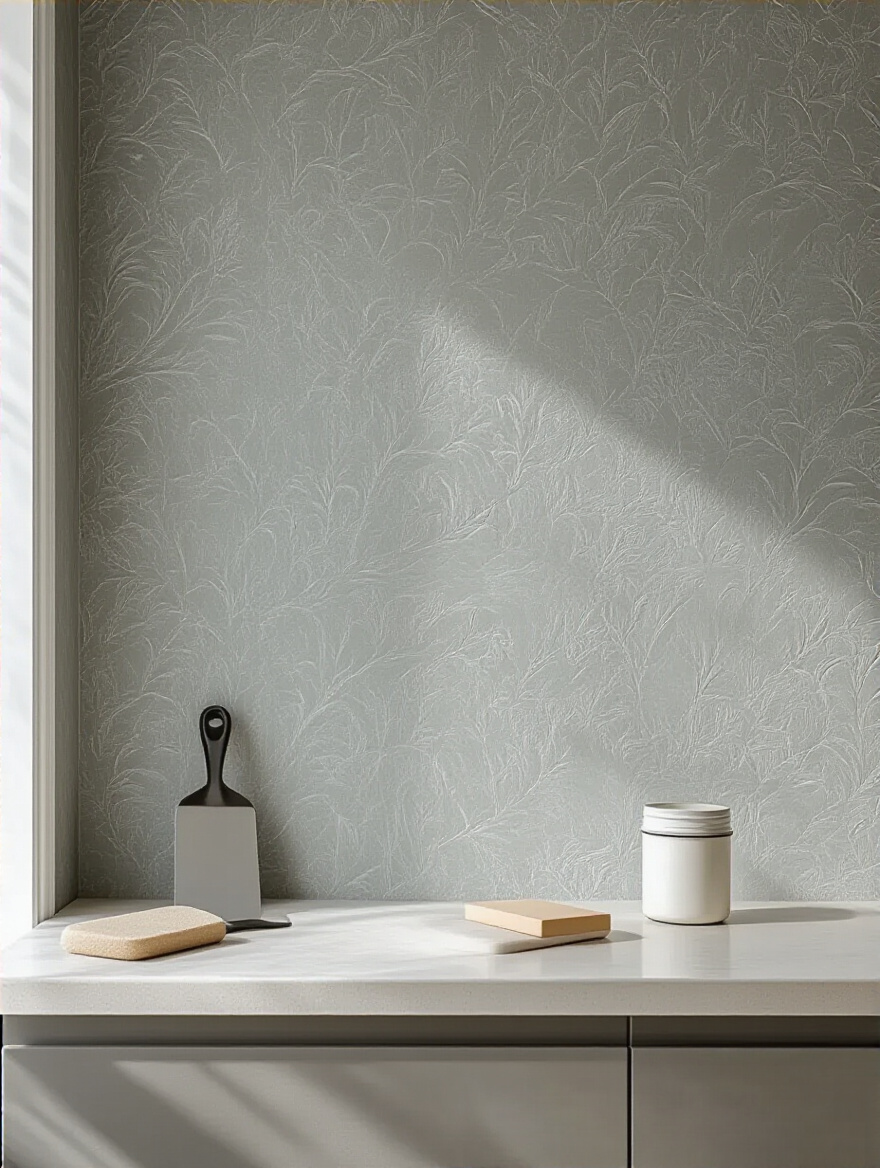
Textured wallpapers, like grasscloth, silk, or embossed vinyls that mimic natural materials, add a layer of warmth and sophistication. Running your hand along a textured wall feels incredibly high-end; it’s a sensory detail that is central to luxury hospitality design. It makes the space feel bespoke and layered. I once used a charcoal-colored, silk-look vinyl in a client’s master bathroom, and it completely transformed the room into a moody, hotel-like retreat.
Just a word of caution: these specialty finishes are masters at highlighting wall imperfections. This is where meticulous wall prep and professional installation are absolutely non-negotiable. But when done right, the result is pure, unadulterated opulence.
Designers often refer to the ceiling as the “fifth wall,” and it is the most tragically overlooked surface in a room. Wallpapering the ceiling in a bathroom is a bold, confident design move that adds an incredible layer of unexpected charm and character. It draws the eye upward, creating a sense of height and drama, and it makes the entire room feel like a thoughtful, fully realized design concept.
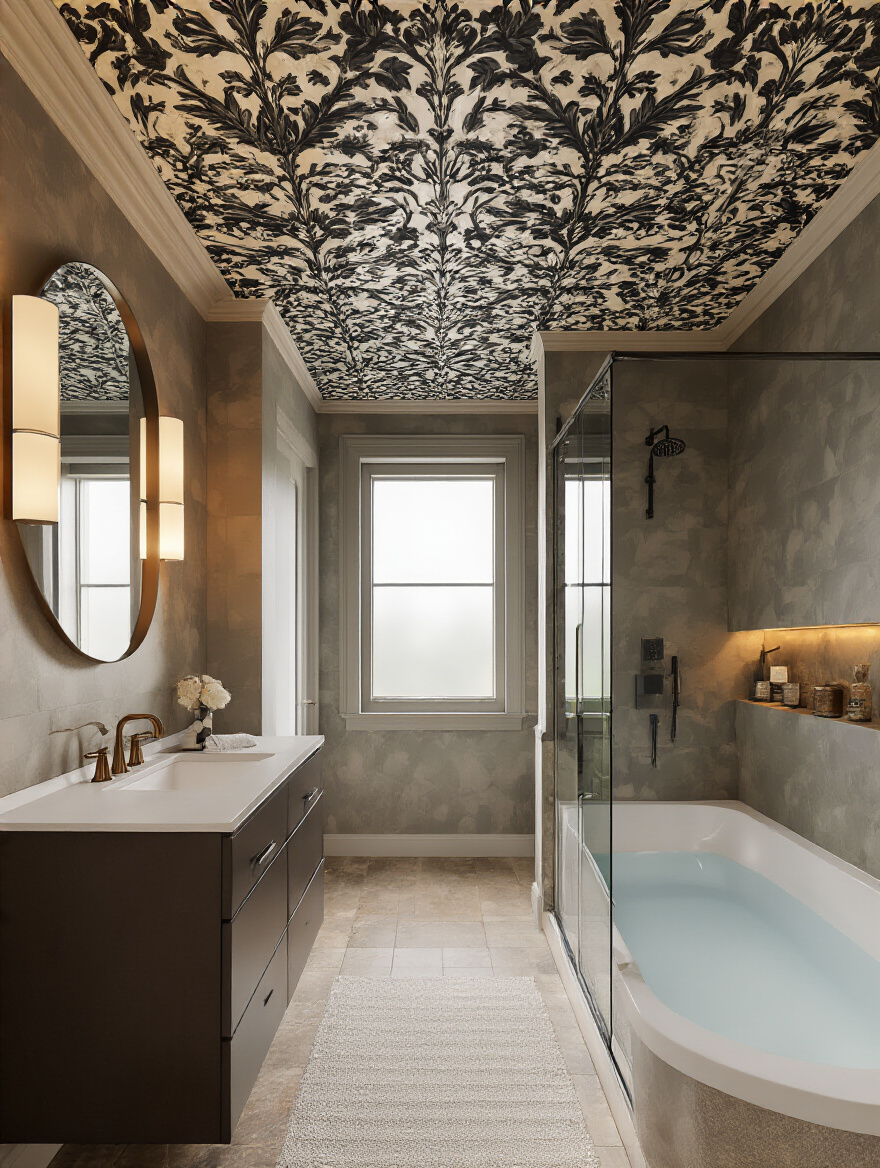
In a small powder room, papering the ceiling with a dark, dramatic pattern can create a stunning, enveloping effect that feels cozy and grand all at once. In a larger bathroom with tall ceilings, it’s an opportunity to add an element of surprise and whimsy without overwhelming the space. Imagine soaking in a tub while looking up at a canopy of delicate floral vines or a subtle, cloud-like pattern. It turns a simple ceiling into a piece of art.
This is definitely an advanced move and one that absolutely requires a professional installer—hanging wallpaper overhead is a true test of skill. But the payoff is immense. It’s a detail that feels completely custom and sets your space apart from the ordinary.
Your beautiful bathroom is complete, but the work isn’t quite over. Just like any luxury item, your wallpaper requires a bit of care and foresight to keep it looking pristine. These final steps are all about safeguarding your investment for the long haul.
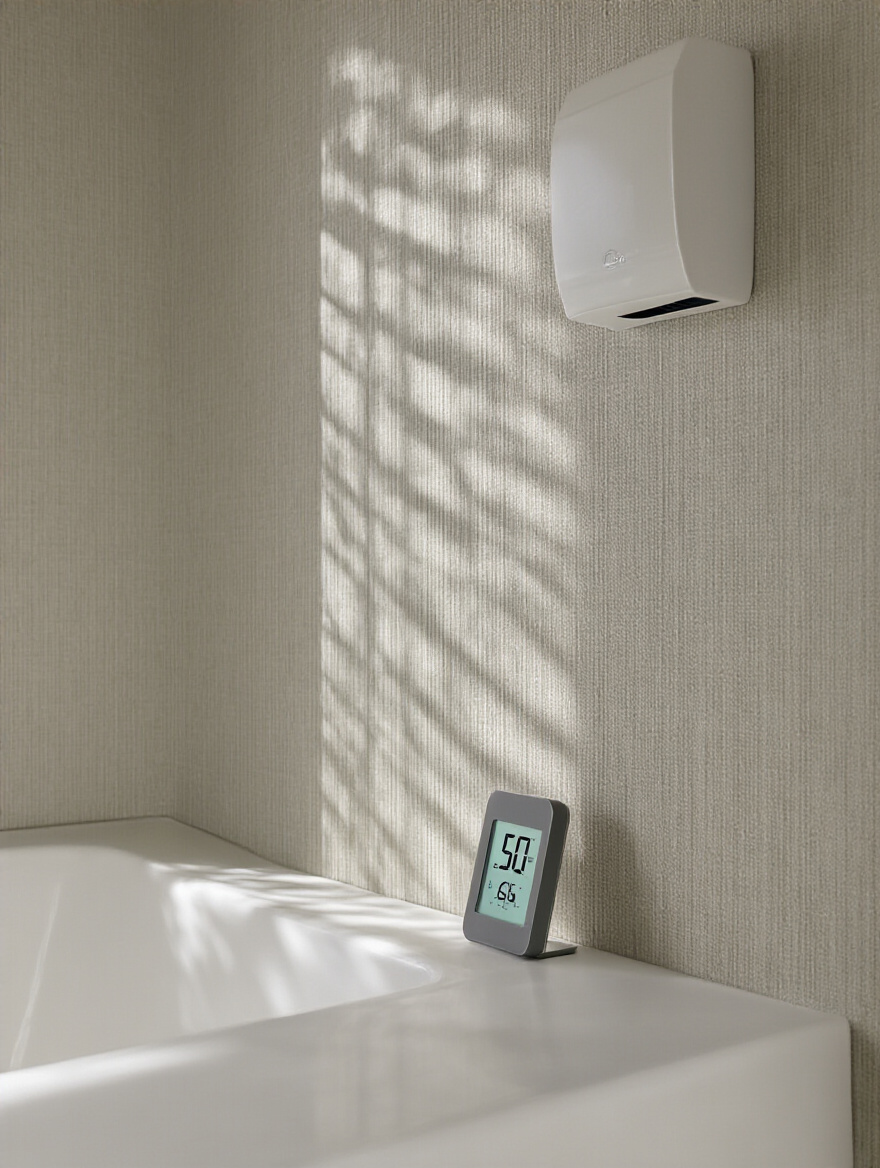
Yes, we’re talking about ventilation again. That’s how important it is. Even with the most water-resistant vinyl wallpaper, persistent, lingering humidity is the enemy. Think of proper ventilation as the daily maintenance that protects your long-term investment. Running a powerful, high-quality exhaust fan for 15-20 minutes after every shower is the single most effective thing you can do to prevent moisture from getting behind your wallpaper and compromising the adhesive.
I often recommend clients install a fan with a timer or a humidity sensor. This takes the guesswork out of it. The fan automatically turns on when it detects high humidity and runs until the air is clear. It’s a set-it-and-forget-it solution that provides constant protection. It may seem like a small detail, but it is the secret to ensuring your wallpaper looks as good five years from now as it did on the day it was installed.
So, consider this your final reminder: don’t let a poor ventilation system sabotage your beautiful design. It is the invisible guardian of your walls.
Here’s an insider secret from the design world that is perfect for bathrooms: Decorator’s Varnish. It’s a clear, matte-finish acrylic sealer that you can paint right over your wallpaper. For wallpapers that are merely “washable” but not fully vinyl, or even for some vinyls in high-splash zones (like behind a sink), this adds an invisible shield of protection. It makes the surface more durable, easier to clean, and much more resistant to water spots and steam.
I wouldn’t recommend this for every single wallpaper—some textured or metallic finishes might be altered by it—which is why you must test it on a sample first. But for many standard papers, it’s a game-changer. I especially love using it in powder rooms where a client might fall in love with a more delicate paper. A coat or two of Decorator’s Varnish gives them the look they want with the durability they need.
Think of it as the top coat for your walls. It’s a simple, extra step that provides a huge amount of peace of mind and significantly extends the life of your wallpaper.
The key to keeping your wallpaper looking fresh is gentle, consistent maintenance. The biggest mistake people make is letting grime build up and then attacking it with harsh, abrasive cleaners. That’s a surefire way to damage the surface and fade the colors. Instead, your mantra should be “blot, don’t scrub.”
For durable vinyl wallpapers, a simple wipe-down once a week with a soft, damp cloth and maybe a tiny drop of mild dish soap is all you need to remove residue from steam or hairspray. For any accidental splashes, blot them immediately with a dry cloth. For more delicate, non-washable papers, a light dusting with a dry microfiber cloth is the safest approach. The goal is prevention, not aggressive intervention.
And again, good ventilation is your best cleaning tool. By whisking away most of the moisture before it even settles, your fan is doing 90% of the cleaning work for you. Consistent, gentle care is what preserves the beauty of your investment over time.
Let’s assume you’ve done everything right up to this point: you’ve prepped, you’ve primed, and you’ve chosen the right materials. Now, it all comes down to the application itself. The most common cause of peeling is not using enough adhesive, especially at the seams and edges. An installer who is rushing might not apply the paste all the way to the very edge of the paper, creating a weak spot that’s the first to lift when exposed to humidity.
Another critical error is not “booking” the wallpaper correctly. This is a process where, after applying paste to the paper, you gently fold it over on itself and let it rest for a few minutes. This allows the paper to expand evenly before it goes on the wall, preventing bubbles and shrinking as it dries. Every wallpaper has a recommended booking time, and skipping this step or getting it wrong is a recipe for problems down the road.
These are the kinds of technical details that separate a true professional from a novice. A flawless application is a craft, and it’s these seemingly small steps that ensure a durable, peel-free finish.
Thinking about the end at the beginning is the mark of a savvy homeowner. A truly successful design project isn’t just about creating something beautiful for today; it’s about making it easy to evolve your space tomorrow. A little foresight now can save you a world of pain later.
The idea of someday removing wallpaper can be so daunting that it stops people from using it in the first place. They picture hours of steaming and scraping, ending with damaged walls that need extensive repairs. But it doesn’t have to be that way. The secret to easy removal is planning for it before you even hang the paper. And it all comes back to that one magic step: priming.
I once worked on a renovation where the previous owners had applied wallpaper directly to unprimed drywall. It was a nightmare. The removal process took two full days and tore the face off the drywall, which then had to be skim-coated and re-primed before we could paint. It was a costly, frustrating, and completely avoidable disaster. In contrast, in rooms where we’ve used a proper wallpaper primer, the paper often comes off in large, clean sheets with minimal effort.
So, when you are priming your walls before installation, know that you are not just preparing them for the paper you’re about to hang. You are doing a massive favor for your future self. You’re ensuring that when you’re ready for a change, the process will be a simple refresh, not a major demolition project.
Transforming your bathroom into a personal sanctuary isn’t a far-off dream reserved for luxury hotels. It’s a series of thoughtful choices you can make right now. We’ve explored how the right wallpaper can inject personality, create drama, and wrap your most functional room in a layer of bespoke elegance. Whether you’re drawn to a bold botanical or a subtle, textured neutral, the power to redefine your space is right at your fingertips.
This is your opportunity to be daring. Forget the idea that a bathroom must be plain and sterile. It can be a vibrant jewel box, a serene oasis, or a chic, modern statement. Now that you’re armed with both the inspiration and the essential technical know-how, you can move forward with confidence. Choose the idea that sparked something in you and begin imagining how it could come to life in your own home.
Your dream bathroom is waiting. It’s in the pattern that makes you smile and the texture that feels like an indulgence. It’s a space that doesn’t just serve a purpose but elevates your daily routine and brings you a moment of joy. Go on, create the stunning sanctuary you deserve.