Physical Address
304 North Cardinal St.
Dorchester Center, MA 02124
Physical Address
304 North Cardinal St.
Dorchester Center, MA 02124
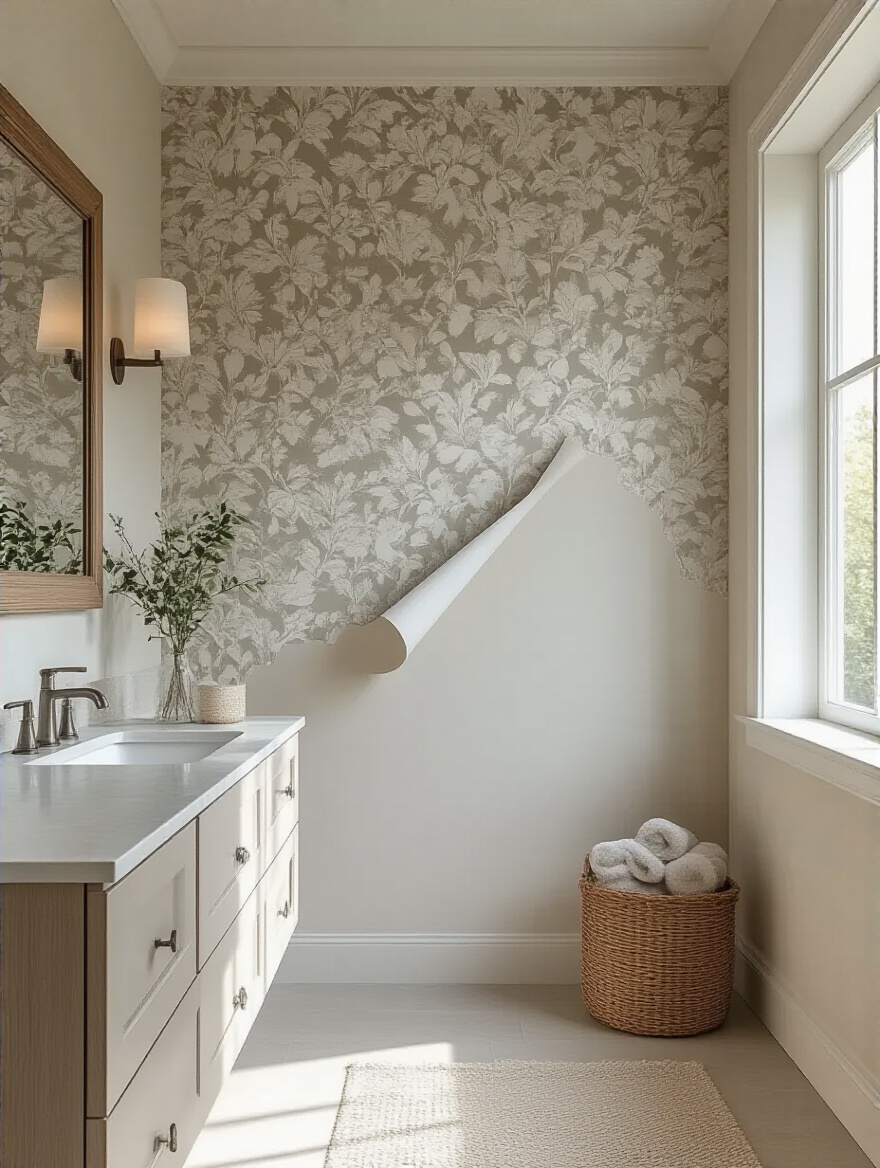
Elevate your home with 23 insider tips for a flawless bathroom wallpaper half wall. Discover secrets on selection, installation, and styling for a lasting, luxury finish.
Picture this: You’re stepping into the powder room of a boutique hotel in Paris. The lower half of the wall is wrapped in a breathtaking, textured grasscloth, topped by a perfectly crisp line of paint in a deep, moody hue. The light from a single, elegant sconce grazes across the wallpaper’s surface, highlighting every natural fiber. It feels bespoke, intentional, and utterly luxurious. This is the exact feeling my clients are always trying to capture.
They always ask me, “How can I bring that level of polish into my own home?” And my answer is always the same. It’s not about spending a fortune. True luxury is born from thoughtful details and flawless execution. A half-wall of wallpaper in a bathroom is one of the most effective ways to achieve this, but it’s also one of the easiest to get wrong. The internet will give you a thousand conflicting tips, but I’m going to tell you what actually matters—the secrets we use in the design world to ensure a perfect finish every time.
Before you even think about unrolling a single sheet of beautiful paper, we need to lay the groundwork. This initial phase is the unseen foundation of every stunning hotel interior. It’s where we separate a fleeting trend from timeless elegance. Rushing this part is a mistake I see all too often, and it’s what leads to peeling seams and disappointing results.
The single biggest mistake people make is underestimating the power of steam. That beautiful, expensive wallpaper you just installed can turn into a peeling, bubbling nightmare within a year if you ignore the bathroom’s environment. A luxury finish is, above all, a lasting one. So, before you do anything, you must become an expert on your bathroom’s microclimate. A cheap digital hygrometer is your best friend here.
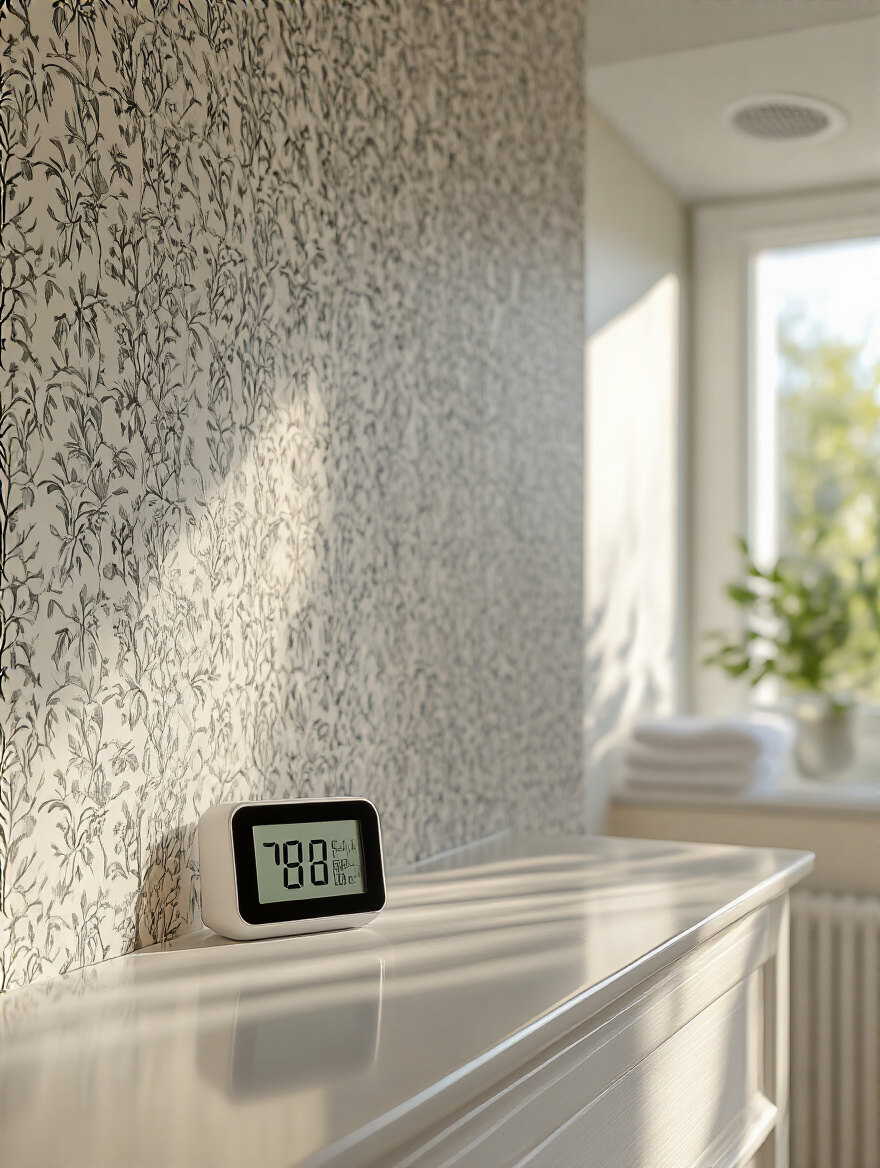
What you’re looking for is honesty. Does humidity spike above 60% after a shower and stay there? If so, your current exhaust fan isn’t cutting it. In the hospitality world, we over-spec our ventilation because we can’t have a guest suite looking worn after six months. Think of a powerful, quiet fan not as an expense, but as insurance for your design investment. It’s the invisible detail that makes all the visible ones last.
This foundational check is what ensures your beautiful work will look just as impeccable five years from now as it does the day you finish.
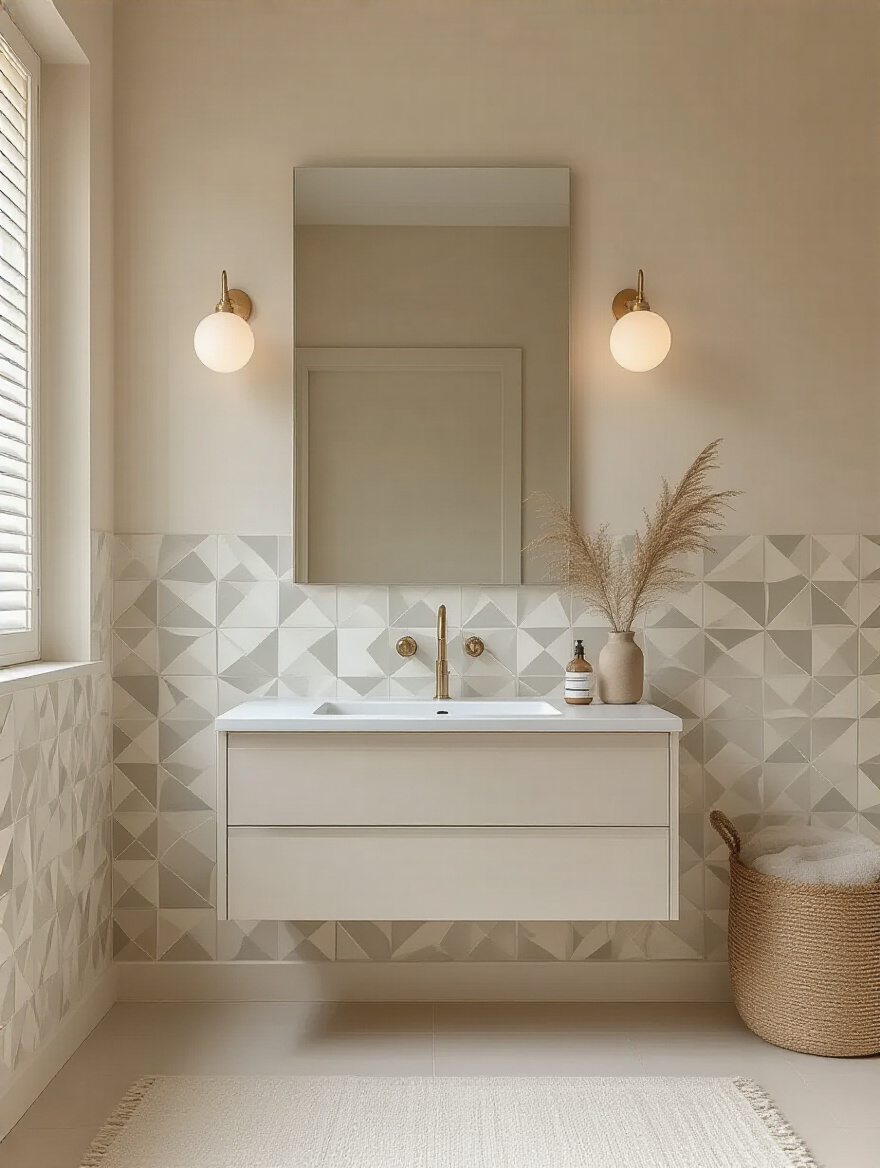
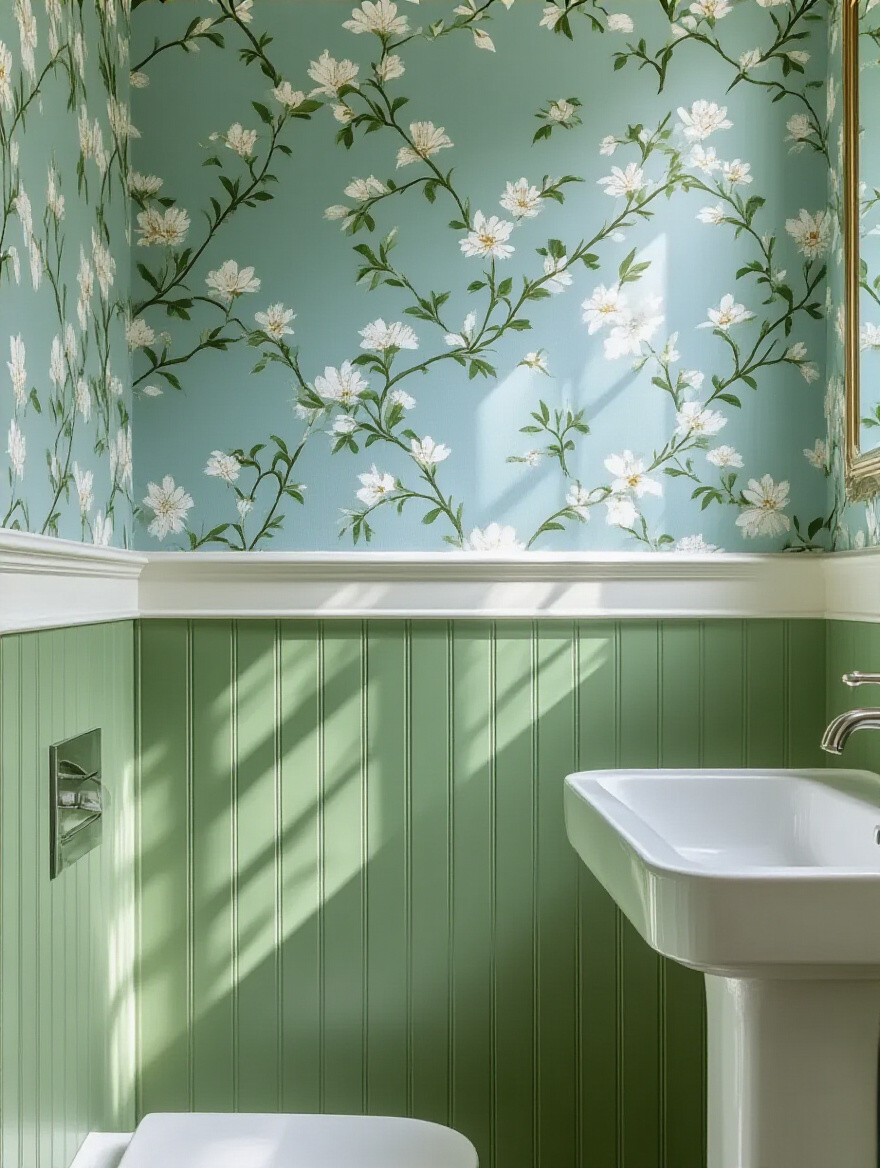
You know what separates a designer-led space from a DIY project? A sense of effortless harmony. The height of your wallpaper is a crucial part of that. Just picking a random spot—say, 36 inches—can make the entire room feel chopped in half and awkward. Instead, let the room’s architecture guide you. The wallpaper should feel like it belongs there, not like it was just stuck on.
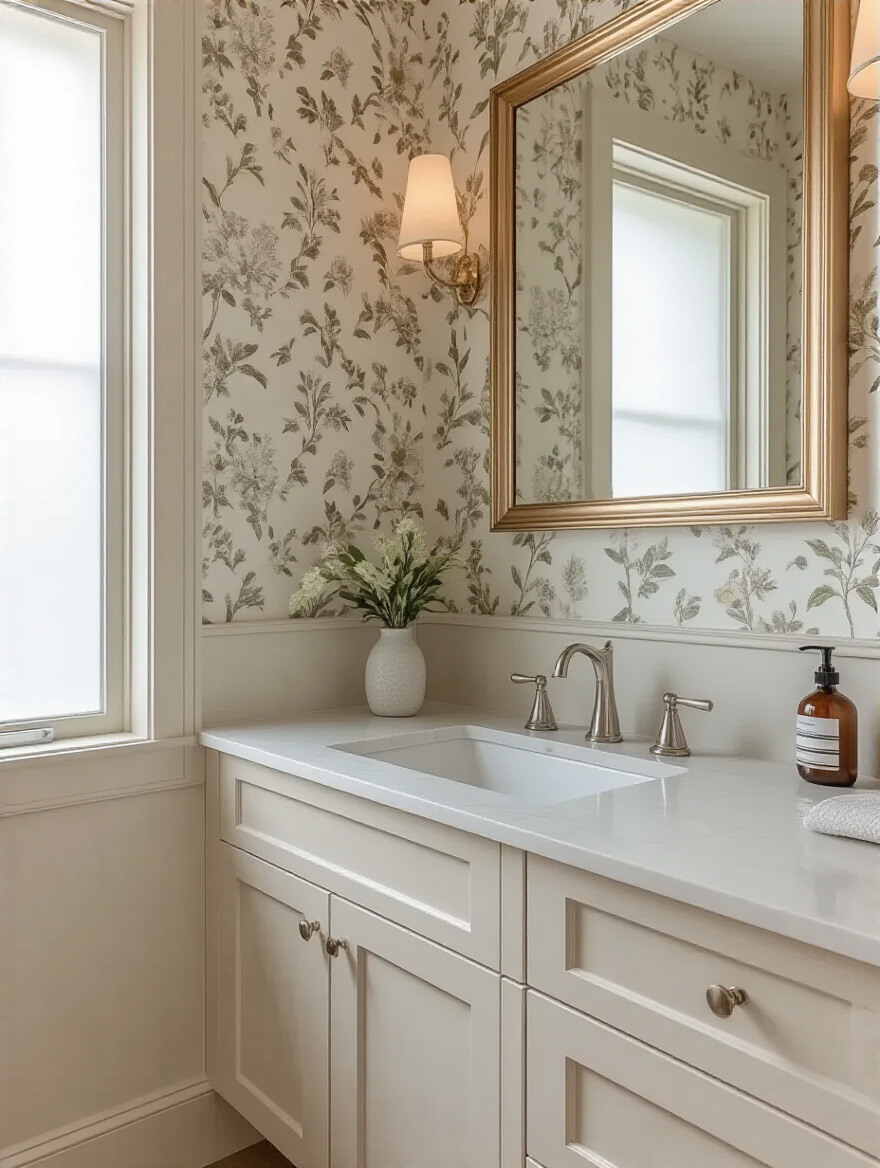
The secret is to align the top of the wallpaper with an existing horizontal line. Look for the top of the vanity backsplash, the sink rim, or a windowsill. Aligning with one of these points creates a deliberate, cohesive look. My go-to design rule is the Rule of Thirds. Dividing the wall into thirds and placing the break at the one-third or two-thirds mark almost always creates a visually pleasing balance that feels instinctively correct. Before you commit, use painter’s tape to mark your proposed line. Live with it for a day and see how it feels.
With the height sorted, you can move on to choosing the material that will bring your vision to life.
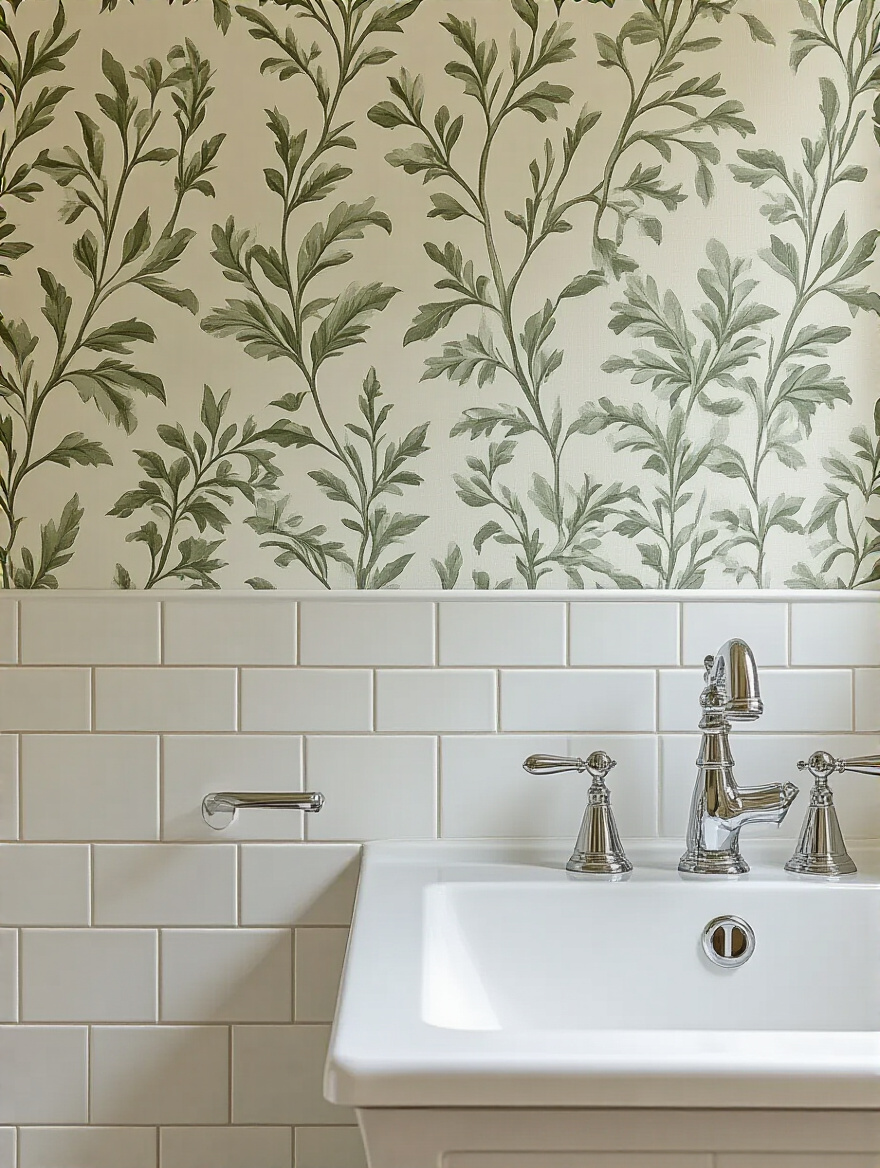
Now we can talk about the pretty part. But in a bathroom, “pretty” has to be backed up by performance. Using a standard, untreated paper wallpaper in a full bath is like wearing suede shoes in a rainstorm—a guaranteed disaster. In hotel design, we almost exclusively use high-performance, contract-grade materials, and you should adopt the same mindset. Look for solid vinyl, vinyl-coated paper, or even specially treated non-woven papers.
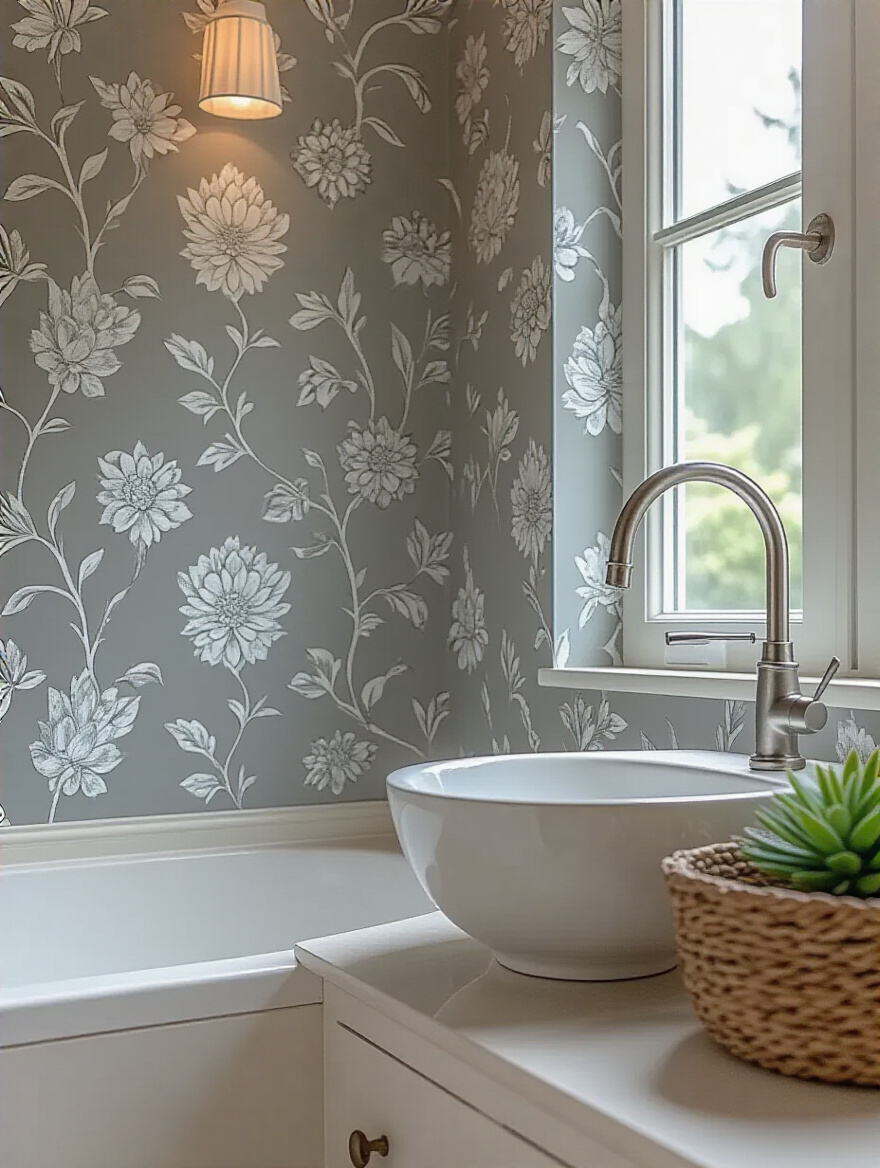
The term you want to look for is “scrubbable.” It’s an industry term that signals the wallpaper has a durable, water-resistant surface that can handle moisture and be gently cleaned. This is non-negotiable for a space that sees daily use. I remember a client who fell in love with a delicate, hand-printed paper. We had it treated with a custom matte varnish to make it bathroom-appropriate. You don’t need to go that far, but you do need to choose a material that is explicitly rated for bathroom or kitchen use.
Your choice of material is set, but the quantity is just as important as the quality.
Here’s a hard lesson I learned early in my career: running out of wallpaper mid-project is a design emergency. Why? Because wallpaper is printed in batches called dye lots. A roll from a new batch, even of the exact same pattern, can have a minuscule color variation that will scream from the wall once it’s up. It’s the kind of tiny flaw that cheapens an entire room. This is why meticulous measuring is a sign of a true professional.
Measure each wall, then measure it again. Calculate your total square footage, but don’t stop there. The critical detail is the pattern repeat. A large repeat means you’ll have more waste as you align the pattern from strip to strip. Always add at least 15% to your final number to account for this and for any mistakes. My rule is to always buy one full roll more than the calculation suggests. That extra roll is your “attic stock”—it’s your salvation if a section gets damaged years down the road.
Now that your materials are calculated and chosen, we can focus on preparing the canvas itself.
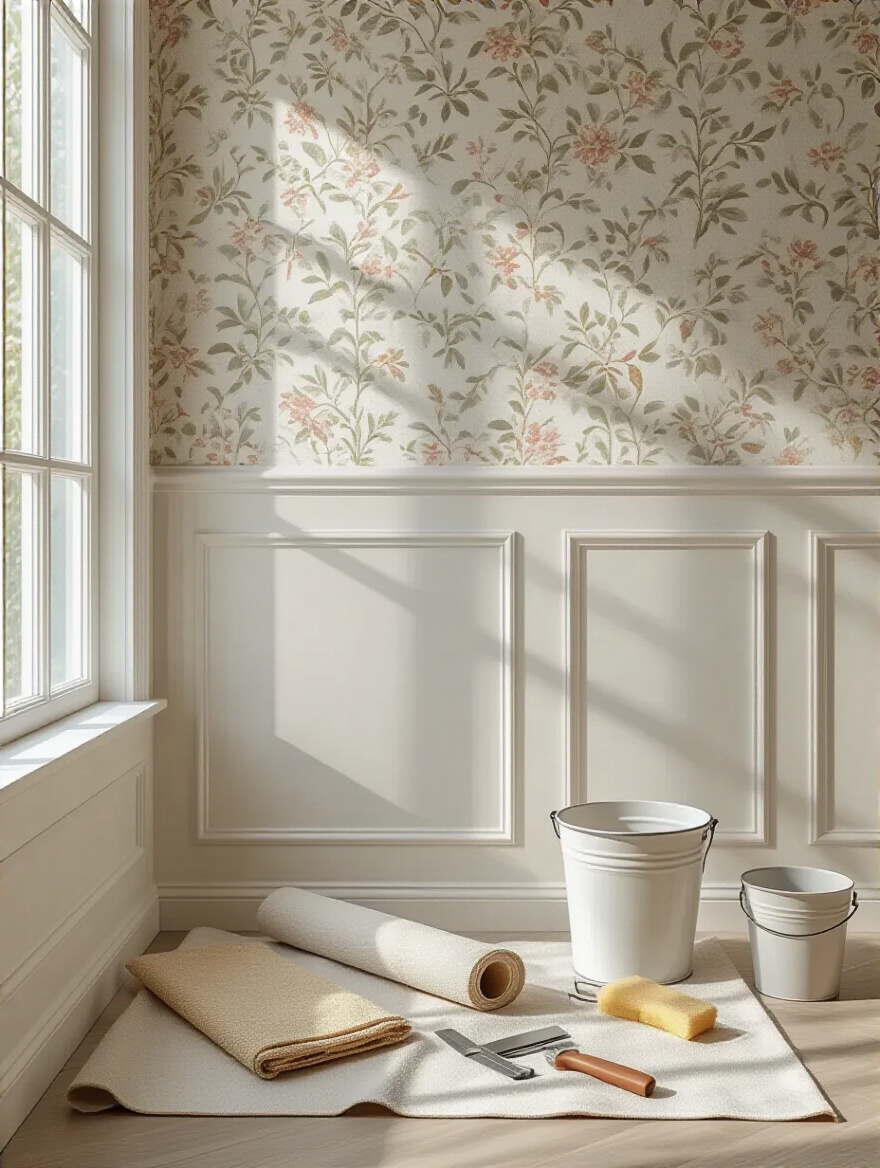
With your materials selected, it’s tempting to jump straight into the application. This is where patience truly becomes a virtue. Think of this stage as preparing a canvas for a masterpiece. An artist would never paint on a dirty, uneven surface, and neither should you. This is the behind-the-scenes work that ensures a flawless public debut.
Let me be blunt: 90% of wallpaper failures are actually wall preparation failures. If your wallpaper peels or bubbles, it’s almost always because the wall underneath wasn’t ready. This step is the least glamorous but the most critical. You need to create a surface that is perfectly clean, smooth, and non-porous. Start by washing the walls with a TSP substitute to remove any unseen grime or soap scum.
Then, you must fix every single imperfection. Fill every nail hole and sand every bump until the wall is glass-smooth. Run your hand over it; you shouldn’t feel anything. Finally, and this is non-negotiable, you must prime the wall. A dedicated wallpaper primer, often called a “sizer,” does two things: it creates the perfect surface for the adhesive to grip onto, and it seals the drywall so that when it’s time to remove the paper years from now, it comes off cleanly without destroying your wall.
A flawless surface is nothing without the right tools and budget to see the project through.
Luxury is not about spending the most money, but about spending money on the things that matter most. When budgeting for this project, do not skimp on three things: the wallpaper itself, the primer, and the tools. A cheap utility knife with a dull blade will tear your expensive paper. A flimsy smoothing tool will leave bubbles. A bad roller will apply paste unevenly.
Invest in a professional wallpaper toolkit. It should contain a snap-off utility knife (so you have a fresh blade for every cut), a wallpaper smoother, a seam roller, and a good brush or roller for the paste. I always use a laser level to establish my first line—it is the single best tool for ensuring your pattern doesn’t slowly creep downhill as you move around the room. It’s better to spend an extra $100 on quality tools for a perfect finish than to save that money and have to look at flawed seams for the next ten years.
With your planning complete and your toolkit ready, it’s time for the art of application.
This is where the magic begins to take shape. The key to a flawless installation isn’t speed; it’s precision and a methodical approach. Every choice from this point forward will be visible, so we approach it with the focus and care of a couturier crafting a bespoke garment.
Your wallpaper isn’t an island; it’s part of a cohesive design story. Before you choose “the one,” create a physical mood board. Gather a sample of your wallpaper, a swatch of your floor tile, a paint chip for the upper wall, and a photo of your vanity and fixtures. See how they speak to each other. Do they create harmony or chaos? The paint color for the upper wall should be pulled directly from a color within the wallpaper pattern.
Pick one of the less dominant colors in the print for a sophisticated, layered look. This creates a design thread that pulls the entire room together. For instance, if you have a botanical wallpaper with shades of green, cream, and a hint of blush, painting the upper wall in that soft blush tone is a much more interesting choice than simply defaulting to white. It shows a level of design intention that feels incredibly high-end.
This harmony of color and pattern sets the stage, but the right adhesive ensures the performance lasts.
Using the wrong glue is one of the most common—and most disastrous—mistakes. Do not, under any circumstances, use a generic, all-purpose wallpaper paste. It will fail. The humidity in a bathroom will reactivate a standard paste, causing your seams to lift and the paper to bubble. You absolutely must use an adhesive that is specifically labeled for high-humidity areas like bathrooms and kitchens.
Look for a “heavy-duty” or “vinyl-over-vinyl” clear adhesive. Many of these have mildewcides mixed in, which is an essential feature for preventing mold growth behind the paper. My preference is for a clay-based paste for heavy papers like grasscloth and a clear, strippable paste for standard vinyls. When in doubt, always follow the wallpaper manufacturer’s specific recommendation. They’ve tested their product and know what works best. Think of the adhesive as the invisible hero of the project.
With the perfect adhesive in hand, let’s assemble the rest of your toolkit.
We touched on this in the budgeting phase, but it’s worth repeating: your tools are the difference between a project that looks professional and one that screams “I did this myself.” A bespoke suit is defined by its crisp lines and perfect seams; the same is true for wallpaper. The single most important tool is your cutting blade. I use a 9mm snap-off utility knife and I snap off a segment for a fresh, factory-sharp blade before every single major cut. A dull blade doesn’t cut; it tears.
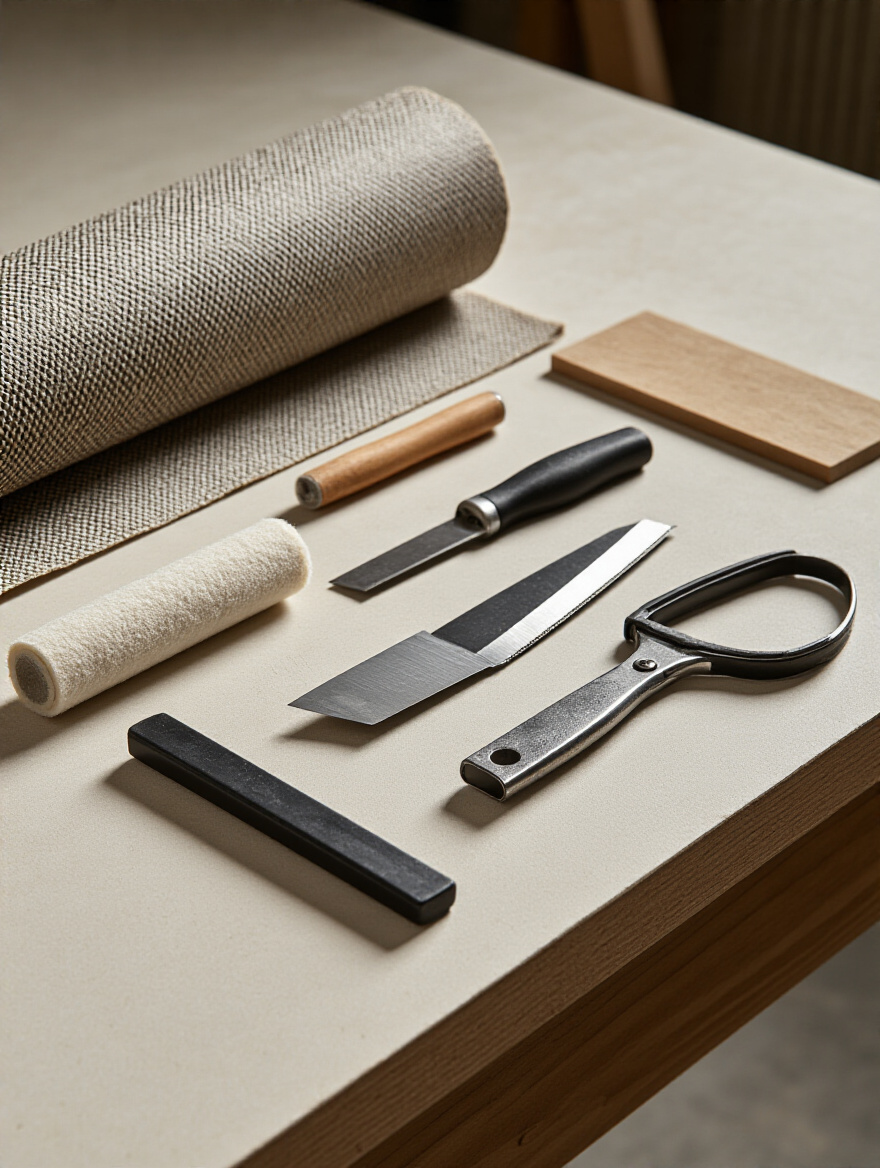
Your essential toolkit should include: a laser level, a high-quality snap-off knife, a smoothing tool (a flexible plastic one is best for most papers), a small seam roller to ensure the edges are perfectly bonded, a measuring tape, a straightedge, and a clean bucket and sponge for wiping away excess paste. Having everything clean and ready before you start prevents panic and sloppy work. A well-organized workspace is the sign of a serious craftsperson.
And the first step in using those tools is preparing your wall with the right foundation.
If I could only give you one piece of advice, it would be this: prime your walls with a wallpaper-specific primer. Please do not mistake paint-and-primer-in-one for what you need here. A wallpaper primer, or “sizer,” is a completely different product. It creates a hard, non-porous surface that allows the wallpaper to “slip” a little as you position it, which is essential for getting your pattern match just right.
Most importantly, it creates a protective barrier. The wallpaper adhesive bonds to the primer, not to the surface of your drywall. This means that years down the road when you decide to change the look, the wallpaper will strip off cleanly, leaving the primer layer behind and your wall perfectly intact. Skipping this step is what causes chunks of drywall to be torn away during removal, creating a costly and time-consuming mess to repair. It is the ultimate act of kindness to your future self.
Now, with our foundation perfectly set, we can finally begin the installation itself.
This is the moment of truth. Every bit of planning and preparation culminates here. Approach this stage calmly and methodically. This is not a race. A beautifully wallpapered room is the sum of many small, precise actions done correctly.
Where you hang your first piece of wallpaper will dictate the success of the entire project. Never, ever start in a corner. I guarantee your corners are not perfectly straight. If you start in a corner, by the time you get to the other side of the wall, your pattern will be noticeably crooked. Instead, you need to find the visual center of the most prominent wall—usually the one behind the vanity or the one you see first when you walk in.
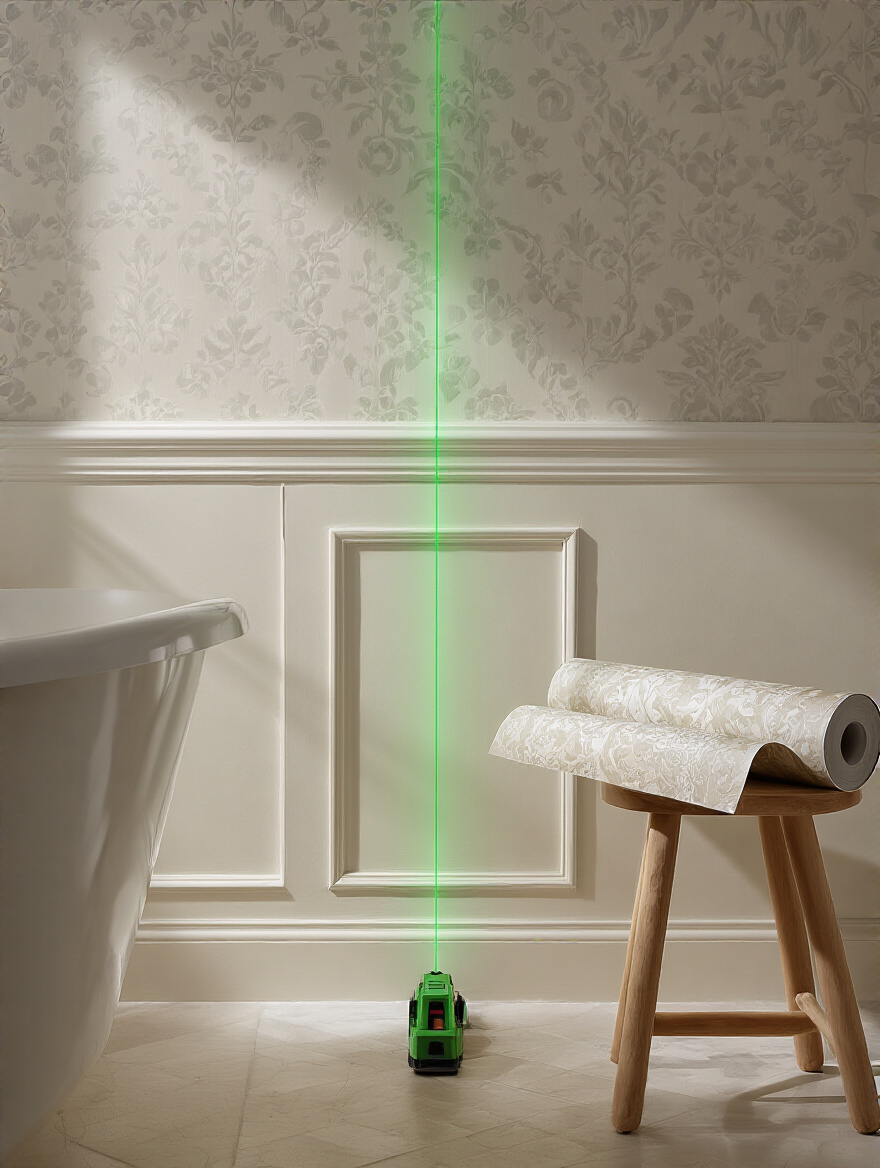
From the center of that focal wall, use your laser level to create a perfectly vertical plumb line. This is your starting guide. Your first strip of wallpaper will be aligned to this laser line, ensuring it is perfectly straight. Every subsequent strip will align to this first one, wrapping the room in a pattern that is level and true. This is the ultimate pro secret. It ensures that any slight imperfections in the room’s construction are hidden, while your wallpaper remains flawless.
With your starting line established, you’ll inevitably encounter obstacles that require precision.
Navigating around outlets, light switches, and plumbing fixtures is where true craftsmanship is revealed. The key is to never cut out the hole for the obstacle beforehand. Hang the wallpaper right over the outlet or pipe, make a few small relief cuts from the center of the obstacle outward, and then gently press the paper against the wall around it.
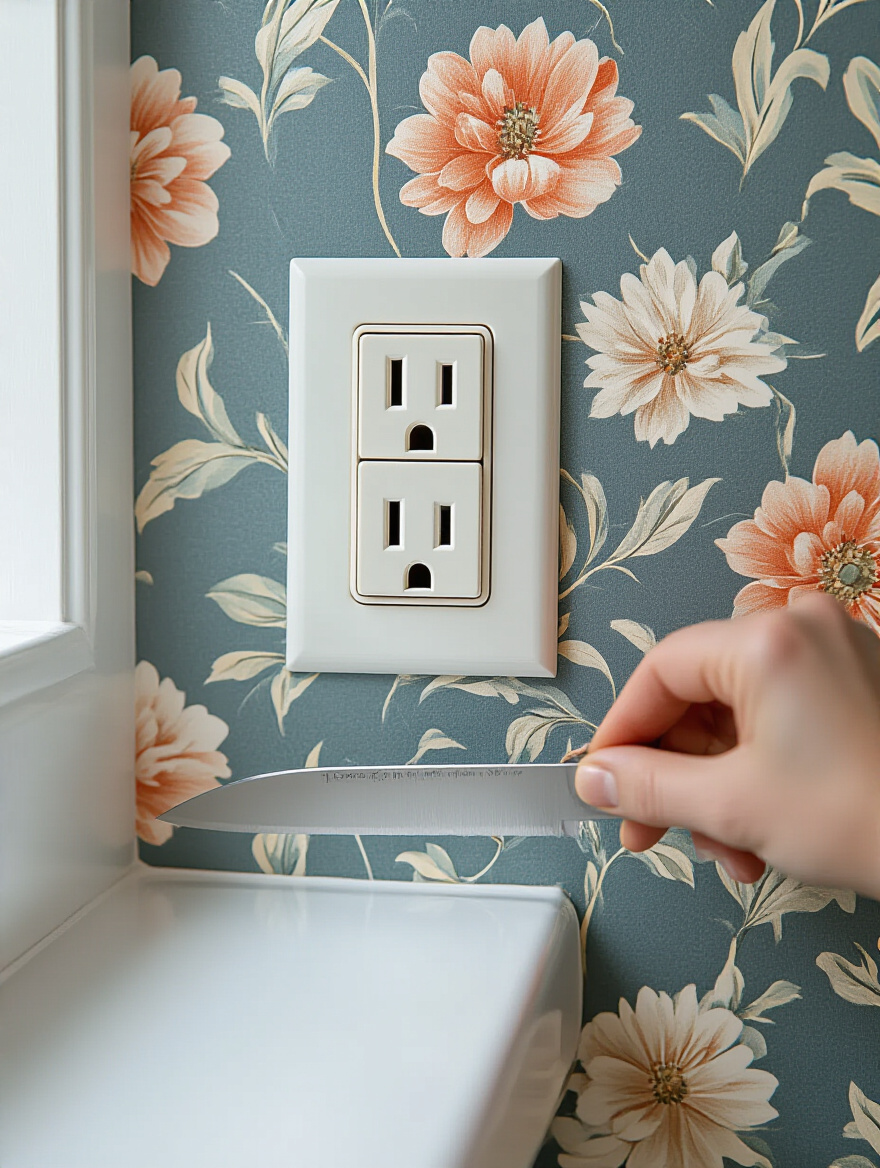
Use your sharp knife to carefully trim away the excess paper, following the shape of the fixture. For an electrical outlet, you’ll be cutting out a small rectangle from the middle. For a pipe, you’ll make a small slit from the nearest edge of the paper to the pipe, wrap the paper around it, and then press the seam flat. Always cut less than you think you need to; you can always trim away a little more, but you can never add paper back. This patient, precise technique is what creates that seamless, built-in look.
After each strip is placed and cut, the final touch is ensuring a perfect surface.
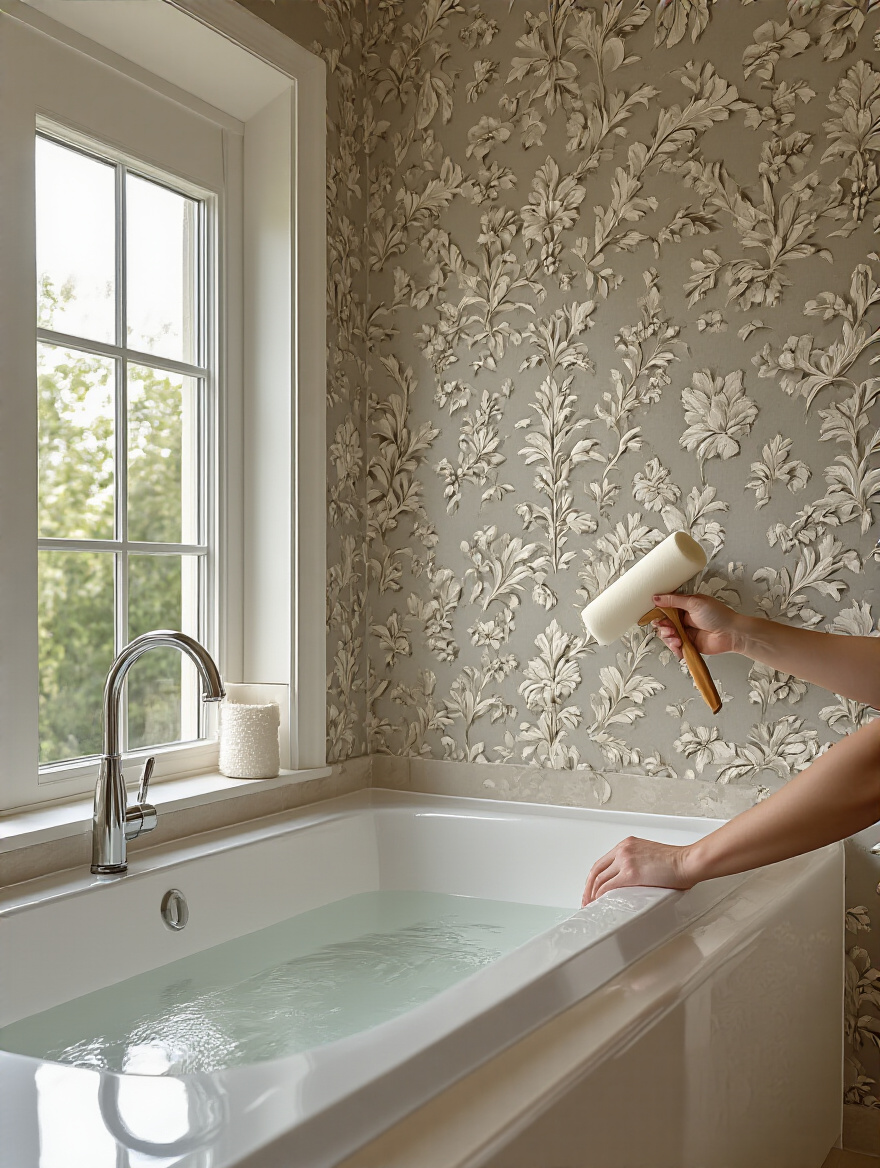
As you hang each strip, you will inevitably trap small pockets of air. Removing these is a delicate art. Work from the center of the strip out toward the edges, using your plastic wallpaper smoother. Use firm, even strokes to push the bubbles out. Don’t press so hard that you stretch the paper, but be systematic.
If you encounter a stubborn bubble, don’t try to force it out. Instead, gently lift the nearest edge of the wallpaper up to the bubble to release the air, then smooth it back down. For a truly tiny bubble that appears after the fact, you can use a pin to prick a minuscule hole in its center and then gently smooth the air out through the hole. Immediately after smoothing each panel, use your seam roller to apply firm pressure along the seams where two strips meet. This ensures a permanent bond and makes the seams virtually invisible.
Once the paper is up, the final step is integrating it into the room’s complete design story.
The wallpaper is on the wall, but our work isn’t done. This is the styling phase, where we layer in the details that make the wallpaper feel like a natural, intentional part of a complete vision. This is how you transform a decorated room into a designed one.
Now is the time to look at your bathroom with a critical eye. Your wallpaper has introduced a new star player, and the supporting cast may need to be updated. Do the towels and shower curtain complement the new colors and pattern? Does the hardware on your vanity clash or harmonize? This is where that mood board you created comes back into play.
Luxury design is holistic. Every element should feel connected. This might mean swapping out your chrome faucet for one in brushed brass to pick up on a metallic detail in the wallpaper. It could be as simple as buying new hand towels in a color pulled from the pattern. These small, thoughtful adjustments are what create a sense of cohesion and make the entire space feel custom-designed.
Beyond accessories, consider how the wallpaper interacts with the other finishes in the room.
While you can certainly paint the upper portion of the wall white, choosing a deliberate, contrasting color is a much more powerful design move. Pull a secondary or tertiary color from the wallpaper pattern and use that for the paint. A deep charcoal, a soft sage green, or a warm terracotta can create a dramatic, immersive experience that feels incredibly chic and intentional.
This technique does more than just add color; it adds depth and can even make the ceilings feel higher. By drawing the eye upward, a contrasting color prevents the half-wall effect from visually compressing the space. It’s a classic trick we use in hotel guest rooms to create an atmosphere of expansive elegance, and it works beautifully in residential bathrooms.
To further elevate this transition, we can introduce an architectural element.
To achieve a truly polished, high-end look, consider adding a piece of decorative trim along the top edge of the wallpaper. This is often called a chair rail or a dado rail. This single piece of molding does three wonderful things: it provides a clean, crisp visual break between the paper and the paint; it adds a layer of architectural detail that makes the room feel more substantial; and it protects the vulnerable top edge of the wallpaper from nicks and peeling.
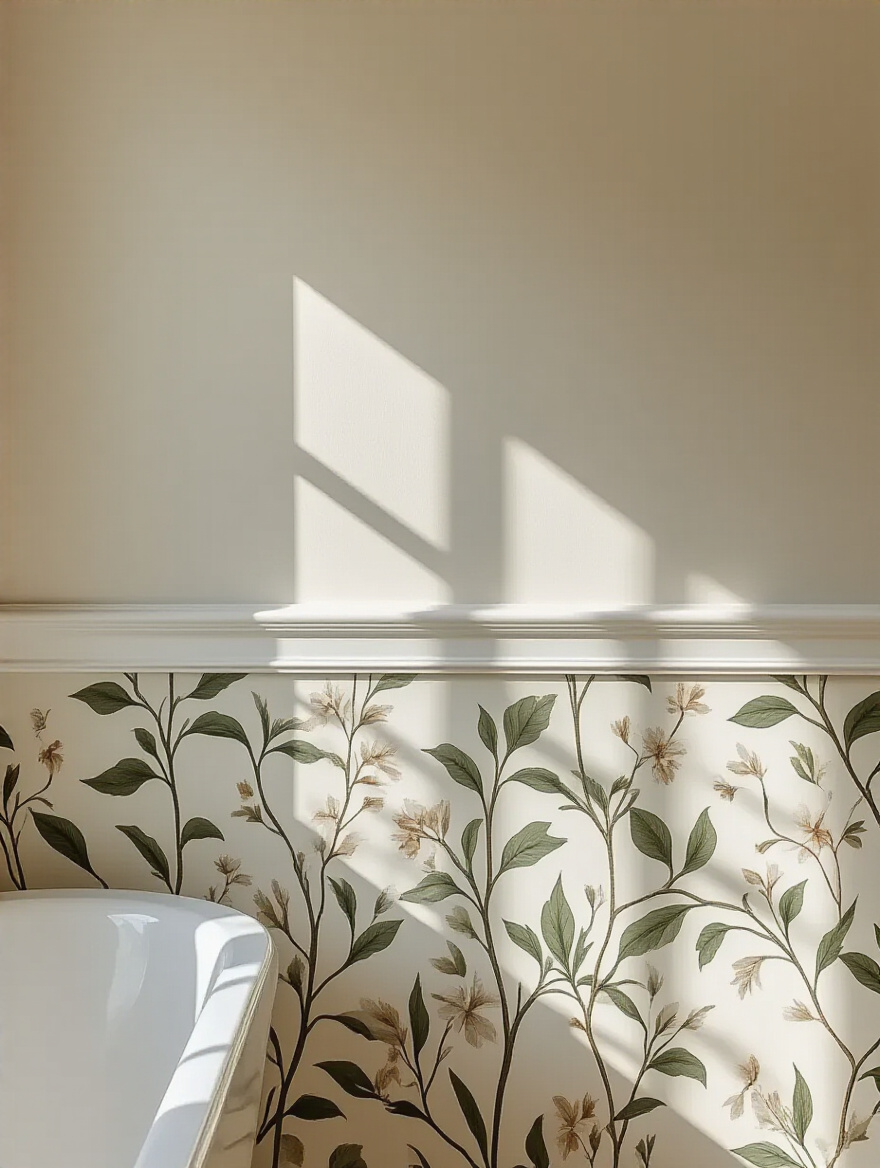
The style of the trim should match the overall aesthetic of your bathroom. A simple, flat piece of molding works well for modern designs, while a more ornate profile suits traditional spaces. Paint the trim to match the upper wall color for a seamless look, or paint it a crisp white to create a sharp, defined border. It’s like putting the perfect frame on a piece of art.
Finally, we need to illuminate our masterpiece correctly.
Lighting is not just for function; it is a design tool. If you have chosen a wallpaper with any kind of texture—like a grasscloth, a flock, or an embossed pattern—your lighting can make it come alive. The technique is called “grazing.” By placing a light source close to the wall, either from a picture light above or sconces on the side, the light washes down the surface at a sharp angle.
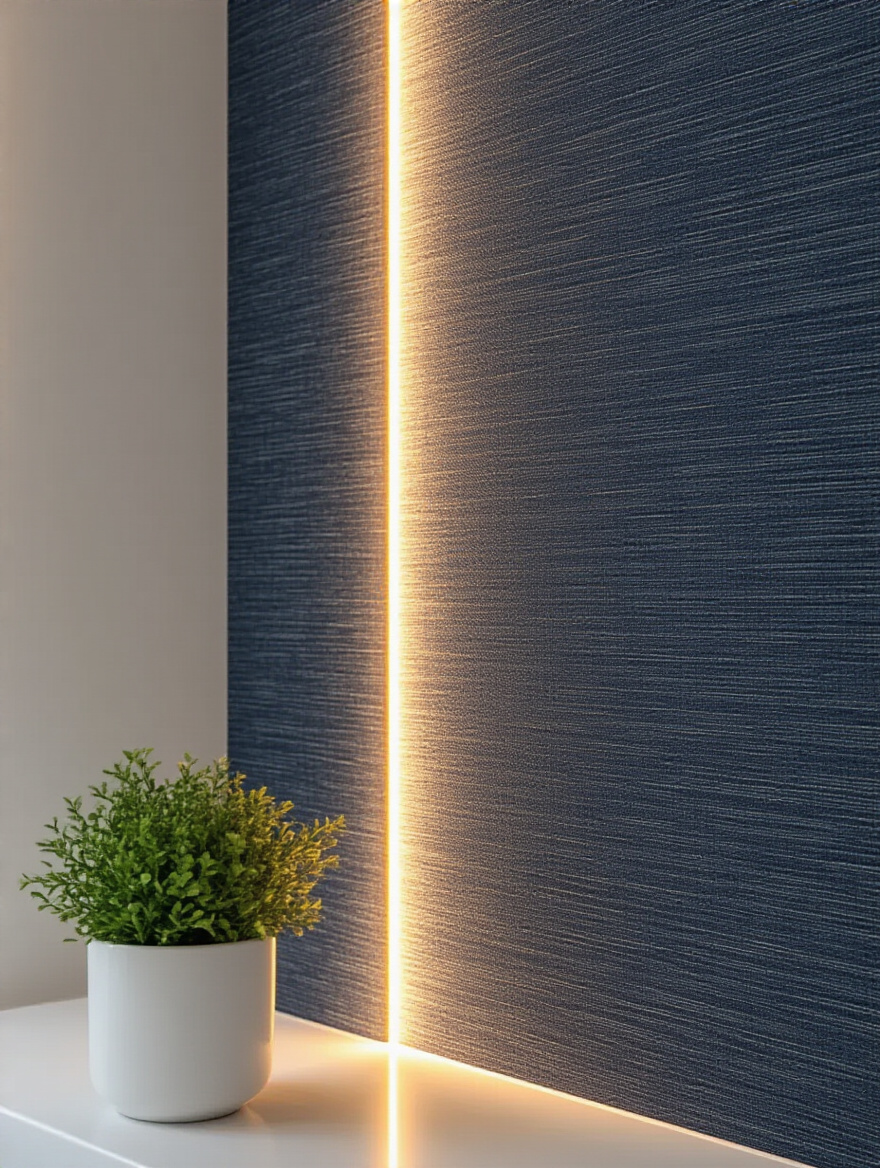
This angle creates tiny shadows that highlight every bit of texture and dimension in the paper, transforming a flat wall into a dynamic surface. This is a go-to trick in luxury hotel and restaurant design to create mood and drama. Even for a flat patterned paper, ensuring the light has a warm color temperature (around 2700K) will enrich the colors and make the space feel inviting and sophisticated.
With the primary elements in place, we focus on the final layers of refinement.
We’re now in the final phase of styling, where we add the small, curated touches that infuse the space with personality. These details transform the room from a beautifully decorated space into a personal sanctuary that tells your unique story.
Now that your walls are a work of art, treat the surfaces in your bathroom—the vanity counter, a floating shelf—as galleries for small, curated collections. A vignette is simply a small grouping of objects that tell a story. Instead of a random soap dispenser and toothbrush holder, think about creating a cohesive moment. On a small tray, group a beautiful soap bottle, a small vase with a single stem, and a scented candle.
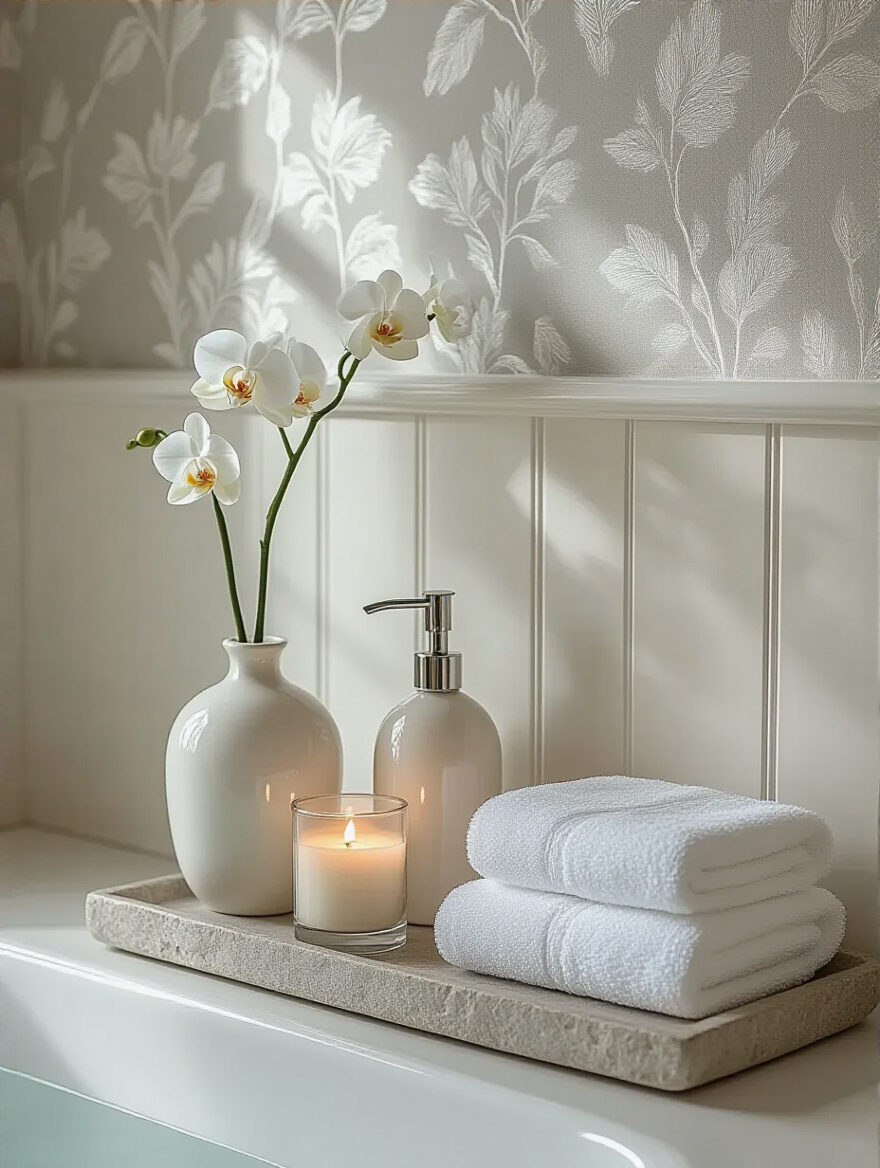
The key is to follow the Rule of Threes (grouping items in odd numbers is visually more appealing) and to vary the height, texture, and shape of the objects. The materials should complement the wallpaper and the room’s overall theme. A little vignette adds a layer of personality and polish that feels incredibly thoughtful and makes the space feel truly finished.
But before you finalize these choices, it’s critical to test everything in the actual space.
This is more of a strategic tip, but it belongs in the styling section because it’s about ensuring visual harmony before you commit. I never, ever approve a wallpaper for a project without first getting a large sample and taping it to the wall in the actual room for at least 48 hours. The way a color and pattern look on a computer screen or in a showroom is completely different from how it will look in your bathroom with its unique natural and artificial light.
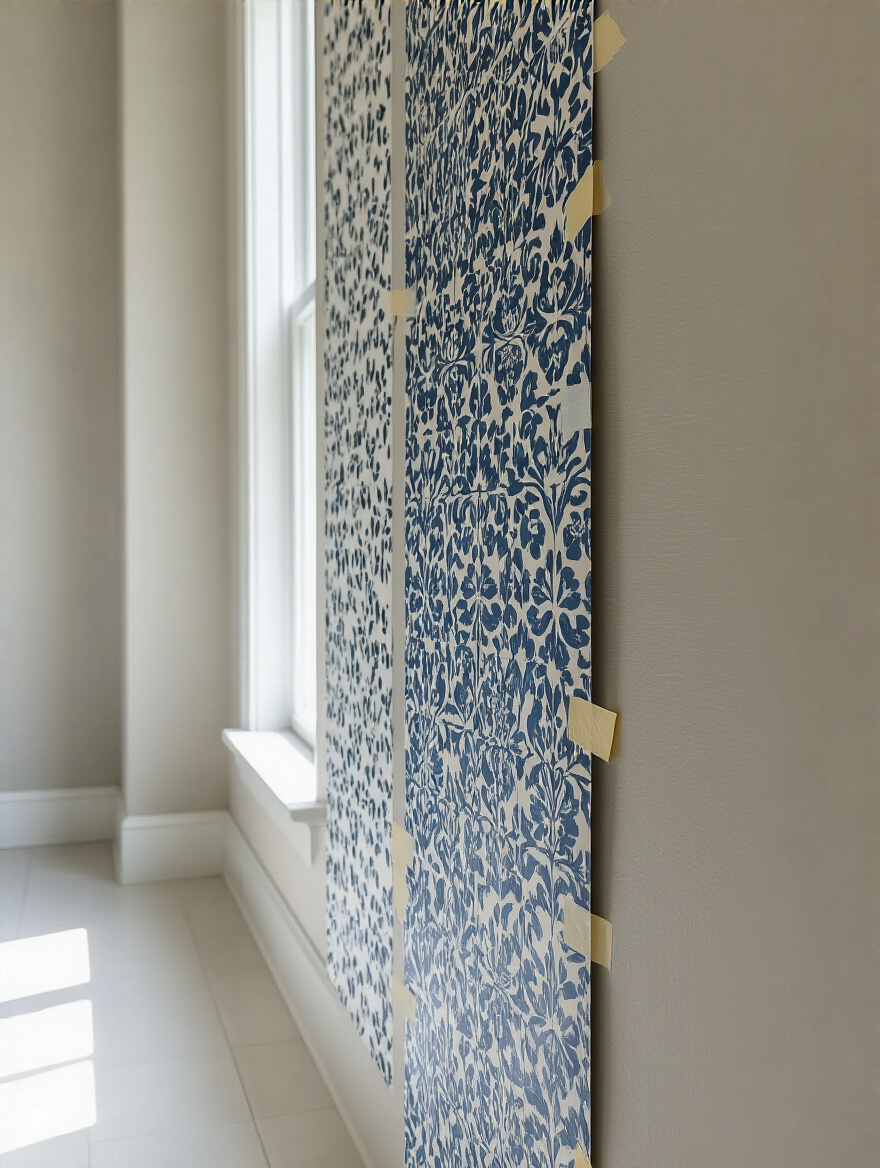
Live with the sample. Look at it in the morning light, in the afternoon, and at night with the lights on. Does it still have the color and mood you fell in love with? Does it complement the undertones in your tile? This single step has saved my clients from more costly design mistakes than any other. It is the most important final check you can do to ensure the result is one you’ll love for years.
Once your design is complete, the final step is ensuring it lasts.
A luxury finish is one that endures. The final piece of the puzzle is putting practices in place to protect your beautiful new walls and knowing how to handle any small issues that may arise. This foresight ensures your investment continues to bring you joy every single day.
For bathrooms that get very heavy use or for wallpapers that aren’t solid vinyl, a final protective coat is an excellent insurance policy. A product called Decorator’s Varnish, which comes in various sheens from matte to gloss, can be rolled on in a very thin layer over the top of the wallpaper after the adhesive has fully cured. It provides a clear, scrubbable, water-resistant barrier that is virtually invisible.
This is especially critical around the sink area, where splashing is inevitable. I always recommend a matte finish, as it won’t alter the look of the paper. This extra step provides peace of mind and can add years to the life of your installation, protecting it from moisture, stains, and scuffs. It’s the final, invisible layer of armor for your design.
This seal also makes your new care routine much simpler.
Maintaining your wallpaper is simple, but it must be done gently. For regular upkeep, dusting with a soft, dry microfiber cloth is usually all that’s needed. For any smudges or splashes, use a slightly damp sponge with a tiny drop of mild dish soap. Test it in an inconspicuous area first, and never, ever scrub or use abrasive cleaners.
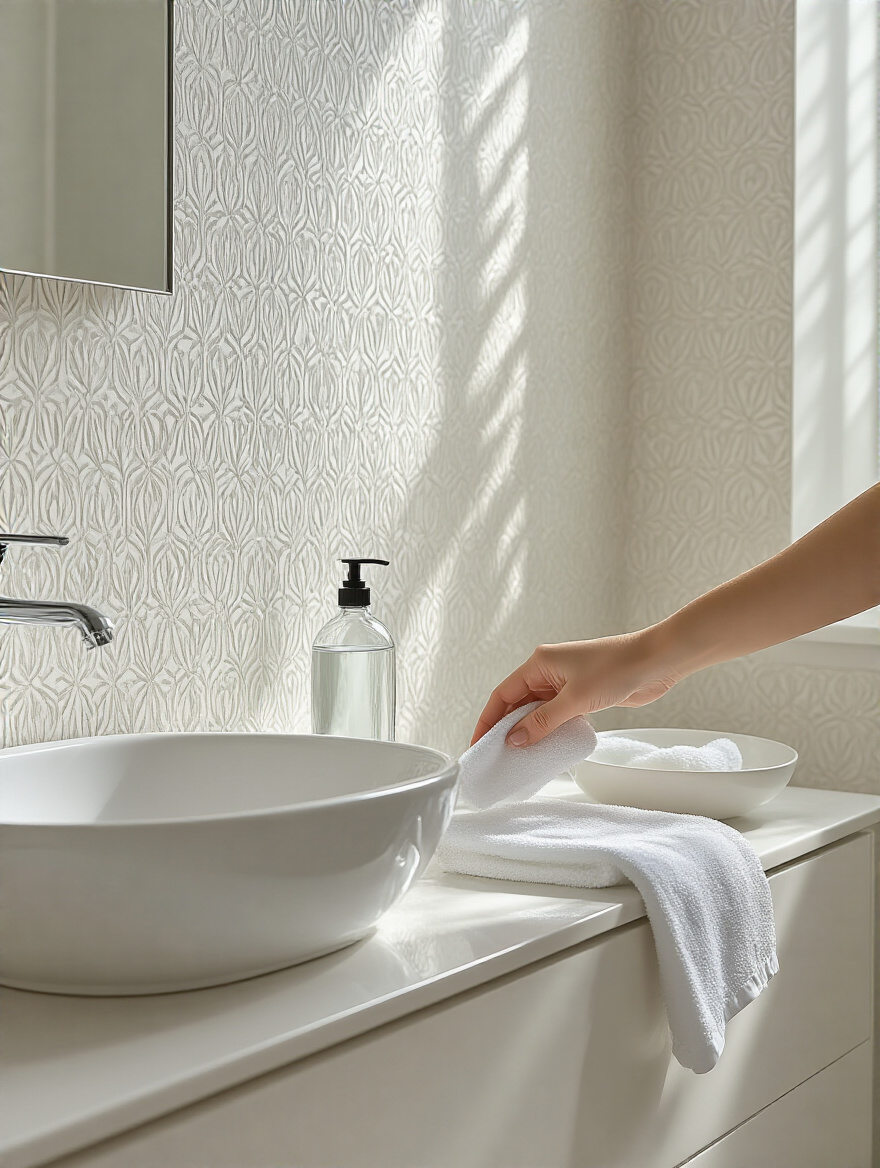
The key is to blot, not rub. Immediately wipe away any splashes of water to prevent them from sitting on a seam and potentially weakening the adhesive over time. A consistent, gentle cleaning routine will keep your wallpaper looking as fresh and vibrant as the day it was installed.
Of course, even with perfect planning, small issues can arise.
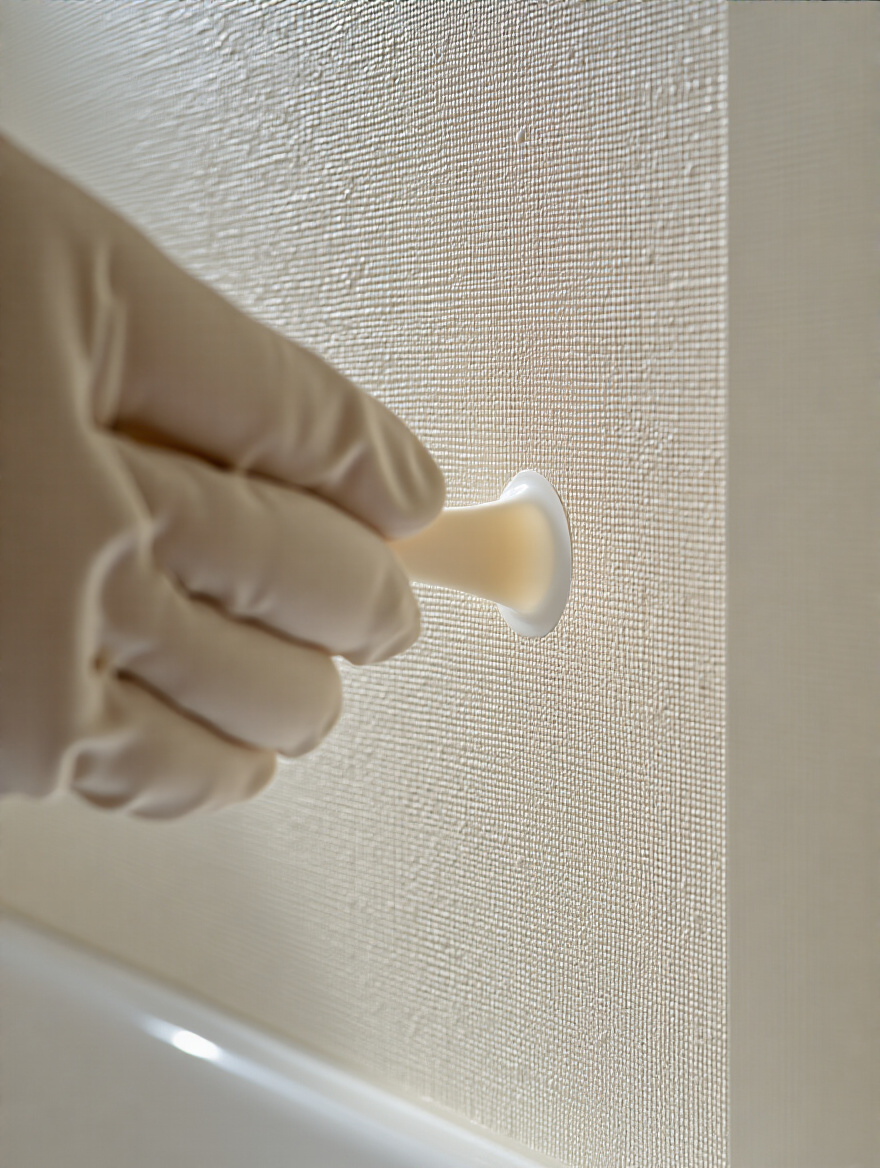
Even the pros can run into issues. If you notice a seam begin to lift slightly after a few weeks, don’t panic. This is easily fixed. You can buy a small tube of seam repair adhesive. Squeeze a tiny amount under the lifted edge, press it back into place with your seam roller, and wipe away any excess with a damp sponge.
If a small bubble appears that you missed during installation, use the pinprick method we discussed earlier. The key to troubleshooting is to address small problems immediately before they become big ones. A proactive approach to maintenance is the hallmark of a well-cared-for home.
Finally, let’s think about the future.
Good design always considers the future. By choosing a modern “strippable” non-woven wallpaper and, most importantly, by using a proper wallpaper primer, you have already planned for easy removal. When it’s time for a change, the paper will peel off in full sheets, leaving your wall almost perfectly intact.
This foresight is what gives you design freedom. It means you’re not locked into this look forever. It allows your home to evolve with your tastes. Choosing a high-quality, removable product from the start is the ultimate luxury—it gives you the ability to change your mind beautifully and without consequence.
There you have it—the insider’s guide to creating a bathroom half-wall that truly feels like a custom piece of design. We’ve moved beyond just a simple DIY project and into the realm of thoughtful, intentional creation. By focusing on a foundation of proper planning, using quality materials, and executing with precision, you can create a space that has the polish and personality of a luxury boutique hotel. This isn’t just about hanging paper on a wall; it’s about layering texture, color, and pattern to build an atmosphere.
The beauty of a half-wall treatment is its high-impact, lower-commitment nature. It’s a design feature powerful enough to redefine a room without overwhelming it. So choose a pattern that makes your heart sing, gather your tools, and trust in the process. You now have the knowledge to transform a purely functional room into a small, personal sanctuary—a space that delights you every time you walk in. Your perfect bathroom is waiting.