Physical Address
304 North Cardinal St.
Dorchester Center, MA 02124
Physical Address
304 North Cardinal St.
Dorchester Center, MA 02124
Master your dining room chandeliers with 23 game-changing tips! Learn to choose, style, and maintain the perfect fixture for a healthy, beautiful, and inspiring home.
Can we talk about why so many people get dining room lighting completely wrong? It’s one of my biggest pet peeves. Picture this: you’ve just wrapped up a tough workout, you’ve prepped a beautiful, nourishing meal full of color and whole foods, and you sit down to enjoy it… under a light that feels like a hospital cafeteria. It’s harsh, it’s glaring, and it kills the entire vibe. All that effort to take care of your body, and the environment is working against you. It’s like trying to find your zen in the middle of a heavy metal concert. It just doesn’t work.
What people don’t get is that your dining space is part of your wellness ecosystem. It’s where you refuel, connect, and practice mindful eating. The right light is just as critical as the right ingredients. It can make a simple meal feel like a five-star act of self-care. Forget the corporate speak and the overwhelming design jargon. I’m going to break it down for you, trainer-style. We’ll cover the non-negotiables, the common mistakes that are like bad form on a deadlift, and the pro moves that will make your space feel amazing. This is the stuff I wish I knew when I first started blending my passion for design with fitness. Let’s build a space that energizes and inspires you, starting from the top down.
Alright, first things first. We have to build a strong foundation. In fitness, this is your core work, your mobility, the stuff that isn’t glamorous but prevents injury and makes everything else possible. It’s the same with design. Getting the size and placement right from the start is non-negotiable. Get this wrong, and no matter how beautiful the fixture is, it will feel awkward and out of place, constantly throwing you off balance.
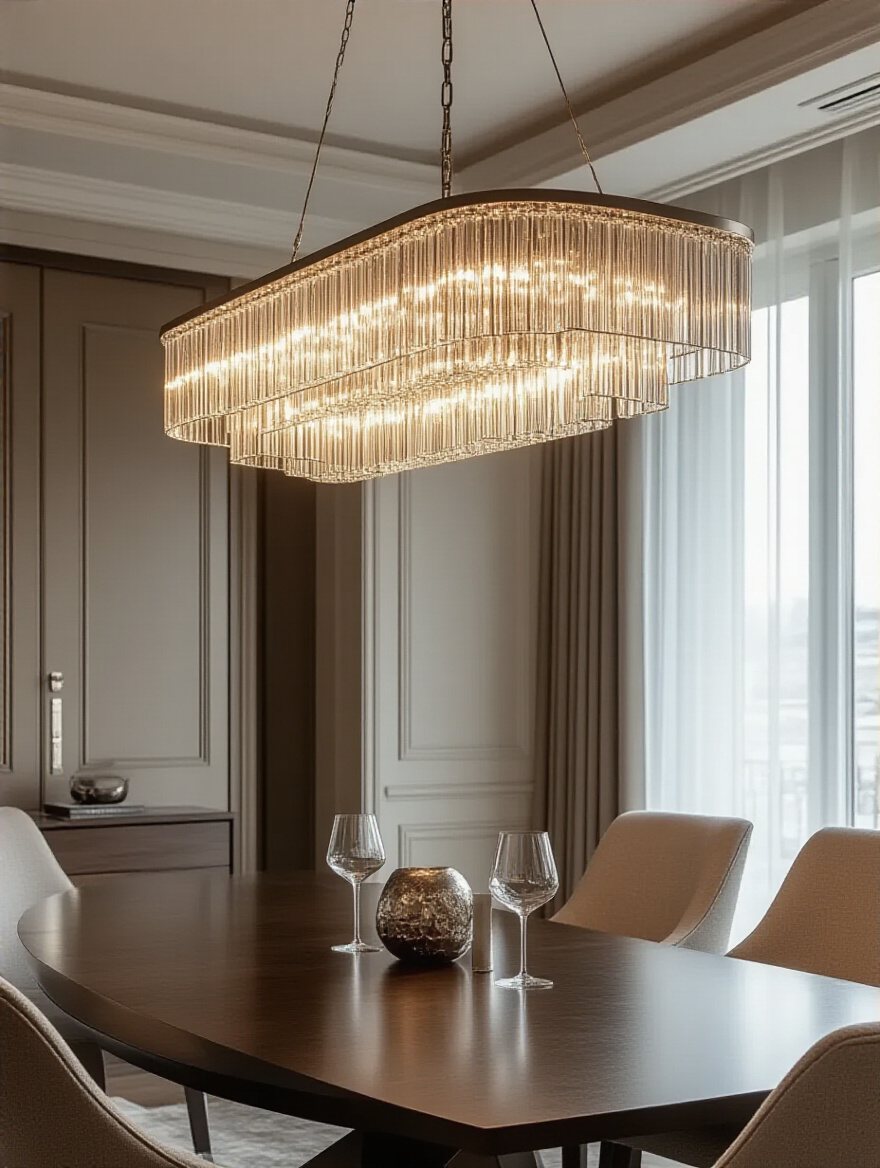
So you’re asking how big the chandelier should be. Easy. This is a simple formula, and you have to nail it. Think of it like calculating your macros—it’s specific and sets you up for success. You don’t want a light that’s so big it feels like it’s going to crash down on your salad, or one so small it looks like a lonely little tea light floating in space. Visual balance is key to creating a calm, focused environment for your meals.
The rule is simple and it works every time: measure the width of your dining table in inches, then subtract 12. That number is the maximum diameter your chandelier should be. For example, if your table is 48 inches wide, you’re looking for a chandelier that’s 36 inches wide or a little less. This leaves a 6-inch buffer on each side, so no one’s bumping their head or getting an eyeful of bulb when they sit down. It’s practical, and it just looks right.
Once you know this simple rule, you’ll start to see where everyone else goes wrong. Now, let’s talk about how high to hang that bad boy.
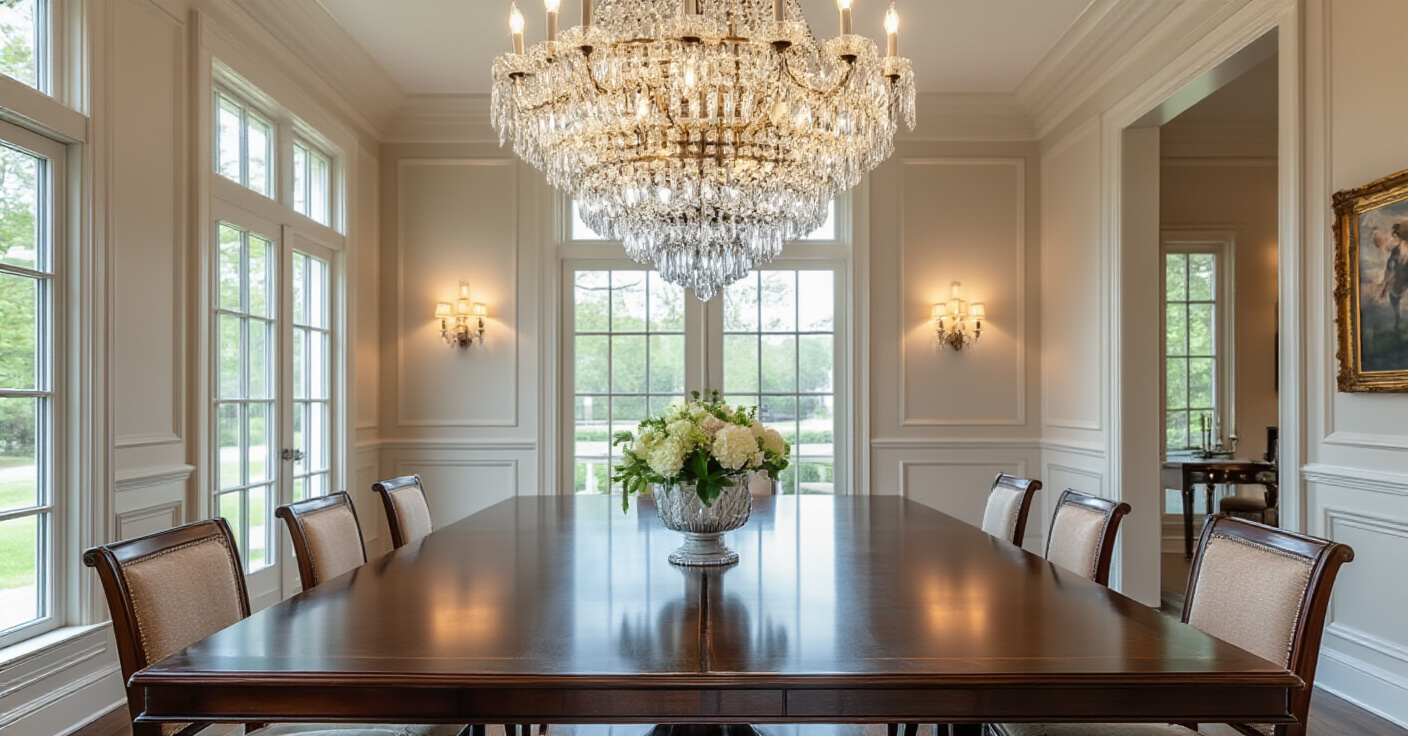
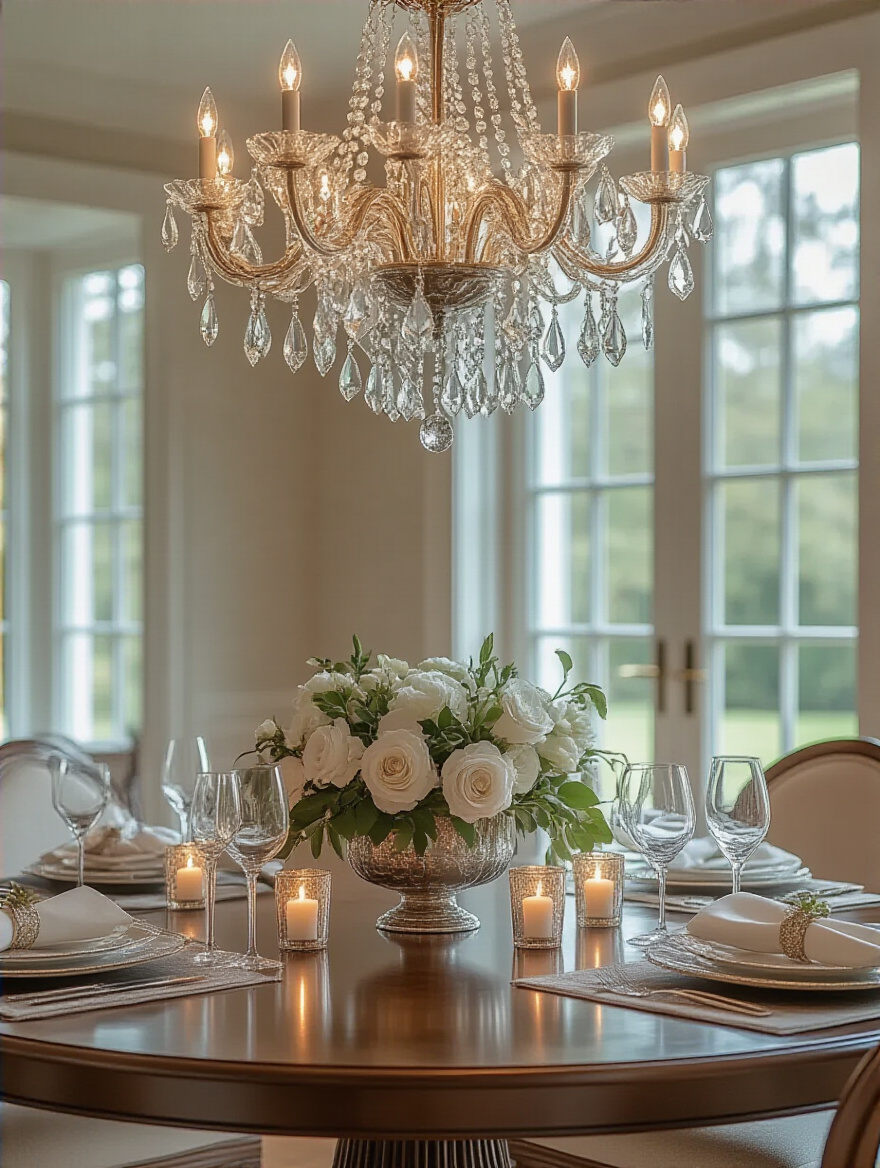
Okay, next question: how low should it hang? This is just as critical as the diameter. Too high, and you lose all that warm, intimate glow over your food; it just becomes another generic ceiling light. Too low, and you can’t see the person you’re talking to. It becomes a barrier, and mealtimes are about connection. The goal here is to create an intimate pool of light that makes the space feel cozy and focused.
Here’s your starting point: the bottom of the chandelier should hang between 30 and 36 inches above the surface of your table. This is the sweet spot for a standard 8-foot ceiling. Now, if you’ve got higher ceilings, you need to adjust. For every extra foot of ceiling height, add another 3 inches to that hanging distance. So for a 10-foot ceiling, you’re looking at 36 to 42 inches above the table. This keeps the whole room feeling balanced and proportional.
So you’ve got the width and the height down. But before you buy, we need to make sure the fixture actually fits the scale of the entire room, not just the table.
You’re thinking, “Wait, didn’t we just cover this?” Not exactly. We sized the light for the table, but now we need to make sure it doesn’t look ridiculous in the room. I once had a client who followed the table rule perfectly, but their dining area was part of a massive open-concept space with 14-foot ceilings. The technically “correct” chandelier looked like a lost button in a gymnasium. You have to consider the whole training ground.
There’s another simple math trick for this. Add the length and width of your room together in feet. That sum, in inches, is a great starting point for your chandelier’s diameter. So, a 10-by-12-foot room (22 feet total) calls for a chandelier around 22 inches wide. You use this number along with the table-sizing rule to find the perfect fixture. It’s about finding the balance point, just like in a yoga pose. A delicate, airy design might let you go a bit larger, while a heavy, solid one might need to be smaller.
Now that we’ve got the technical specs dialed in, we can finally talk about the fun part: making sure it actually looks good with your other stuff.
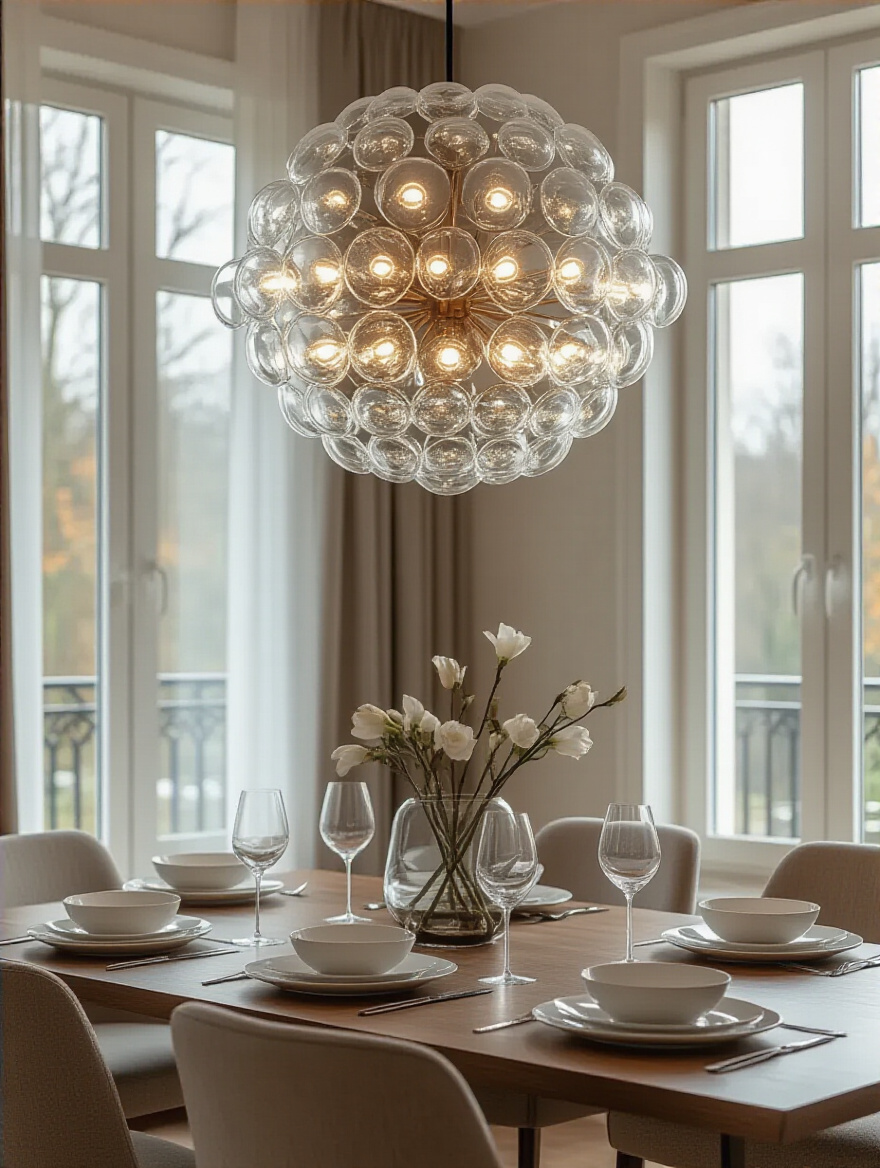
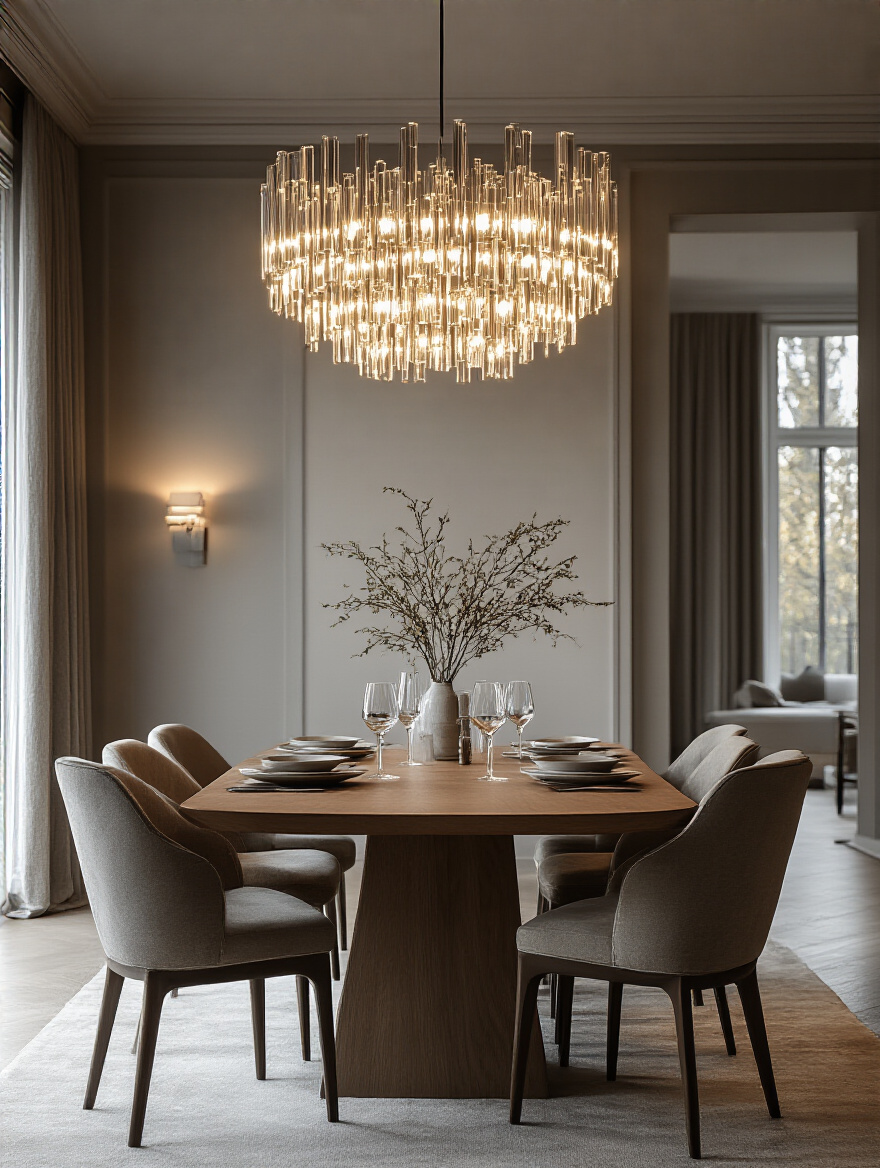
Alright, let’s talk style. This is where your personality comes in. A chandelier isn’t just a light; it’s the centerpiece, the statement piece. You wouldn’t wear running shoes with a tuxedo, right? The same logic applies here. Your chandelier needs to feel like it belongs in the room, complementing the furniture and decor you already have. Getting this right creates harmony and makes the space feel complete and intentional.
Don’t get paralyzed by this. Start by just looking around your room. What’s the vibe? Is it modern and clean? Rustic and cozy? Traditional and formal? Look at the materials—do you have a lot of dark wood, black metal, or polished chrome? Find a chandelier that picks up on at least one of those elements. If you have a rustic farmhouse table, an industrial-style iron chandelier or one with wood accents will look incredible. If your space is super minimalist, a sleek, sculptural fixture will feel right at home. The goal is connection, not a perfect match.
Think of it like building a workout—you want variety, but it all needs to serve a common goal. Now, let’s get into some of the other crucial planning steps that people almost always forget.
We’re still in the foundation-building phase. These next couple of steps are what separate the amateurs from the pros. It’s about thinking beyond just how the fixture looks and considering how it actually functions as a piece of equipment in your home. This is where you future-proof your design and make sure it truly serves your lifestyle.
Before you hit “buy,” you have to ask yourself a critical question: “What do I actually do in this room?” Because a dining room is rarely just for dining. Is it where your kids do their homework? Is it your WFH spot during the day? Is it where you host lively dinner parties or quiet, intimate meals? Each of these activities requires a different kind of light. A bright, focused light is great for homework, but a killer for a romantic dinner.
So, audit your needs. You need to create layered lighting. Your chandelier is the star, the main event, but it can’t do all the work alone. It provides the ambient, mood-setting light. You’ll probably still need other sources, like recessed lights for general brightness or a lamp on a buffet for a softer glow. And here’s the most important piece of advice I can give you: put your chandelier on a dimmer switch. It’s a non-negotiable. It’s the single easiest way to control the energy of the room, turning it from a bright workspace to a relaxing sanctuary with the slide of a button.
Getting the mood right is huge, but we also have to make sure you don’t burn the house down. Let’s talk about the electrical side of things.
Okay, stay with me, because this part is serious. Mismatching your chandelier with your electrical system is like loading 400 pounds onto a barbell rated for 200. It’s a disaster waiting to happen. You have to make sure your circuit can handle the wattage of your new light, especially if it has a dozen bulbs. Overloading a circuit is a major fire hazard.
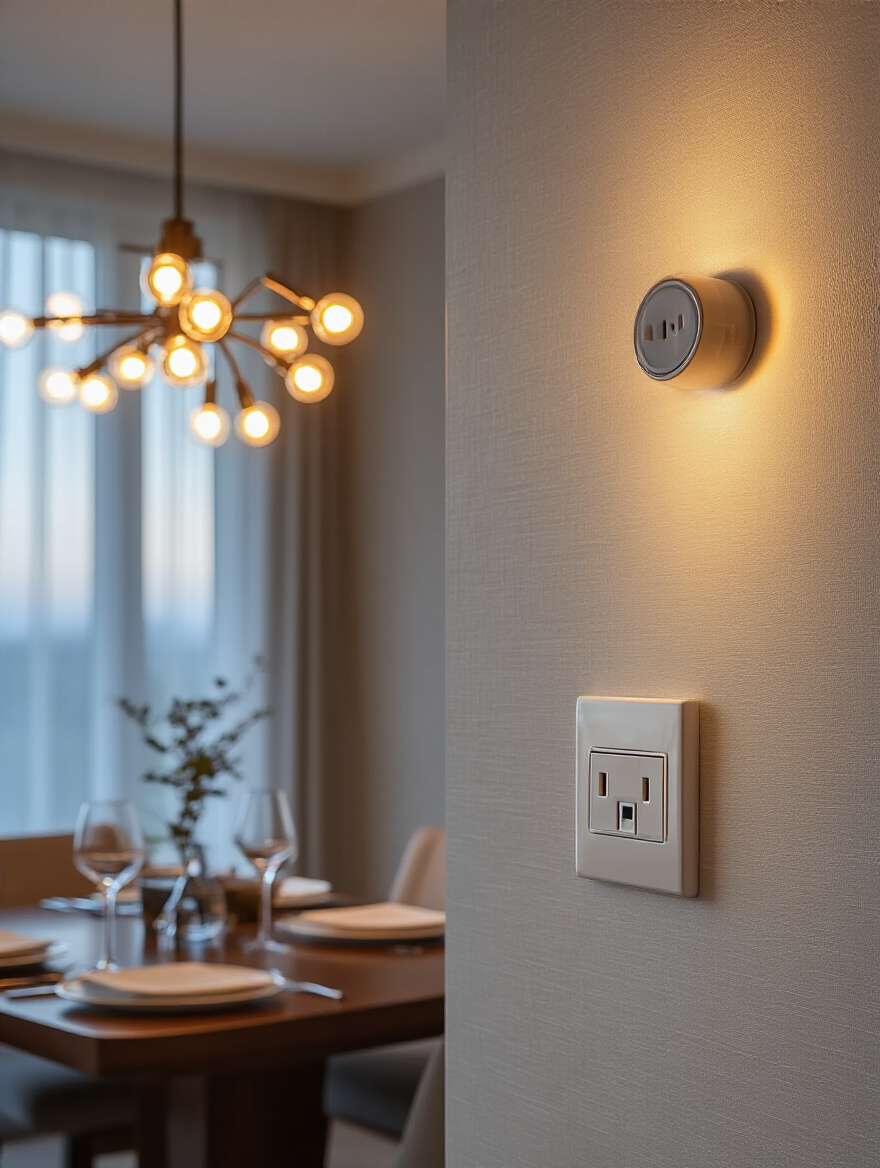
Here’s the shortcut: find the total wattage of your chandelier (add up the max watts for every bulb). Your dimmer switch needs to be rated for a higher wattage than that total. And—this is the BS part most people don’t know—not all dimmers work with all bulbs! LED bulbs are amazing and energy-efficient, but they often require a special LED-compatible dimmer (usually labeled CL or ELV). If you use a standard dimmer, your expensive new LED bulbs will flicker, buzz, and die a quick death. I learned that the hard way after a client called me frustrated that his “relaxing” dining room sounded like it was being attacked by a swarm of angry bees. We swapped the dimmer, and the problem vanished.
Don’t guess on this. If you’re unsure, this is the one time I’ll tell you to absolutely call a pro. Safety first, always.
Now we’re moving from planning to action. We’re going to pick the right equipment for the job and make sure our form is perfect during the installation. This is where your vision starts to become a reality, and paying attention to the details will make all the difference in the final result.
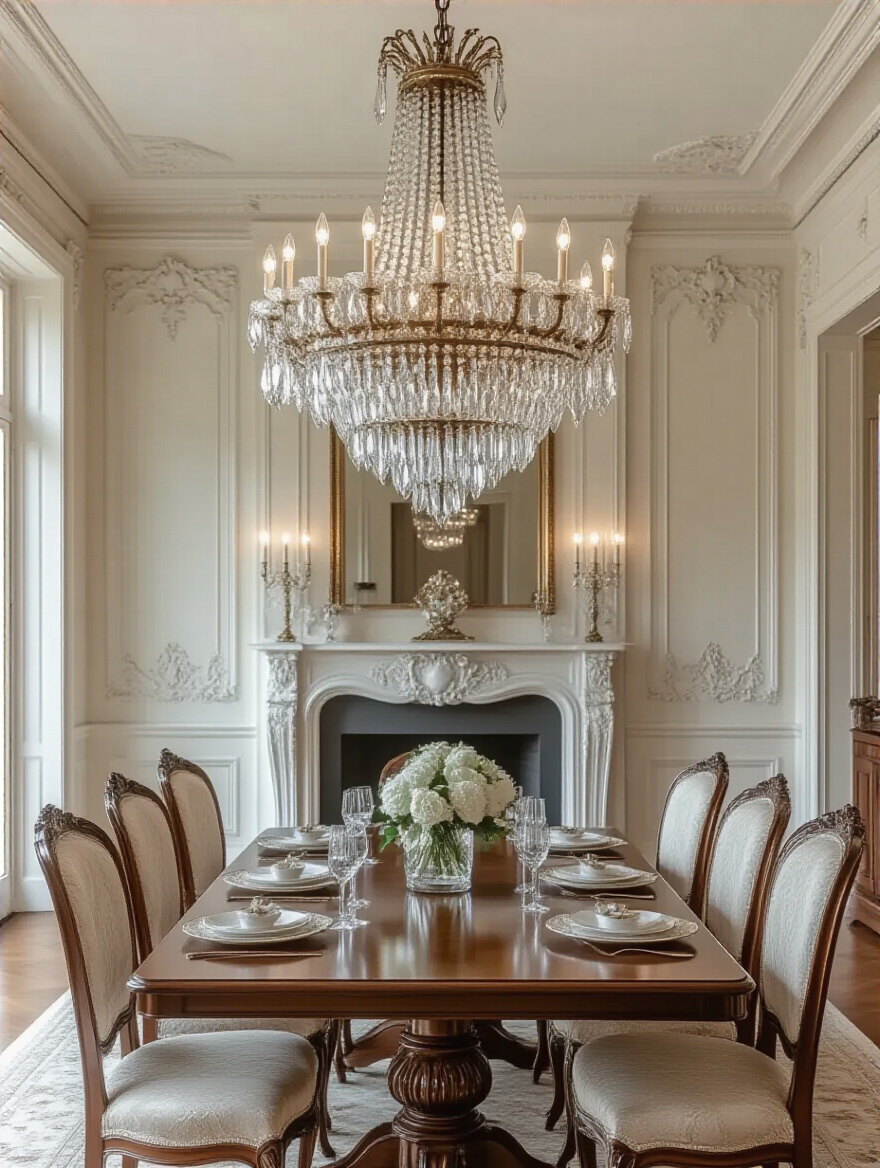
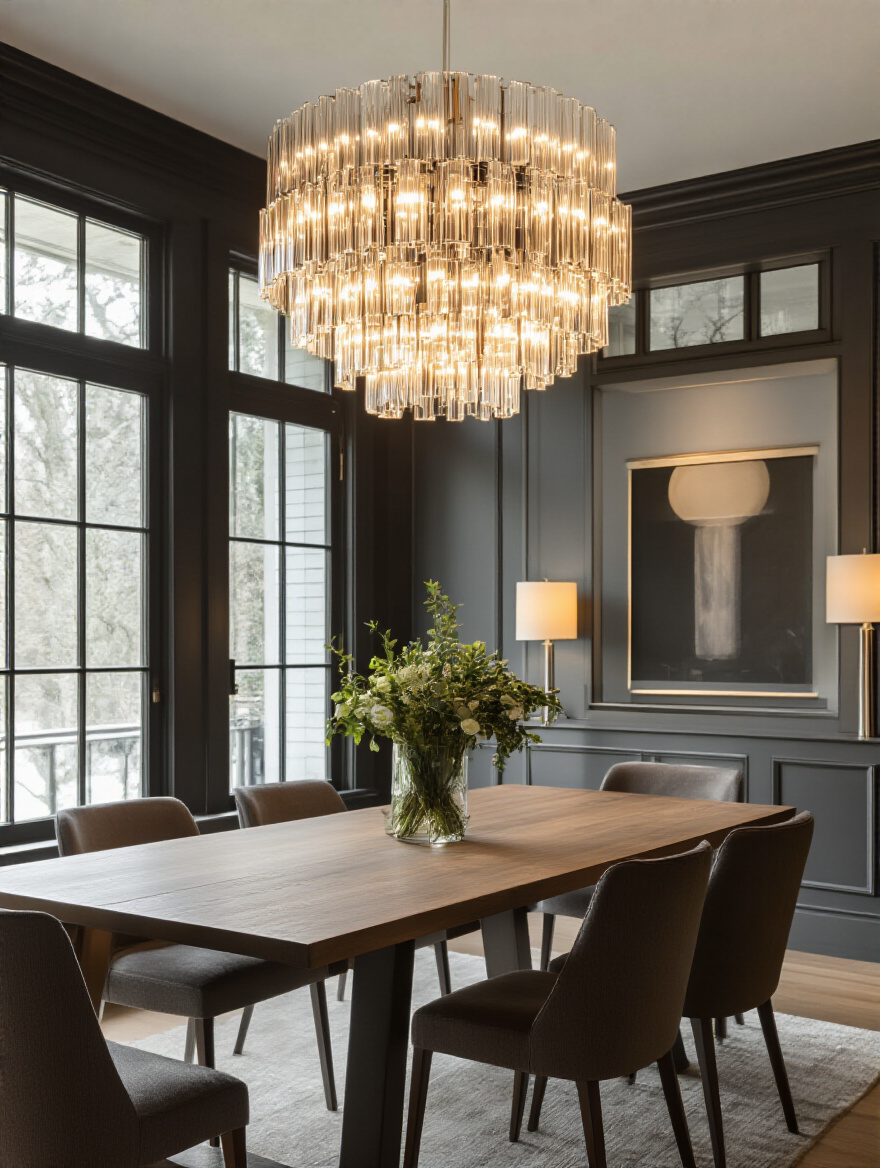
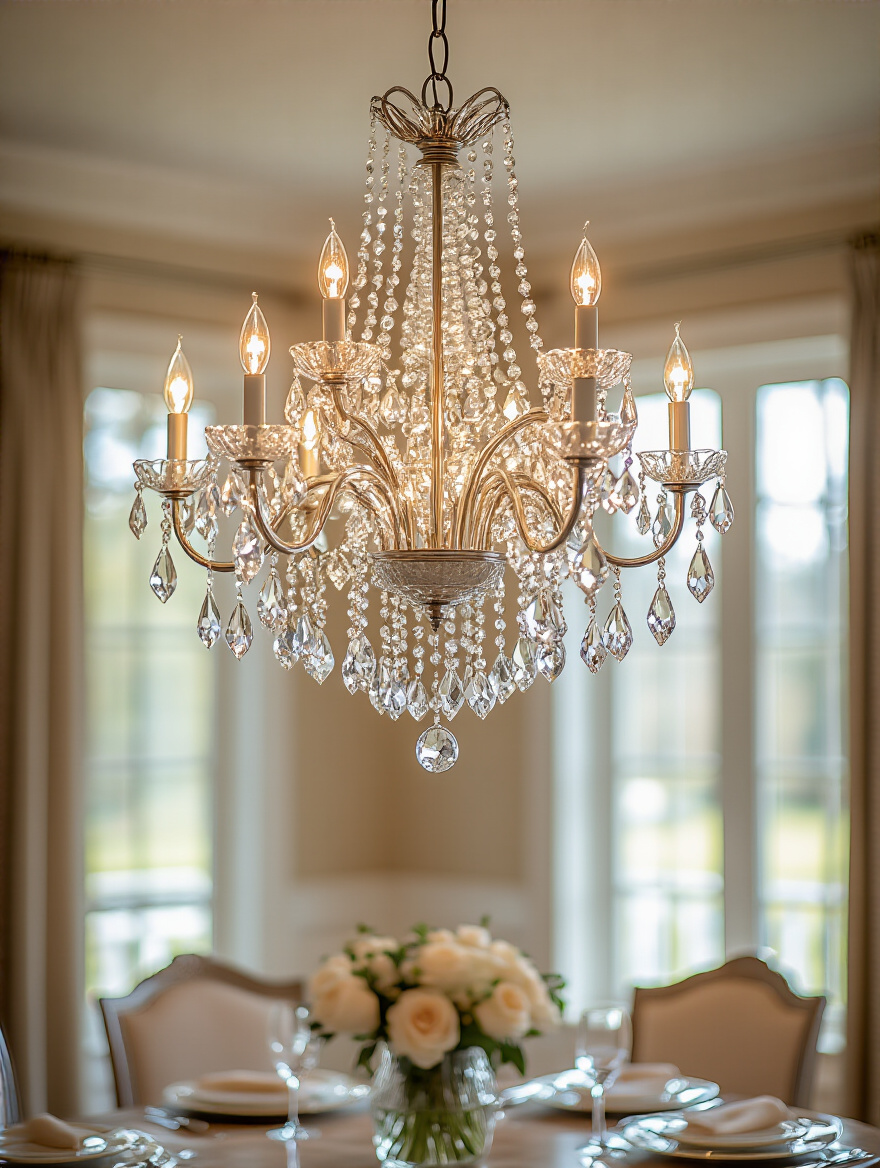
The material and finish of your chandelier are what give it its character. It’s not just about the shape; it’s about the texture and how it plays with light. A polished brass fixture will give off a warm, golden glow, while a matte black one will feel modern and graphic. A crystal chandelier will refract light into a thousand rainbows, creating energy and movement, while a beaded or wood one will feel more grounded and organic.
Think about your lifestyle here. A delicate crystal chandelier might not be the best choice if you have kids who are prone to throwing things. Forged iron or solid brass are workhorses—they can take a beating and still look amazing. Also, consider the maintenance. That incredible crystal fixture will look dull and sad if you don’t commit to cleaning it. A simple metal one might just need a quick dusting. There’s no right or wrong answer, but be realistic about what you’re signing up for.
Once you’ve settled on a material, you need to power it up. Let’s get into the heart of the light: the bulbs.
Bulbs are the engine of your chandelier, and you’ve got to get them right. This isn’t just about screwing something in. The type of bulb you choose affects the color of the light, the energy bill, and even the safety of the fixture itself. The biggest mistake people make is thinking wattage equals brightness. It doesn’t, not anymore. Wattage is how much energy a bulb uses. Lumens are how bright it is. With LEDs, you can get a ton of lumens with very few watts.

For a dining room, you want a warm, inviting light. Look for a color temperature between 2700K and 3000K. Anything higher will start to feel sterile and blue, like an office. And I’ll say it again: buy dimmable bulbs! As for safety, always check the fixture for a sticker that says the maximum wattage allowed per socket. Never, ever exceed that, even with LEDs. It’s a fire risk, plain and simple.
We’ve got the fixture and the bulbs. Now let’s make sure it hangs just right.
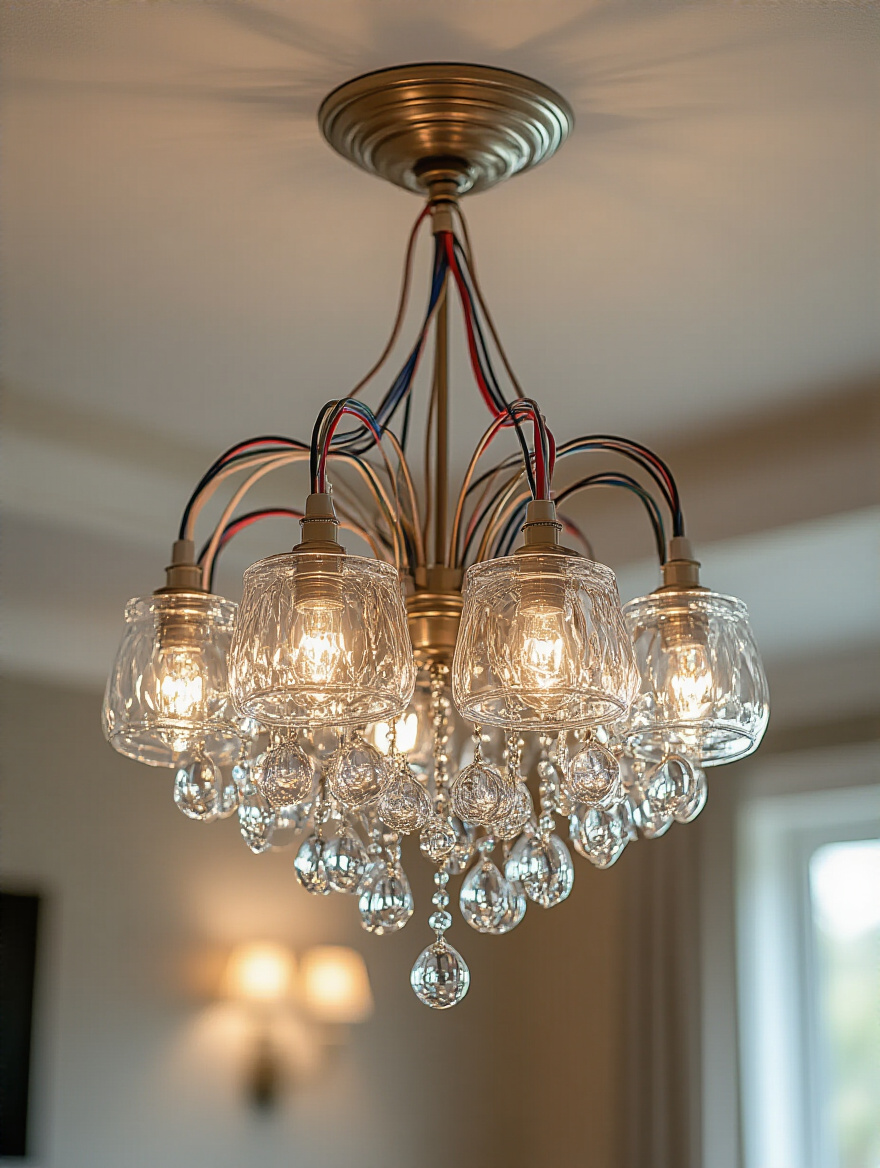
Most people just use the chain that comes in the box. That’s a rookie mistake. The chain length is what allows you to dial in that perfect 30-to-36-inch height above your table we talked about. You’ll almost always need to have an electrician shorten it, so make sure it’s adjustable. And don’t just think about the chain—look up at the ceiling. That little plate that covers the electrical box is called a canopy. The standard one that comes with most fixtures is usually a cheap, ugly piece of plastic.
This is a pro move: upgrade the canopy. For just a few bucks, you can get a beautiful metal one that matches your fixture’s finish. Or, for a truly high-end look, install a ceiling medallion. It’s a decorative molding that goes around the canopy, and it makes the chandelier feel like a grand, intentional piece of architecture instead of something that was just stuck on the ceiling. It’s one of those little details that elevates the entire space.
Attention to detail is key, and the biggest detail of all is making sure this thing is installed safely.
Listen to me on this one. Unless you are 100% confident in your electrical skills, hire an electrician. I’m a pretty handy guy, but for heavy chandeliers, I always call in a pro. Why? Because a standard electrical box in your ceiling is only rated to hold 50 pounds. Many larger chandeliers weigh more than that. An electrician will know how to properly brace it to a ceiling joist so it doesn’t come crashing down on your dinner party.
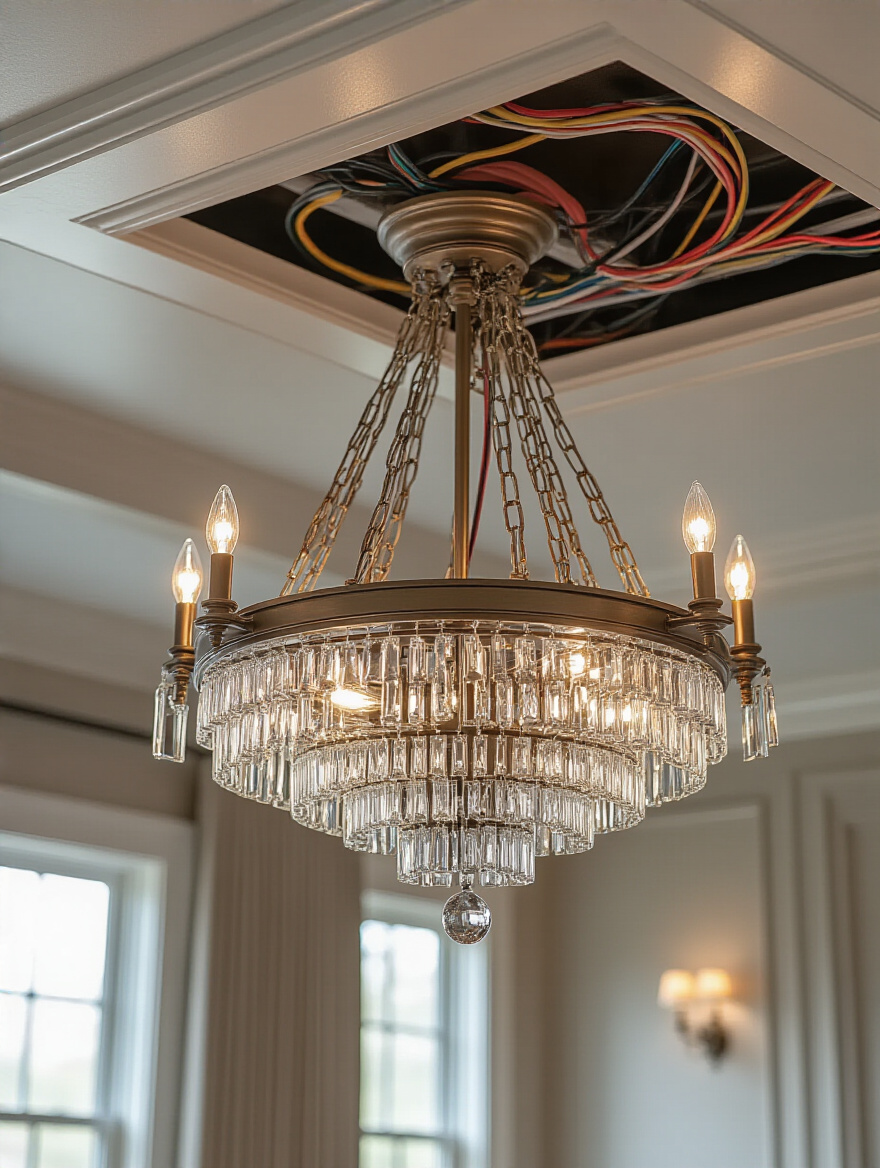
I have a horror story about this. A DIY client installed a beautiful, 70-pound chandelier himself. Months later, he heard a creaking sound and saw cracks forming in the ceiling. The box was pulling away from the drywall. He was lucky he caught it. A professional will handle the weight, ensure the wiring is up to code, and make sure it’s done right. The peace of mind is worth every single penny. Your health and safety are the top priority—in the gym and at home.
Remember that a safe installation is a successful one. Don’t cut corners on this.
We’re honing in on perfect execution now. These next two points are about refining the installation process and avoiding the common slip-ups that can ruin the effect of your beautiful new fixture. Think of this as dialing in your technique for maximum results and minimum risk.
We’ve covered the big one—not bracing for weight—but there are other mistakes that can trip you up. The first, and most crucial, is forgetting to kill the power at the circuit breaker. Not just the wall switch, the breaker. Always use a non-contact voltage tester to double-check that the wires are dead before you touch them. It’s a cheap tool that could literally save your life.
Another common screw-up is a sloppy wire connection. When you twist the wires together, make sure the connection is tight and secure inside the wire nut, with no stray bits of copper exposed. A loose connection can cause arcing—that’s when electricity jumps between wires—which creates heat and can easily start a fire inside your ceiling. Be meticulous. Have a buddy help you lift the fixture into place so you’re not fumbling with it on top of a ladder while trying to connect wires. It’s all about a safe, controlled movement.
By taking your time and being methodical, you set yourself up for a flawless finish. And here’s one final test before you call it a day.
Here’s a trick I learned that has saved me countless headaches. Before you finalize the chain length and close everything up, do a test run. Temporarily hang the chandelier and connect it to your dimmer. Then, wait until evening, have a couple of people sit at the table, and play with the light levels. You might find that at a low, moody setting, the light creates a weird glare on your glossy tabletop.
This is your chance to fine-tune. Maybe you need to lower the chandelier by two inches, or raise it by three, to get the light just right. It’s so much easier to make these tiny adjustments while everything is still accessible. Once you’ve cut that chain and mounted the canopy, it’s a huge pain to change it. This final check ensures that the light doesn’t just look good, but feels good from every seat at the table.
Now that the fixture is up and perfectly tuned, let’s style the rest of the room around it.
The heavy lifting is done. Your chandelier is securely in place and beautifully illuminating the room. Now it’s time to amplify its impact. These next steps are about creating a cohesive design where every element works together. This is where we go from a room with a nice light to a space that feels curated, intentional, and truly inspiring.
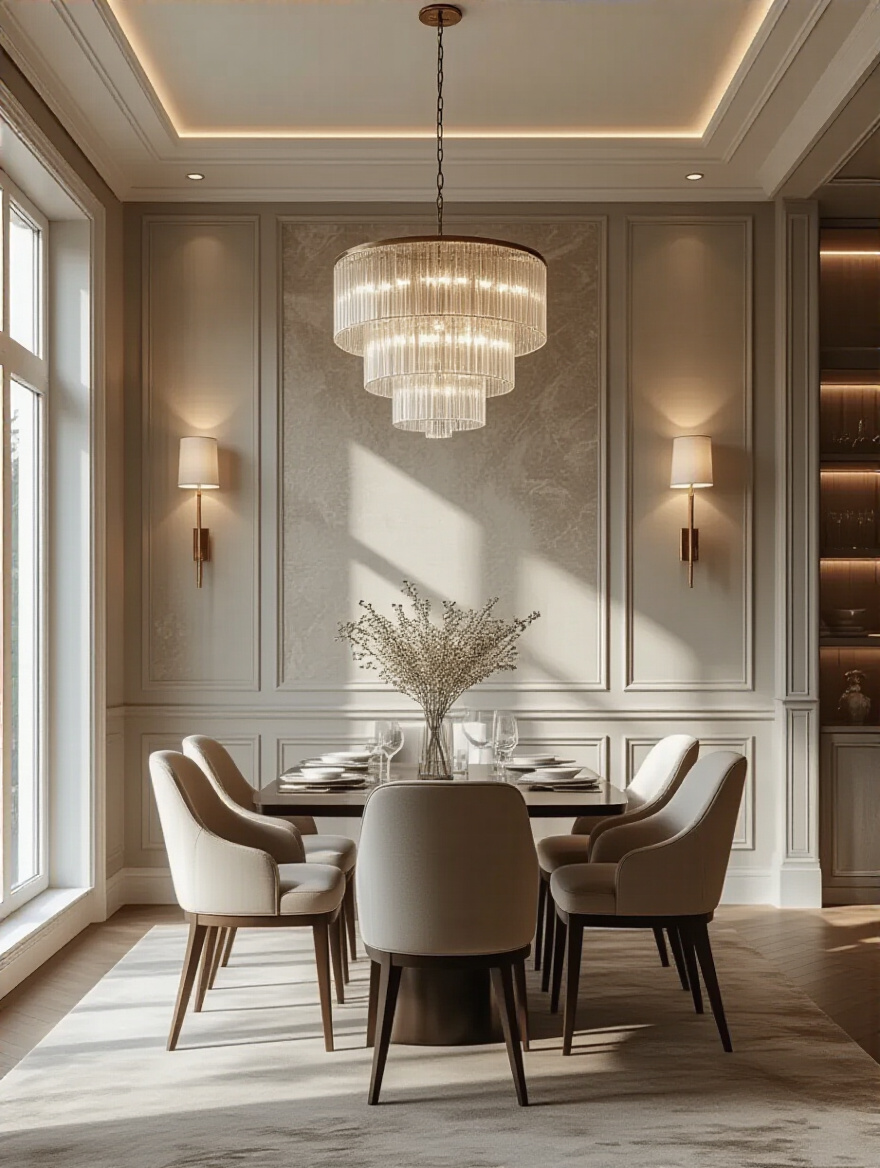
Your chandelier is the leader of the pack, but it’s not a solo act. Any other lights in the room—wall sconces, a floor lamp, lamps on a buffet—need to be in harmony with it. I’m not saying they have to be a matching set from the same collection. Please don’t do that; it’s a bit dated. Instead, think of them as complementary athletes on the same team. They should share a common element.
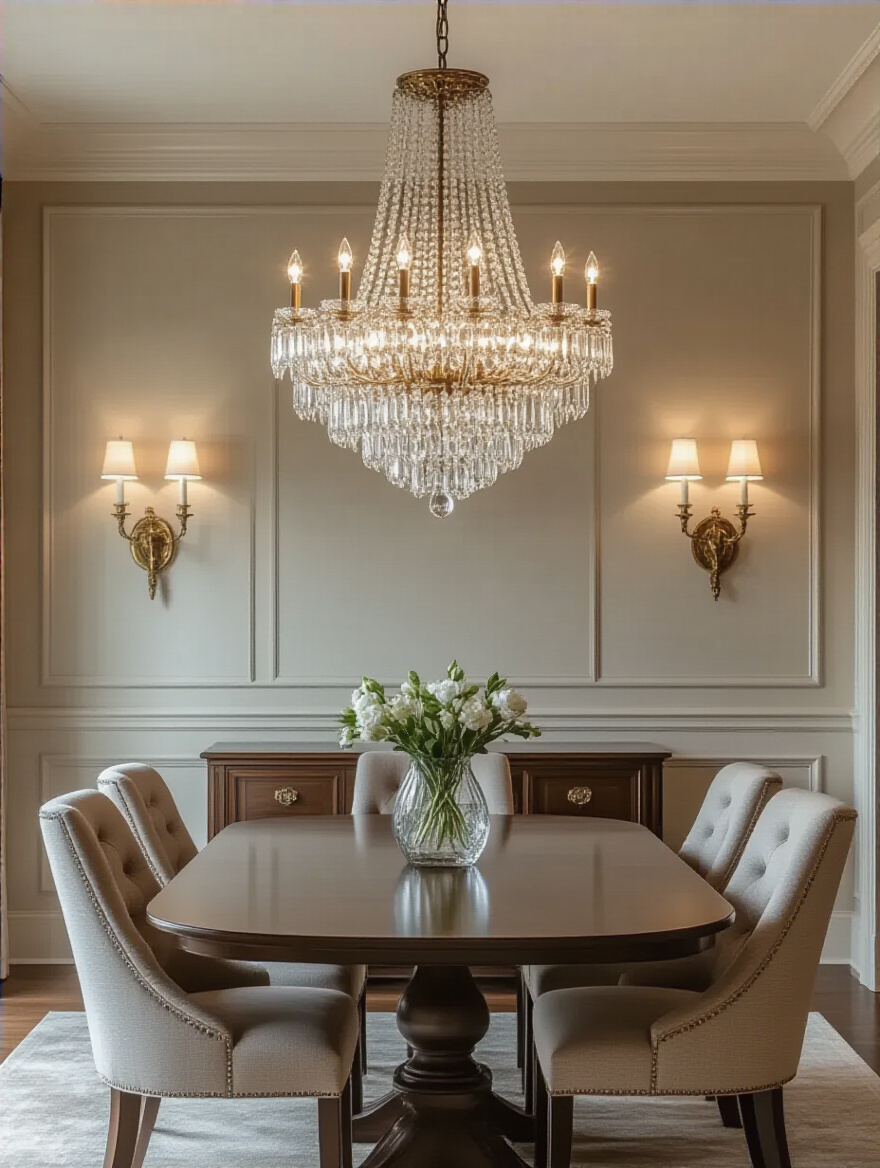
Maybe all the fixtures have the same finish, like brushed brass. Or perhaps they all share a similar design language, like clean lines for a modern space or curved arms for a traditional one. This creates a subtle thread that ties the whole room together.
“Treat all your light fixtures like pieces of jewelry for a single outfit—they don’t have to match exactly, but they should complement each other in style, finish, and scale to create a cohesive look.”
That little piece of advice from designer Emily Henderson is pure gold. It’s about creating a conversation between the pieces, not a monologue.
Next, let’s talk about how to handle those really big spaces where one light just isn’t enough.
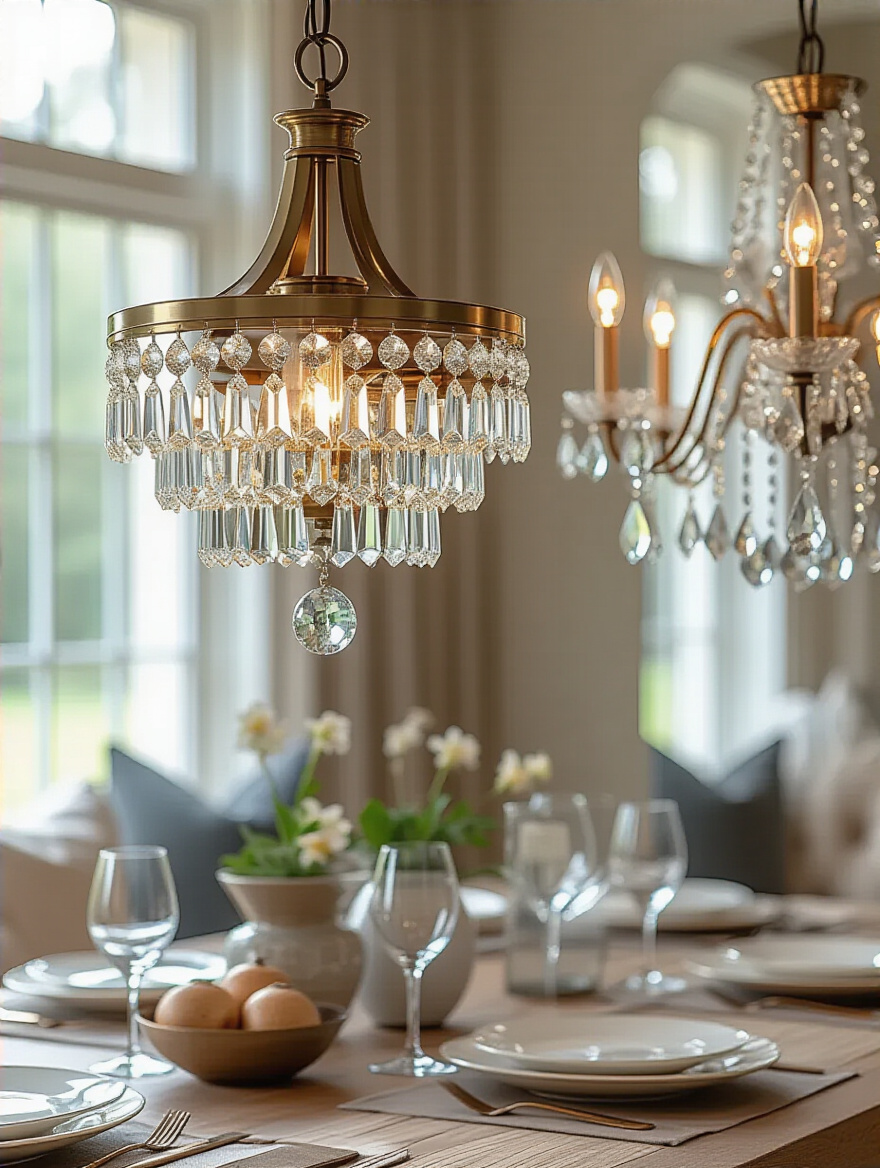
If you have a very long dining table—say, one that seats eight or more—a single chandelier can look lost and fail to light the ends of the table properly. The solution? Use two, or even three, smaller chandeliers in a row. This is a power move that looks incredibly sophisticated and ensures the entire length of the table is bathed in a beautiful, even glow. It’s a perfect example of form meeting function.
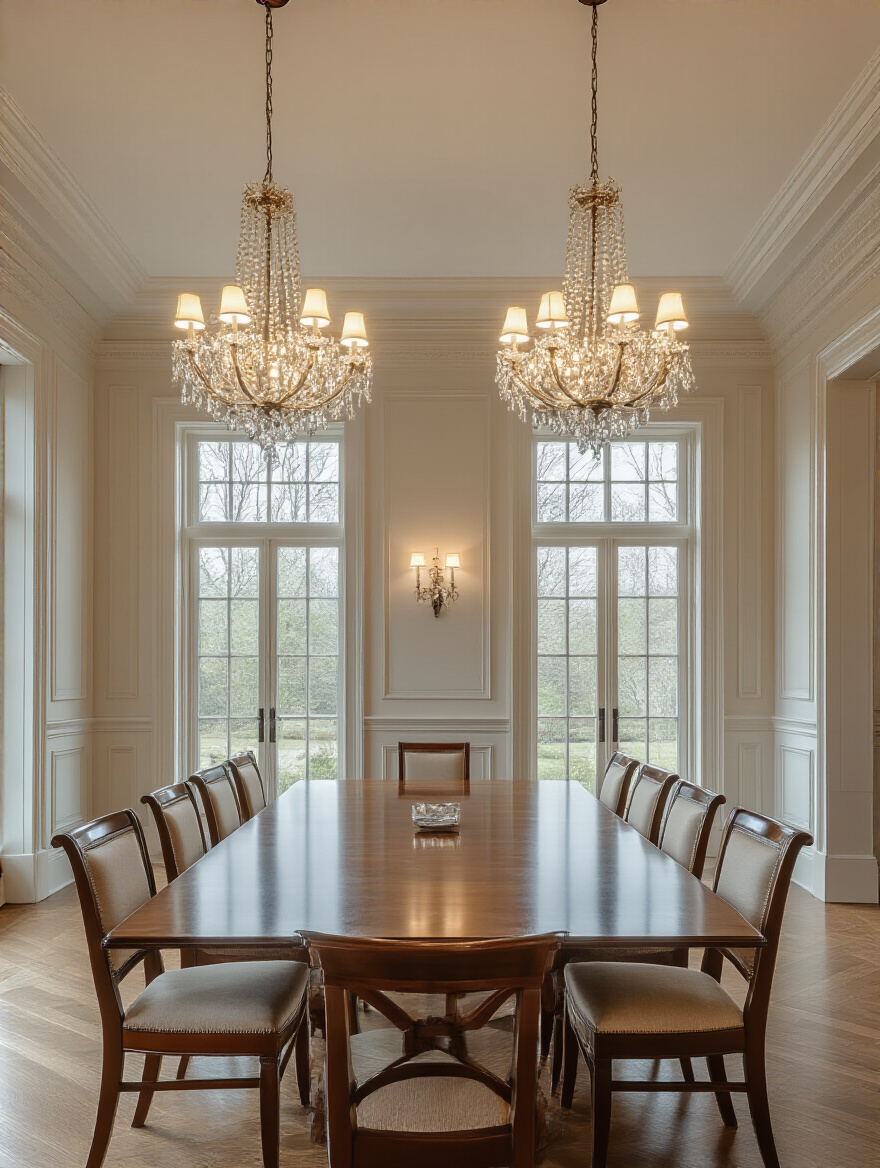
The key here is spacing and repetition. The fixtures should be identical to create a strong, rhythmic visual line. Measure the length of your table and divide it into sections to space them evenly. This approach adds a real sense of grandeur and intention to the room. It says, “this space was designed, not just decorated.” It’s a fantastic way to fill a large room without resorting to a single, monstrously huge fixture.
Ready for another designer secret? It’s all about what’s happening on the ceiling.
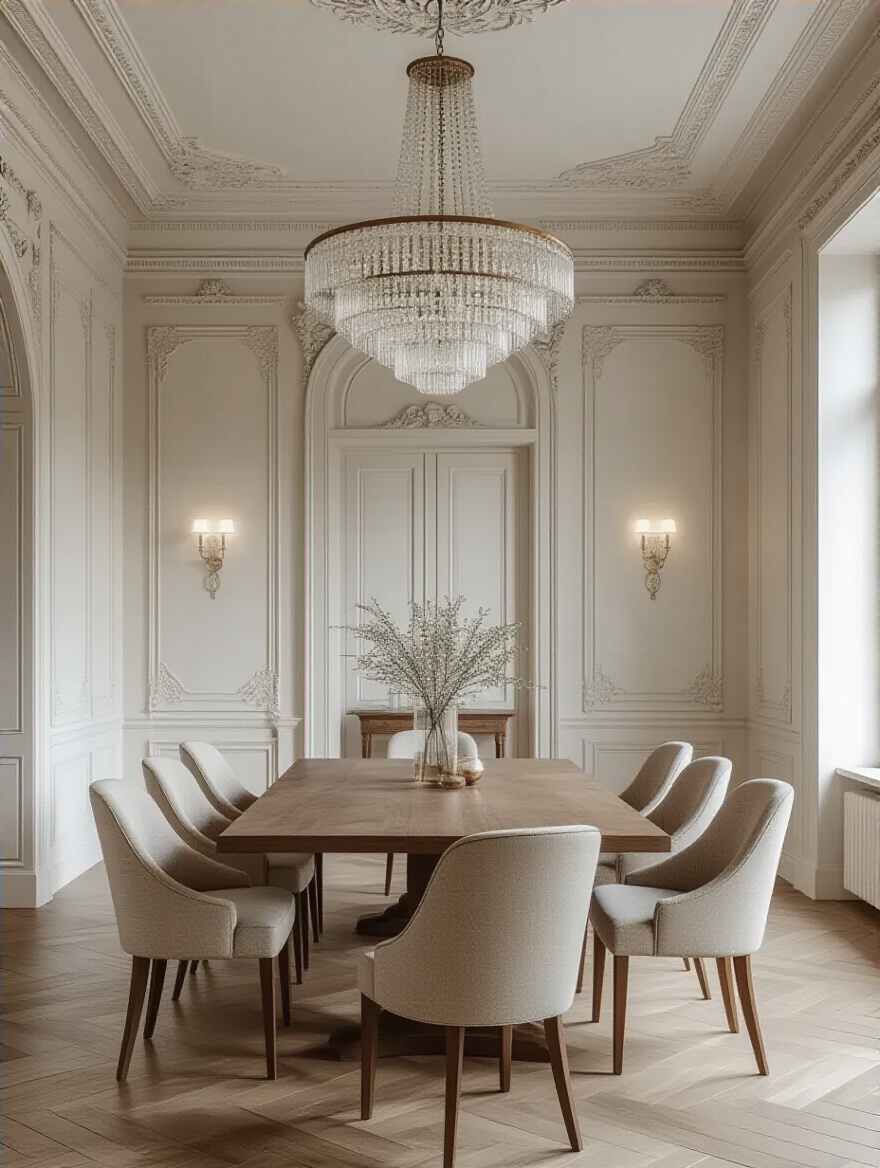
We touched on this before, but it’s worth its own spot. Adding a ceiling medallion is one of the easiest, most impactful upgrades you can make. It’s a round, decorative molding that your chandelier’s canopy sits in the middle of, and it instantly makes the fixture feel more integrated and important. It draws the eye upward and frames your chandelier like a piece of art.
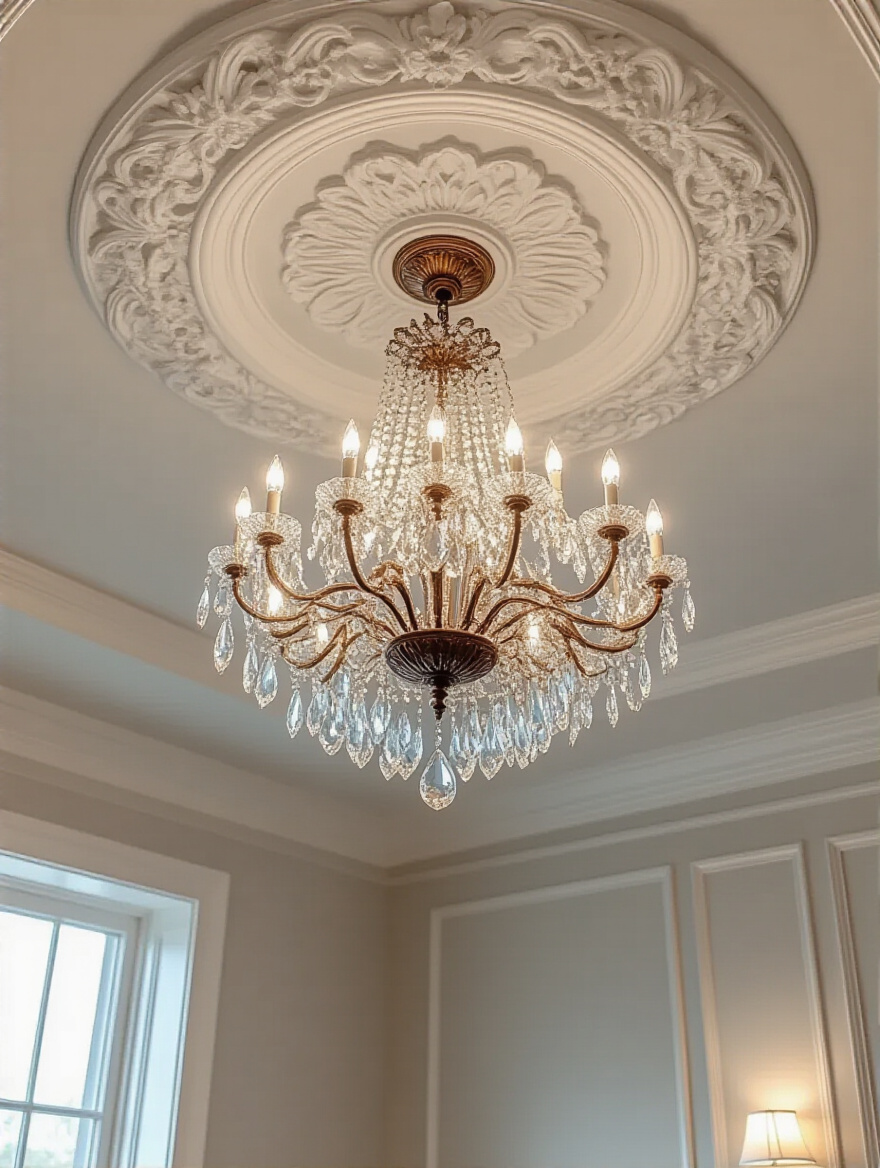
Medallions come in all styles, from simple and modern to ornate and traditional, and they are incredibly easy to install. They add a layer of architectural detail that makes a room feel more finished and expensive. For a bonus touch, you can paint the medallion the same color as your trim, or even a soft contrasting color to your ceiling to make it pop even more. It’s a small detail that delivers a huge return on your design investment.
Now let’s look at how we can amplify the light you already have without adding more bulbs.
Want to make your chandelier look twice as bright and a thousand times more sparkly without changing a single bulb? Use mirrors. This is the oldest trick in the designer playbook for a reason: it works. Placing a large mirror on the wall opposite your chandelier will capture its light and reflect it back into the room, effectively doubling its impact. It makes the room feel brighter, bigger, and infinitely more glamorous.
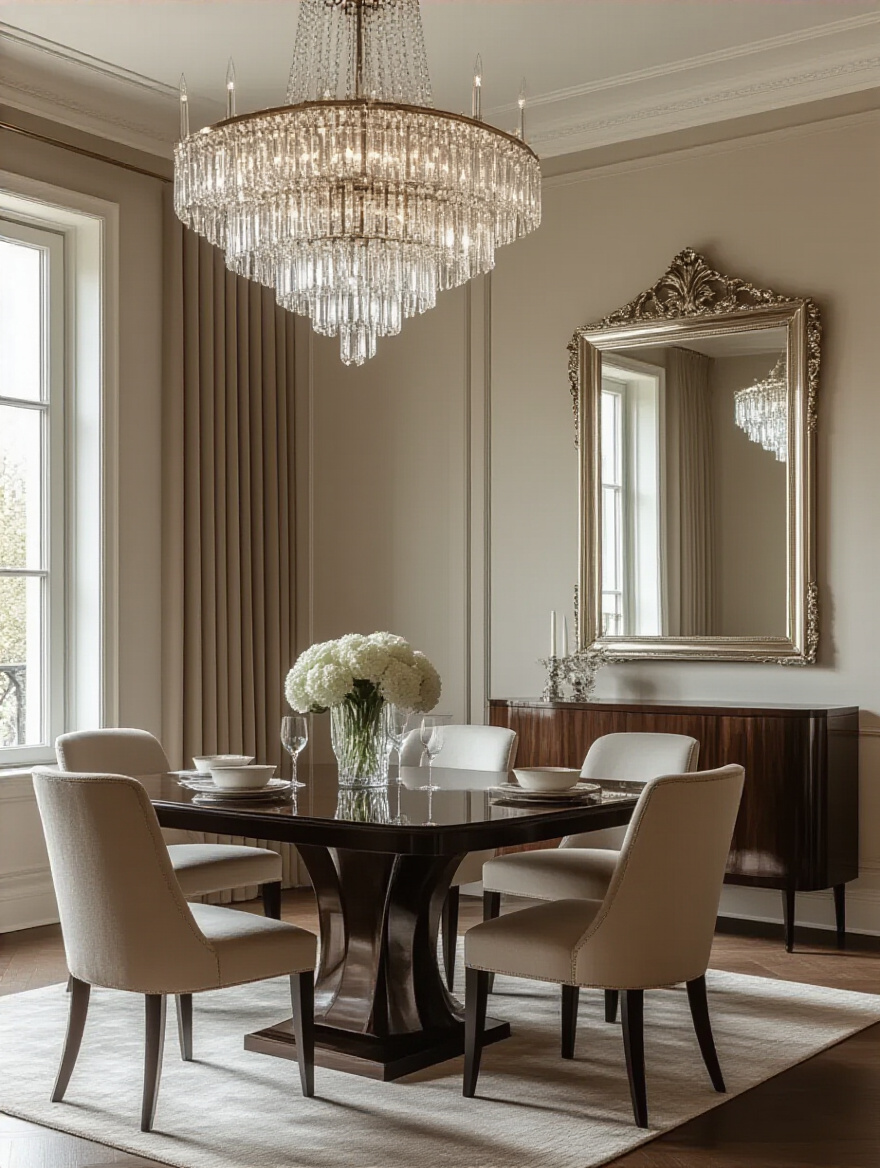
It’s not just mirrors. Any reflective surface will help. A dining table with a glossy finish, a polished silver serving tray, or even shiny metallic charger plates on the table will catch the light from your chandelier and scatter it around the room. This is especially effective if you have a crystal fixture. The reflections create a dynamic, sparkling effect that adds energy and life to the space. It’s a simple concept with a dazzling result.
With the big picture styling handled, let’s zoom in on the finer details of the room.
We’re in the home stretch now. This is all about refinement. Your chandelier is the star, but how it interacts with the furniture and the decorations on your table completes the scene. This is where we create a truly holistic environment that feels perfectly balanced and ready for any occasion.
This might sound obvious, but you’d be surprised how many people mess this up: your dining table must be centered directly under your chandelier. It’s the anchor for the entire room. When it’s off-center, the whole space feels unbalanced and chaotic, like doing a lopsided squat. It creates a subtle tension you might not be able to name, but you can definitely feel.
Once your table is perfectly aligned, make sure you leave enough space around it. You need at least 30-36 inches of clearance between the edge of your table and the nearest wall or piece of furniture. This “breathing room” is crucial for comfortable movement. It allows people to pull out their chairs without bumping into anything and creates a sense of spaciousness, even in a smaller room. Good flow is essential for a relaxing, functional space.
With the furniture set, the final touch is styling the tabletop itself.
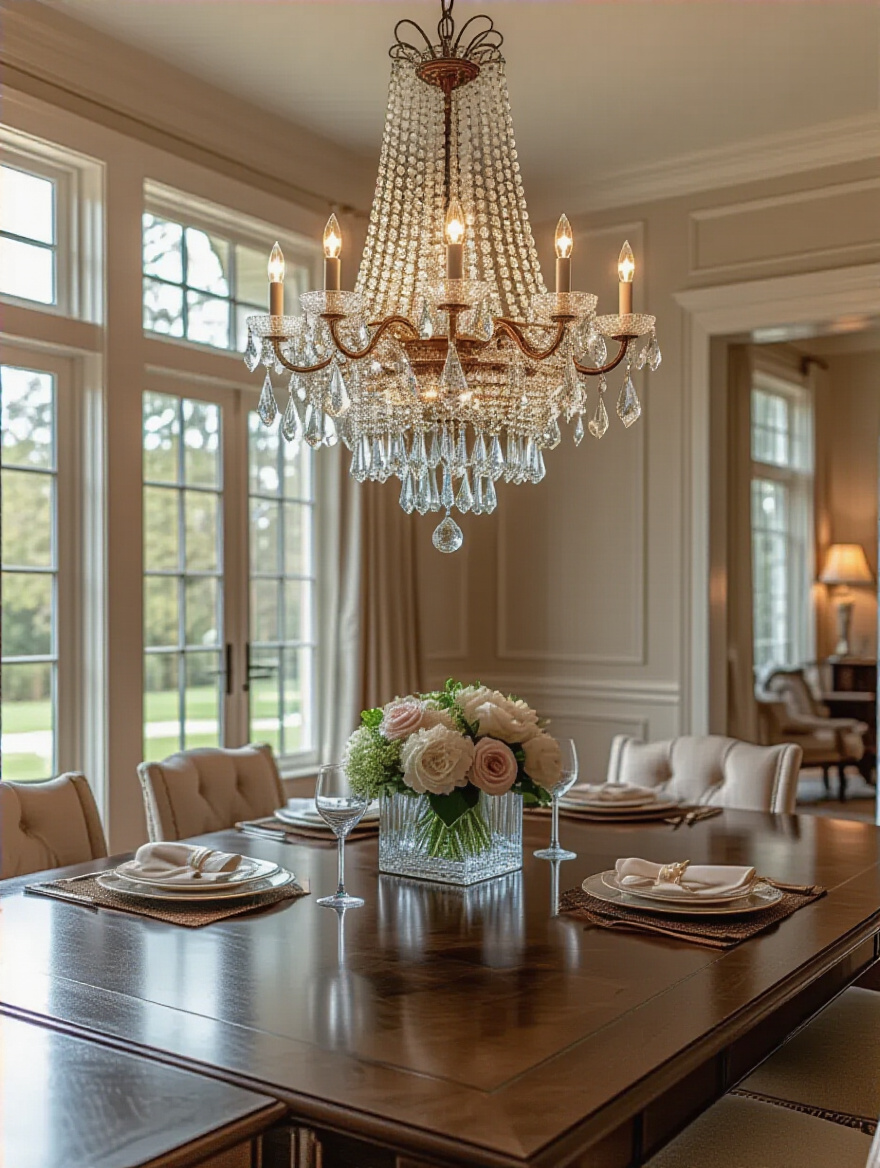
Your tabletop decor is the final layer of the design. The key is to choose pieces that complement your chandelier without competing with it. If you have a massive, ornate crystal chandelier, a huge, towering floral arrangement is just going to create visual chaos. Instead, opt for a series of low-profile vases or a collection of small candles. Let the chandelier be the star.
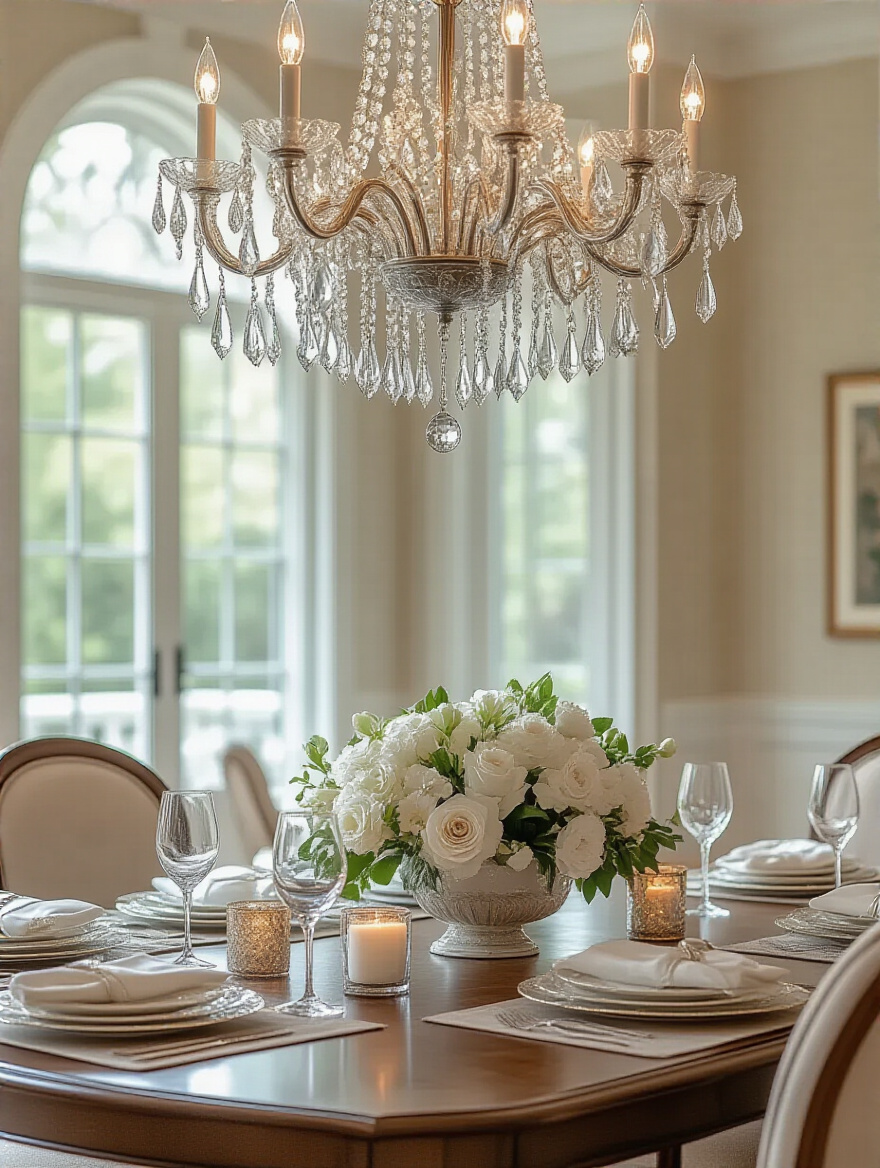
Think about materials and color. If your chandelier is a warm brass, incorporating small brass candle holders or a vase with a similar finish will create a lovely echo. If your light is a sleek black metal, some modern black ceramic pieces on the table will tie it all together beautifully. The goal is to create a visual conversation between what’s above the table and what’s on it, resulting in a perfectly harmonious scene.
Now that everything looks perfect, let’s talk about how to keep it that way for the long haul.
You’ve invested time, energy, and money into creating this beautiful space. Now you have to protect that investment. Just like you can’t hit a new personal record in the gym and then stop training for a year, you can’t just hang a chandelier and forget about it. Proper maintenance is key to keeping it looking brilliant and functioning safely.
A dusty chandelier is a sad chandelier. Dust and grime absorb light, making your entire room feel dimmer and duller. You have to clean it regularly. I’m not talking about a major deep clean every week. Just build it into your routine. Every week or two, give it a light dusting with a long-handled, soft duster to keep the cobwebs at bay.
Then, every three to six months, schedule a deeper clean. The exact method depends on the material, but the prep is always the same: turn off the power at the breaker, lay a soft towel on the table below to catch any drips, and use a gentle, appropriate cleaner. Consistency here is everything. It prevents buildup that becomes a nightmare to remove later and keeps your fixture sparkling and bright, maximizing its light output and its beauty.
Cleaning a standard fixture is one thing, but what about all those delicate, sparkly bits?
If you have a crystal chandelier, this one’s for you. Cleaning those individual crystals can feel daunting, but it’s totally manageable if you have a system. First, put on some clean cotton gloves. This keeps fingerprints off the crystals and lets you handle them without worry. Second, never spray cleaner directly onto the fixture. It can get into the electrical sockets and cause a short.

Instead, lightly spray your specialized crystal cleaner onto a lint-free microfiber cloth. Then, gently wipe down each crystal one by one. For intricate bits, a cotton swab dipped in the cleaner works wonders. It takes patience, yes, but the payoff is huge. When you’re done, your chandelier will throw light around the room like a disco ball, creating that magical sparkle that made you fall in love with it in the first place. It’s a meditative process that restores the energy of the whole room.
While you’re up there cleaning, it’s the perfect time to do a quick safety check.
Every time you do a deep clean, make it a habit to give the whole fixture a quick once-over for safety. You’re already up on the ladder, so it only takes an extra minute. Check the wires for any signs of cracking, fraying, or discoloration. Look at the sockets where the bulbs screw in—do you see any scorch marks or corrosion? Gently check that the nuts and screws holding the fixture to the ceiling are still tight.
These little visual checks can help you spot a potential problem before it becomes a major hazard. Flickering lights or a faint buzzing sound are not “character”—they’re warning signs that something is wrong with the wiring. Don’t ignore them. Your awareness is your best defense against electrical issues.
This last bit of maintenance advice might sound counterintuitive, but trust me on this.
Don’t wait for bulbs to burn out one by one. It creates an ugly, patchy look with some spots being bright and others dark. It completely kills the uniform, sophisticated look you’ve worked so hard to create. Instead, practice “group replacement.” When one bulb in the chandelier dies, replace all of them at the same time.

Yes, it means you’ll be replacing bulbs that are still working. But it ensures that every single light source is the same age, brightness, and color temperature. The result is a perfectly even, consistent glow that looks incredibly professional. Keep a log of when you replace them. With long-lasting LEDs, you might only have to do this every few years, but it’s a pro-level maintenance habit that makes a world of difference.
With our maintenance plan in place, let’s look at one final, fun way to keep your dining room feeling fresh.
Maintenance isn’t just about cleaning and safety checks. It’s also about keeping your space feeling dynamic and aligned with your life. This final tip is all about how to evolve your chandelier’s look over time without having to start from scratch.
Your chandelier doesn’t have to be a static, unchanging object. Many fixtures have removable parts that offer a fantastic opportunity for a quick and easy refresh. Think of it as changing the accessories on an outfit. Got a traditional chandelier with removable crystals? For the holidays, you could swap out a few of them for beautiful, jewel-toned ones or even small, elegant ornaments.

Some chandeliers have miniature clip-on lampshades. You can find them in tons of different colors and patterns online. Swapping out boring beige shades for a rich velvet or a fun pattern can completely change the personality of your fixture in about ten minutes. This is such a simple, cost-effective way to celebrate a new season, get ready for a party, or just keep your dining room from feeling stale. It keeps the energy fresh and allows your centerpiece to evolve right along with your style.
So there you have it. We’ve covered everything from the foundational math of sizing to the pro-level details of styling and maintenance. The big takeaway is this: your dining room chandelier isn’t just a light fixture. It’s a powerful tool for shaping the energy of your home and supporting your wellness goals. It sets the stage for mindful meals, meaningful connections, and moments of calm in a busy life.
You now have the game plan to create a space that doesn’t just look good, but feels incredible—a space you’ll actually want to be in. Don’t just let this be another article you read. Take one of these ideas and put it into action this week. Start browsing, get inspired, and make a plan. You have the power to transform your dining experience and create a haven that radiates style, warmth, and well-being. Now go make it happen.